I make this kimchi quesadilla when I want something warm, crunchy, and full of flavor without spending much time in the kitchen. It has the comfort of a cheesy quesadilla, but the kimchi gives it a bright, tangy bite that keeps it from feeling too heavy.
This is the kind of meal I can pull together for lunch, a quick dinner, or even a hearty snack after school. The tortilla gets golden and crisp, the cheese melts into the kimchi, and every bite has a nice mix of creamy, spicy, crunchy, and savory flavors.

Why You’ll Love This Recipe
Kimchi Quesadilla with Crispy Tortilla is simple, fast, and packed with flavor. It takes everyday ingredients and turns them into something a little special, without making the cooking process complicated.
The crispy tortilla is one of the best parts because it gives the quesadilla a satisfying crunch. Inside, the melted cheese balances the bold kimchi, making the flavor more mellow and kid-friendly while still being fun for adults.
This recipe is also flexible, which makes it great for busy families. You can make it mild or spicy, add protein, use different cheeses, or cut it into small wedges for an easy snack plate.
Serves: 2 people
This recipe makes one large quesadilla, which is usually enough for 2 people when served with a side dish or dipping sauce. For a bigger meal, you can easily double or triple the ingredients and cook the quesadillas one at a time so each tortilla stays crisp.
Ingredients You’ll Need
- 2 large flour tortillas, about 10 inches each
- 1 cup shredded mozzarella cheese
- 1/2 cup shredded Monterey Jack cheese
- 3/4 cup kimchi, drained and chopped
- 1 tablespoon kimchi juice, optional for extra flavor
- 2 tablespoons sliced green onions
- 1 teaspoon toasted sesame oil
- 1 teaspoon low-sodium soy sauce
- 1/2 teaspoon honey or sugar
- 1 tablespoon mayonnaise
- 1 teaspoon gochujang, optional for mild heat
- 1 tablespoon unsalted butter, divided
- 1 teaspoon neutral oil, such as avocado oil or canola oil
- 1 tablespoon chopped cilantro, optional
- 1 teaspoon toasted sesame seeds, optional for serving
- Sour cream, plain Greek yogurt, or extra mayonnaise, for dipping
Pro Tips
Drain the kimchi well before adding it to the tortilla. Too much liquid can make the inside soggy and stop the tortilla from getting that crisp, golden texture.
Chop the kimchi into small pieces so every bite has a little bit of flavor. Larger pieces can pull out of the quesadilla when you bite into it, especially for younger kids.
Use a mix of cheeses for the best melt and flavor. Mozzarella gives you a smooth, stretchy center, while Monterey Jack adds a mild, creamy taste that pairs nicely with kimchi.
Cook the quesadilla over medium heat instead of high heat. This gives the cheese enough time to melt while the outside slowly turns crisp and golden.
Press the quesadilla gently with a spatula while it cooks. This helps the filling stay even and encourages the tortilla to brown nicely without burning.
Let the quesadilla rest for 1 to 2 minutes before cutting. The cheese will settle a little, making it easier to slice into clean wedges for kids, snacks, or lunch plates.
Tools You’ll Need
- Large nonstick skillet or cast iron skillet
- Cutting board
- Sharp knife
- Measuring cups
- Measuring spoons
- Small mixing bowl
- Spoon or small spatula
- Large spatula for flipping
- Plate or wire rack
- Pizza cutter or chef’s knife
Substitutions and Variations
Make It Milder
Use mild kimchi and leave out the gochujang. The cheese will soften the tangy flavor, making the quesadilla easier for kids or spice-sensitive eaters to enjoy.
Change the Cheese
Swap mozzarella and Monterey Jack for cheddar, Colby Jack, pepper jack, or a Mexican-style shredded cheese blend. Cheddar gives a sharper flavor, while pepper jack adds a little more heat.
Add Protein
Add 1/2 cup cooked shredded chicken, thinly sliced steak, crumbled tofu, or scrambled egg. This makes the quesadilla more filling while still keeping the kimchi and crispy tortilla as the main stars.
Make It Lighter
Use one tortilla and fold it in half instead of using two full tortillas. You can also use less cheese and add extra green onions or sautéed vegetables for a fresher version.
Boost the Texture
Add a thin layer of crushed roasted seaweed, toasted sesame seeds, or finely chopped cabbage before closing the quesadilla. These little add-ins give each bite more crunch without changing the basic recipe.
Make Ahead Tips
Kimchi Quesadilla with Crispy Tortilla is best cooked fresh, but you can still prep several parts ahead to make mealtime easier. Drain and chop the kimchi up to 2 days ahead, then store it in a covered container in the refrigerator. This helps remove extra moisture and makes the filling quicker to assemble.
You can also mix the chopped kimchi with sesame oil, soy sauce, honey, green onions, mayonnaise, and gochujang ahead of time. Keep that mixture chilled until you are ready to cook, and give it a quick stir before adding it to the tortilla. I like doing this when I know lunch or dinner will need to happen fast.
For the crispiest results, do not fully assemble the quesadilla too far ahead. The kimchi can soften the tortilla if it sits too long. If you want to prep close to mealtime, you can layer the cheese and filling between the tortillas about 10 minutes before cooking, then place it straight into the skillet.
You can also shred the cheese, slice the green onions, and set out your dipping sauce earlier in the day. These small steps make the final cooking feel simple and calm. For family meals, I often set up the fillings like a mini quesadilla station so everyone can choose how mild, cheesy, or spicy they want their own.
Instructions
Step 1: Drain and Chop the Kimchi
Place the kimchi in a small strainer or press it gently with a spoon to remove extra liquid. You do not need it completely dry, but it should not be dripping wet. Too much kimchi juice can make the tortilla soft instead of crisp.
Move the drained kimchi to a cutting board and chop it into small bite-size pieces. Smaller pieces spread more evenly through the cheese and make the quesadilla easier to eat. This is especially helpful if you are serving it to kids or packing leftovers for lunch.
Step 2: Mix the Kimchi Filling
Add the chopped kimchi to a small bowl with the sliced green onions, toasted sesame oil, low-sodium soy sauce, honey or sugar, mayonnaise, and gochujang if using. Stir everything together until the kimchi is lightly coated and the flavors are evenly mixed.
The filling should look glossy and slightly creamy, not watery. Taste a tiny spoonful if you want to check the heat level. If it feels too spicy, add a little more mayonnaise or leave out any extra kimchi juice.
Step 3: Build the First Cheese Layer
Place one large flour tortilla on a clean cutting board or plate. Sprinkle half of the mozzarella and Monterey Jack cheese evenly over the tortilla, leaving about 1/2 inch of space around the edge. This little border helps keep the filling from spilling out as the cheese melts.
The cheese on the bottom acts like a gentle barrier between the tortilla and the kimchi. It also helps hold everything together once it melts. Try to spread it evenly so every slice has a good amount of filling.
Step 4: Add the Kimchi Mixture
Spoon the kimchi filling over the cheese in an even layer. Avoid piling too much in the center, because that can make the quesadilla harder to flip. Spread it out gently with the back of a spoon.
If you are using cilantro, toasted sesame seeds, roasted seaweed, cooked chicken, or another add-in from the variation ideas, add it now. Keep the layer thin so the tortilla can still get crisp. A quesadilla that is overfilled may taste good, but it can slide apart in the pan.
Step 5: Add the Remaining Cheese and Top Tortilla
Sprinkle the remaining mozzarella and Monterey Jack over the kimchi layer. This top layer of cheese helps seal the quesadilla when it melts. It also keeps the top tortilla attached, which makes flipping much easier.
Place the second flour tortilla on top and press down gently with your hands. Do not press so hard that the filling squeezes out. You just want the layers to settle together before cooking.
Step 6: Heat the Skillet
Place a large nonstick skillet or cast iron skillet over medium heat. Add 1/2 tablespoon of butter and 1/2 teaspoon of neutral oil. Let the butter melt and foam lightly, but do not let it brown too much before adding the quesadilla.
The mix of butter and oil gives the tortilla a golden flavor while helping it crisp without burning too quickly. If the pan seems too hot, lower the heat slightly before adding the tortilla. Medium heat is the safest choice for a crisp outside and melted inside.
Step 7: Cook the First Side
Carefully place the assembled quesadilla in the skillet. Cook for 3 to 4 minutes, pressing gently with a large spatula every so often. The bottom should become golden brown and firm enough to flip.
Peek underneath with the spatula to check the color. If it is browning too fast and the cheese has not melted, turn the heat down a little. The goal is a crispy tortilla with warm, melted cheese inside.
Step 8: Flip and Finish Cooking
Slide the spatula fully under the quesadilla and flip it carefully. Add the remaining 1/2 tablespoon butter and 1/2 teaspoon oil around the edge of the pan if needed, letting it melt under the second side. Cook for another 3 to 4 minutes.
The quesadilla is ready when both sides are crisp and golden, and the cheese is melted through. If the center still feels cool, lower the heat and cook for another minute. You can also cover the skillet briefly to help the cheese melt, but remove the lid before the tortilla softens.
Step 9: Rest and Slice
Transfer the quesadilla to a cutting board, plate, or wire rack. Let it rest for 1 to 2 minutes before slicing. This short rest helps the cheese settle so the wedges hold together better.
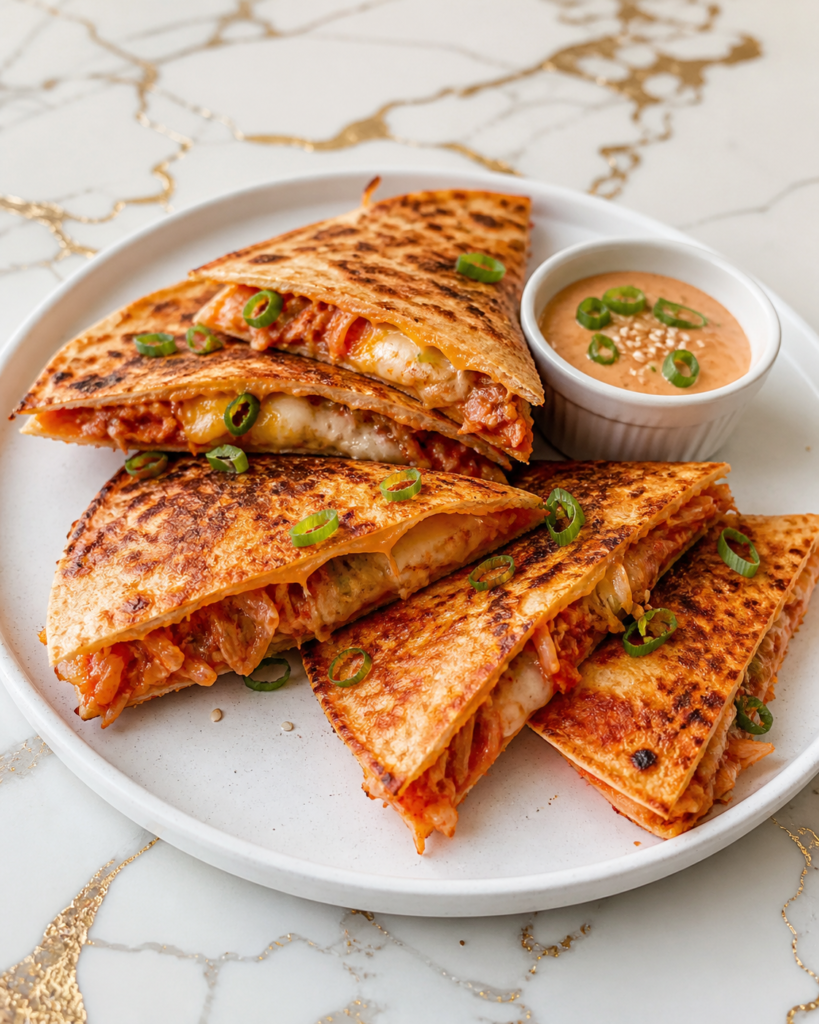
Cut the quesadilla into 4 or 6 wedges using a pizza cutter or sharp knife. Sprinkle with toasted sesame seeds or extra green onions if you like. Serve warm with sour cream, plain Greek yogurt, extra mayonnaise, or a simple dipping sauce on the side.
Serving Suggestions
This quesadilla is wonderful with a cool, creamy dip. Sour cream, plain Greek yogurt, or mayonnaise mixed with a tiny spoonful of kimchi juice all work well. The creamy dip balances the tangy kimchi and makes the meal feel more rounded.
For lunch, serve it with sliced cucumbers, carrot sticks, or a simple cabbage slaw. The fresh crunch pairs nicely with the crispy tortilla and melted cheese. It also keeps the plate light and colorful.
For a heartier dinner, add a bowl of rice, miso soup, or a fried egg on the side. The quesadilla already has plenty of flavor, so simple sides are best. This makes the meal filling without feeling too busy.
You can also cut the quesadilla into small triangles for a snack board. Add fruit, crunchy vegetables, and a mild dip for a family-friendly plate. It is a nice way to introduce kimchi in smaller bites.
If you enjoy extra heat, serve it with sriracha mayo or a little extra gochujang mixed into your dip. For kids, keep the dip mild and let adults add spice at the table. This keeps one recipe flexible for everyone.
Leftovers and Storage
Leftover Kimchi Quesadilla with Crispy Tortilla can be stored in an airtight container in the refrigerator for up to 3 days. Let the wedges cool first so steam does not build up inside the container. Too much trapped steam can make the tortilla softer.
To reheat, use a skillet over medium-low heat for the best texture. Warm each side for 2 to 3 minutes, or until the tortilla crisps again and the cheese is hot. You can also use an air fryer at 350°F for about 3 to 5 minutes.
The microwave works when you need something fast, but the tortilla will be softer. Heat in short bursts of 20 to 30 seconds until warm. For lunch boxes, you can pack the quesadilla chilled or at room temperature if your school or workplace food safety rules allow it.
Freezing is possible, but the texture may change because kimchi has moisture. If you freeze it, wrap cooked wedges tightly and store them in a freezer-safe bag for up to 1 month. Reheat from frozen in a skillet or air fryer until hot and crisp.
Nutrition and Benefits
- Kimchi adds bold flavor with very little effort, so you can build a satisfying meal without a long ingredient list. It also brings tanginess, crunch, and fermented flavor that pairs well with creamy cheese.
- Cheese gives the quesadilla protein, calcium, and a comforting melted texture. Using a moderate amount keeps the recipe rich and satisfying without making it feel too heavy.
- Green onions, cabbage from the kimchi, and optional fresh toppings add color and small amounts of vegetables. This can be a gentle way to bring new flavors to the table for kids and picky eaters.
- A flour tortilla makes the recipe quick, sturdy, and easy to crisp in a skillet. Choosing whole wheat tortillas can add more fiber if your family enjoys them.
- The recipe is easy to adjust for different needs. You can make it lighter with less cheese, heartier with chicken or tofu, or milder by choosing less spicy kimchi.
Recipe FAQ
Can I make this kimchi quesadilla less spicy?
Yes, you can make it much milder by using mild kimchi and leaving out the gochujang. The cheese also helps soften the heat. A creamy dip like sour cream or plain Greek yogurt makes each bite even gentler.
What kind of kimchi works best?
Napa cabbage kimchi works best because it has a nice balance of crunch, tang, and spice. Choose one you already enjoy eating on its own. If the pieces are large, chop them small so they spread evenly through the quesadilla.
How do I keep the tortilla crispy?
Drain the kimchi well and cook the quesadilla over medium heat. Avoid adding too much filling, because moisture can soften the tortilla. Letting the quesadilla rest on a wire rack instead of a flat plate can also help keep the bottom crisp.
Can I use corn tortillas instead of flour tortillas?
You can use corn tortillas, but they are smaller and more delicate. It is easier to make smaller folded quesadillas instead of one large one. Warm the corn tortillas first so they do not crack when folded.
What cheese melts best in this recipe?
Mozzarella, Monterey Jack, Colby Jack, and Mexican-style cheese blends all melt well. Mozzarella gives a stretchy texture, while Monterey Jack adds a creamy, mild flavor. Cheddar works too, but it gives a sharper taste.
Can I add meat to this quesadilla?
Yes, cooked chicken, thinly sliced steak, bacon, ham, or ground turkey can be added. Keep the amount modest so the quesadilla still closes and flips easily. About 1/2 cup cooked protein is enough for one large quesadilla.
Is this good for meal prep?
It can work for meal prep if you store and reheat it the right way. Cooked wedges keep in the refrigerator for up to 3 days. Reheat them in a skillet or air fryer for the best crispy texture.
A Crispy, Cheesy Favorite with a Tangy Twist
Kimchi Quesadilla with Crispy Tortilla is one of those easy meals that feels fun without being hard to make. The crisp tortilla, melted cheese, and tangy kimchi come together in a way that feels cozy, bold, and dependable for lunch, dinner, or a quick snack.
It is also a recipe worth making again because it can fit the people at your table. Keep it mild for kids, add protein for a heartier meal, or serve it with fresh sides for balance. The result is warm, crunchy, comforting, and simple enough for busy days.