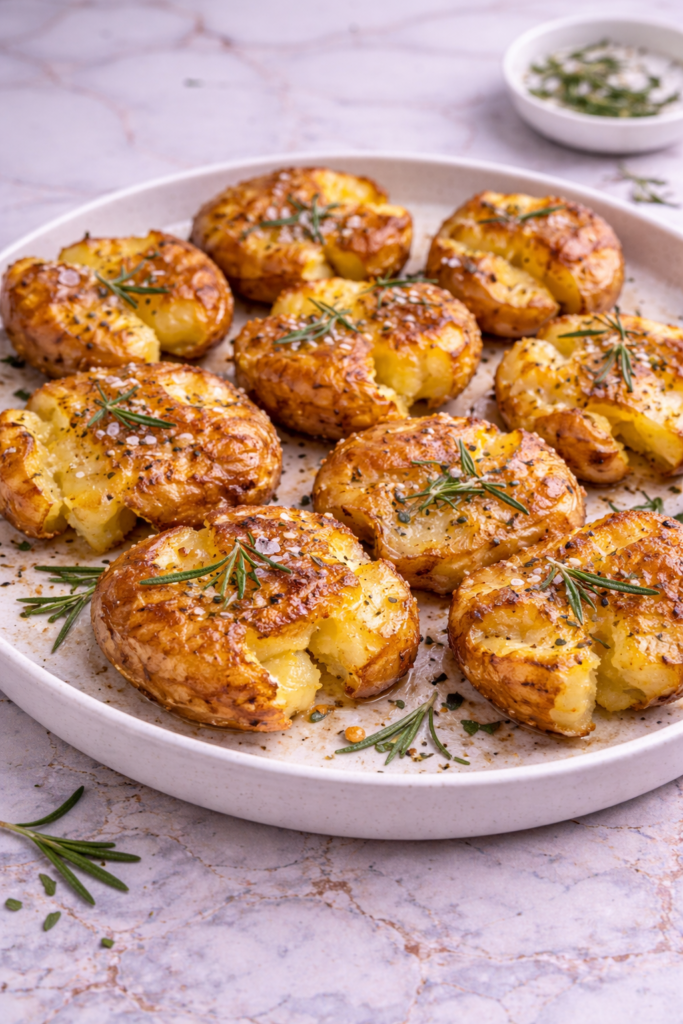
Some side dishes disappear faster than the main course, and Smashed Potatoes is one of those recipes in our home. Crispy golden edges, fluffy centers, and simple savory flavor make them the kind of dish everyone reaches for first.
I first started making smashed potatoes when I wanted something more exciting than regular roasted potatoes but just as easy to prepare.
They quickly became a family favorite because they use simple ingredients, look beautiful on the table, and always deliver that perfect mix of crisp and tender.

Why You’ll Love This Recipe
This recipe gives you the best of both potato worlds. The centers stay soft and creamy while the flattened edges roast into wonderfully crisp golden bites.
It is also practical for everyday cooking. The ingredients are basic pantry staples, the method is straightforward, and the potatoes pair with almost any main dish.
Families love how customizable they are. Keep them classic with garlic and herbs, or add cheese, bacon, or spices to match the meal.
Serves: 6 people
This recipe makes about six side-dish servings, depending on portion size and the size of the potatoes used. It can easily be doubled for larger meals.
Ingredients You’ll Need
For the Potatoes
- 2 pounds baby potatoes or small Yukon Gold potatoes
- 1 tablespoon salt for boiling water
- Water for boiling
For Roasting
- 3 tablespoons olive oil
- 2 tablespoons melted butter
- 1 teaspoon salt
- 1/2 teaspoon black pepper
- 1 teaspoon garlic powder
- 1 teaspoon onion powder
- 1 teaspoon dried parsley or Italian seasoning
Optional Toppings
- 1/2 cup shredded Parmesan cheese
- 2 tablespoons chopped fresh parsley
- 2 tablespoons chopped chives
- 4 slices bacon, cooked and crumbled
- Sour cream for serving
- Red pepper flakes
Small potatoes work best because they cook evenly and create ideal single-serving portions after smashing.
Pro Tips
Choose potatoes that are similar in size so they cook evenly. This helps them boil and roast at the same rate.
Boil the potatoes until fork-tender but not falling apart. Overcooked potatoes can break too much when smashed.
Use the bottom of a glass, measuring cup, or potato masher to flatten gently. Press enough to crack the skin and spread the potato without tearing it apart completely.
Do not crowd the baking pan. Space between potatoes helps them roast crisp instead of steam.
Use both oil and butter for great flavor and browning. The combination gives wonderful texture and taste.
For families with younger children, keep some potatoes lightly seasoned and offer toppings on the side.
Tools You’ll Need
- Large pot
- Colander
- Large sheet pan
- Parchment paper or foil
- Potato masher, glass, or measuring cup
- Measuring cups
- Measuring spoons
- Pastry brush or spoon
- Spatula
A heavy sheet pan helps the bottoms crisp beautifully and encourages even browning.
Substitutions and Variations
Use red potatoes, fingerlings, or small white potatoes instead of Yukon Gold. Most small waxy potatoes work very well.
Swap olive oil for avocado oil or all melted butter if preferred. Each gives slightly different flavor.
Use ranch seasoning, Cajun seasoning, taco seasoning, or lemon pepper instead of the spice blend for easy variety.
Top with cheddar cheese, mozzarella, or feta during the last few minutes of baking for a cheesy version.
Add fresh rosemary, thyme, dill, or parsley for extra herb flavor. Fresh herbs are especially nice after baking.
For a spicy variation, add cayenne, chili flakes, or hot sauce after roasting.
Use dairy-free butter or only oil if you need a dairy-free version.
For loaded smashed potatoes, top with bacon, cheese, sour cream, and chives.
Add minced garlic to the oil mixture for stronger garlic flavor. Watch carefully so it does not burn.
You can also make mini appetizer versions using very small potatoes and serve them with dips.
Make Ahead Tips
This recipe is excellent for planning ahead when preparing busy dinners or holiday meals. You can boil the potatoes up to 24 hours in advance, drain them well, and refrigerate them until ready to roast.
When ready to cook, simply place them on the pan, smash, season, and bake. This saves time and keeps the final steps easy.
You can also mix the oil and seasonings earlier in the day. Having everything ready makes assembly quick and simple.
For entertaining, roast the potatoes shortly before serving so they stay crisp and fresh.
Instructions
Step 1: Preheat the Oven
Preheat your oven to 425°F. Line a large sheet pan with parchment paper or lightly grease it.
A hot oven is important for creating crisp edges and golden color. Starting hot helps the potatoes roast instead of dry out.
Step 2: Boil the Potatoes
Place the potatoes in a large pot and cover with cold water. Add 1 tablespoon salt to the water.
Bring to a boil, then reduce to a steady simmer and cook for 15 to 20 minutes, or until the potatoes are fork-tender.
Step 3: Drain and Dry
Drain the potatoes in a colander. Let them sit for a few minutes so excess moisture can evaporate.
Dry potatoes roast more effectively and become crispier in the oven. This short resting step is helpful.
Step 4: Arrange on the Pan
Transfer the potatoes to the prepared sheet pan, leaving space between each one. Do not overcrowd the pan.
Spacing allows hot air to circulate and helps each potato crisp around the edges.
Step 5: Smash the Potatoes
Using the bottom of a glass, measuring cup, or potato masher, gently press each potato until flattened to about 1/2-inch thick.
The skins should crack and the centers should spread slightly. Be gentle enough to keep most pieces together.
Step 6: Season the Potatoes
In a small bowl, combine olive oil, melted butter, salt, black pepper, garlic powder, onion powder, and dried parsley or Italian seasoning. Stir well.
Brush or spoon the mixture generously over each smashed potato, making sure the edges are coated.
Step 7: First Roast
Bake the potatoes for 20 minutes. The bottoms should begin browning and the edges should start turning golden.
Rotate the pan halfway through if your oven has hot spots. This helps even browning.
Step 8: Add Optional Toppings
Remove the pan briefly if using Parmesan or other cheese. Sprinkle it over the tops now.
Add bacon pieces if desired. Toppings added near the end stay flavorful and avoid overcooking.
Step 9: Final Roast
Return the potatoes to the oven for another 10 to 15 minutes, or until deeply golden and crisp around the edges.
For extra crispness, broil for 1 to 2 minutes at the end while watching closely.
Step 10: Finish and Serve
Remove from the oven and sprinkle with fresh parsley or chives. Add sour cream or extra toppings if desired.
Serve immediately while hot for the best crisp texture and fluffy centers.
Serving Suggestions
Serve these potatoes beside grilled steak, roasted chicken, pork chops, or burgers for a dependable family dinner side. They pair with nearly any savory main dish.
Add sour cream, bacon, cheese, and chives for loaded potato night. This version can even work as a casual main course with salad.
Serve alongside eggs and bacon for a hearty brunch plate. Crispy potatoes are always welcome at breakfast.
Pair with salmon or roasted fish for a simple balanced meal. The crispy texture contrasts beautifully with tender fish.
Use mini smashed potatoes on appetizer platters with ranch dip, garlic aioli, or herbed yogurt sauce.
Serve with soups or chili instead of bread for a cozy cold-weather meal.
Leftovers and Storage
Allow leftover potatoes to cool slightly before storing. Place them in an airtight container and refrigerate for up to 4 days.
To reheat, place on a sheet pan in a 400°F oven or air fryer until hot and crisp again. This is the best way to restore texture.
Microwaving works for speed, though the potatoes will be softer and less crisp.
For freezing, arrange cooled potatoes in a single layer until firm, then transfer to freezer-safe bags for up to 2 months. Reheat from frozen in the oven.
Nutrition and Benefits
- Potatoes provide satisfying energy and pair well with many meals.
- Roasting uses less oil than deep frying while still creating crisp texture.
- Homemade seasoning allows control over sodium and flavors.
- Potato skins provide additional texture and useful nutrients.
- The recipe is flexible with herbs, cheeses, and topping options.
- Make-ahead boiling helps simplify dinner prep and entertaining.
Recipe FAQ
What potatoes work best for smashed potatoes?
Baby Yukon Gold, red potatoes, and other small waxy potatoes work very well. They hold their shape nicely after boiling.
Why are my potatoes not crispy?
They may be too wet or too crowded on the pan. Dry them well and leave space between each potato.
Can I make them ahead?
Yes, boil the potatoes ahead of time and refrigerate. Smash and roast when ready to serve.
Do I need to peel the potatoes?
No, the skins add texture and help hold the potatoes together. They also crisp beautifully.
Can I use an air fryer?
Yes, smashed potatoes cook very well in an air fryer. Work in batches so they have room to crisp.
What toppings go well?
Cheese, bacon, sour cream, chives, herbs, ranch seasoning, and garlic butter are all excellent choices.
Can I freeze leftovers?
Yes, freeze cooked potatoes and reheat in the oven or air fryer for the best texture.
Conclusion
A Crispy Side Worth Making Again
These Smashed Potatoes are the kind of dependable recipe that turns simple ingredients into something everyone loves. They use easy steps, familiar pantry staples, and deliver crisp edges with fluffy centers every time.
They are worth making again because they fit weeknight dinners, holiday meals, brunch tables, and casual gatherings so naturally. With reliable results, family appeal, and endless topping options, this is a side dish people happily come back for again and again.