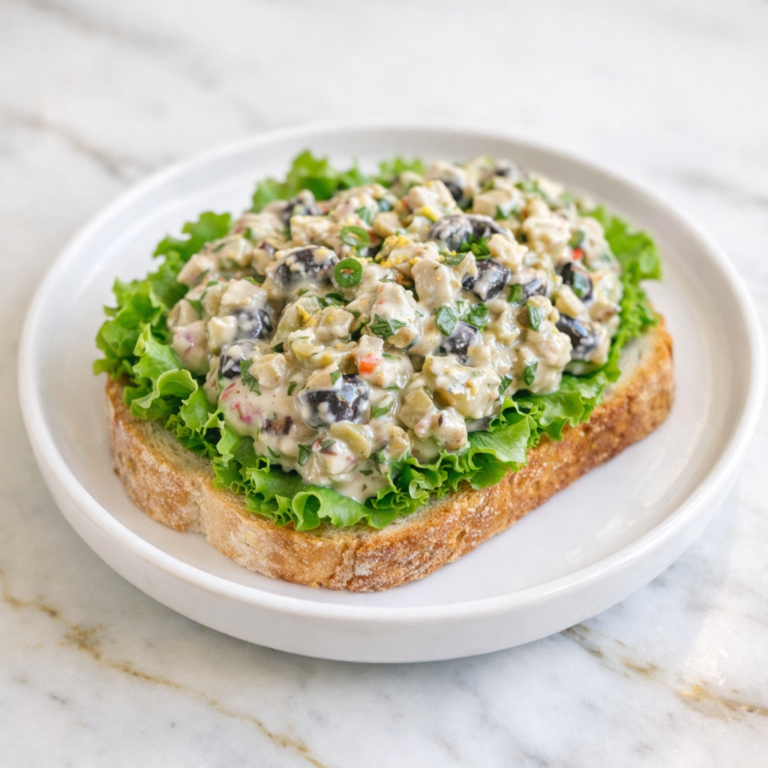
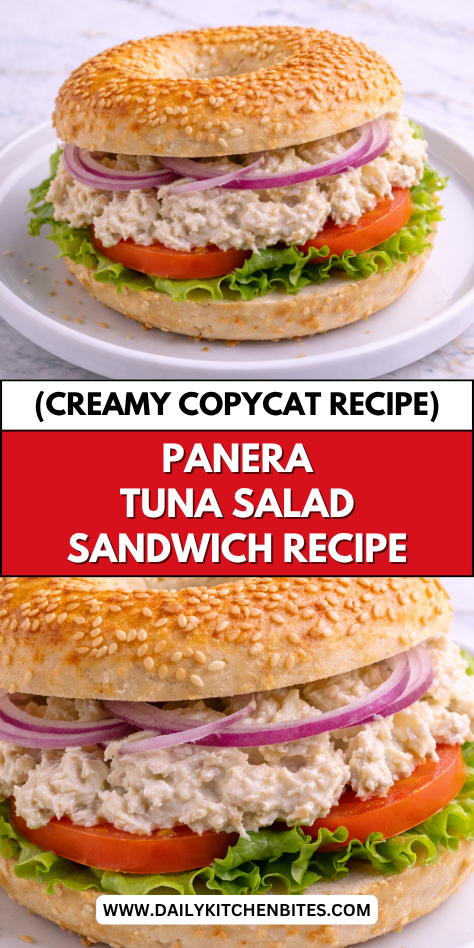
Tuna salad sandwiches are something most home cooks have made plenty of times, but getting it to taste as creamy and well-seasoned as Panera’s version takes a little more attention than just opening a can.
That smooth, flavorful filling with the right balance of creaminess and seasoning is what sets it apart from a basic tuna sandwich. A lot of homemade versions end up too dry or missing that depth of flavor that makes it so satisfying.
I worked through this in my own kitchen until every part of it came together just right. This post shows you exactly how to build it from scratch.
Why You’ll Love This Recipe
This Panera Tuna Salad Sandwich delivers a creamy, flavorful filling that’s perfectly balanced with just the right amount of crunch. The combination of tender tuna, crisp celery, and a smooth dressing creates a texture that feels both light and satisfying. It’s a simple recipe that still feels elevated enough to serve for lunch or a casual gathering.
Another reason this recipe stands out is how quick and easy it is to prepare. With just a handful of pantry and fresh ingredients, you can have a complete meal ready in minutes. It’s perfect for families, meal prep, or anyone looking for a dependable go-to recipe.
Serves: 4 people
This recipe makes enough tuna salad for four generous sandwiches. You can easily adjust the portions depending on your needs. It also works well as a smaller serving for wraps or lettuce cups.
Ingredients You’ll Need
For the Tuna Salad:
- 2 cans (5 oz each) tuna in water, drained
- 1/2 cup mayonnaise
- 1/4 cup celery, finely chopped
- 2 tbsp red onion, finely chopped
- 1 tbsp sweet pickle relish
- 1 tsp Dijon mustard
- 1/2 tsp salt
- 1/4 tsp black pepper
For the Sandwich:
- 8 slices whole grain or sourdough bread
- 4 leaves romaine or green leaf lettuce
- 1 medium tomato, sliced
Optional Add-Ins:
- 1 boiled egg, chopped
- 1 tbsp fresh lemon juice
- 1 tbsp chopped fresh dill
Pro Tips
Drain the tuna well before mixing to prevent the salad from becoming watery. Pressing out excess liquid helps create a thicker, creamier texture. This small step makes a noticeable difference in the final result.
Chop the celery and onion finely so they blend well into the salad. This ensures every bite has a balanced texture without any overpowering crunch. It also makes the sandwich easier to eat.
Use good-quality mayonnaise for the best flavor and creaminess. Since it’s a key ingredient, it really impacts the overall taste. You can also adjust the amount to suit your preference.
Let the tuna salad chill for at least 15 to 20 minutes before serving. This allows the flavors to meld together and develop. It makes the sandwich taste more cohesive and flavorful.
Toast the bread lightly for added texture and to prevent sogginess. A crisp surface holds up better to the creamy filling. It also adds a subtle layer of flavor.
Assemble the sandwich just before serving to keep everything fresh. Adding lettuce between the bread and tuna helps create a barrier that keeps the bread from getting soggy. This keeps the sandwich looking and tasting its best.
Tools You’ll Need
- Medium mixing bowl
- Fork or spoon
- Cutting board
- Sharp knife
- Measuring cups and spoons
- Toaster or skillet (for bread)
Substitutions and Variations
If you prefer a lighter version, you can substitute part or all of the mayonnaise with Greek yogurt. This creates a slightly tangier flavor while reducing richness. It’s a great option for a healthier twist.
For a different texture, try using mashed avocado in place of some of the mayonnaise. This adds creaminess along with healthy fats. It also pairs nicely with the tuna and vegetables.
You can swap red onion for green onion if you prefer a milder flavor. This makes the sandwich more kid-friendly while still adding a bit of freshness. It’s an easy adjustment based on preference.
If you want extra crunch, consider adding chopped pickles or shredded carrots. These ingredients bring additional texture and flavor. They also make the sandwich feel more dynamic.
For a low-carb option, serve the tuna salad in lettuce wraps instead of bread. This keeps the meal light while still being satisfying. It’s a simple way to adapt the recipe to different dietary needs.
Make Ahead Tips
This tuna salad is perfect for making ahead, which makes it a great option for busy weekdays or quick lunches. You can prepare the tuna mixture up to three days in advance and store it in an airtight container in the refrigerator. The flavors continue to develop over time, making it even more delicious after a few hours.
For best results, keep the tuna salad separate from the bread and fresh toppings until you’re ready to serve. This helps maintain the texture of the sandwich and prevents sogginess. Storing components individually makes assembly quick and easy.
You can also chop the vegetables ahead of time and store them in small containers. This cuts down prep time and makes putting everything together feel effortless. Having everything ready helps you create a fresh sandwich in minutes.
If you’re planning lunches for the week, portion the tuna salad into individual containers. This makes it easy to grab and go without extra prep. A little planning goes a long way in keeping meals simple and stress-free.
Instructions
Step 1: Prepare the Tuna
Open and drain the canned tuna thoroughly, pressing out as much liquid as possible. Place the tuna in a medium mixing bowl and break it apart with a fork. This creates a smooth base for the salad.
Step 2: Mix the Dressing
Add mayonnaise, Dijon mustard, sweet pickle relish, salt, and black pepper to the bowl. Stir until the mixture is well combined and creamy. Make sure the tuna is evenly coated for consistent flavor.
Step 3: Add Vegetables
Fold in the finely chopped celery and red onion. Mix gently to distribute the ingredients without breaking down the tuna too much. This step adds crunch and freshness to the salad.
Step 4: Chill the Mixture
Cover the bowl and refrigerate the tuna salad for at least 15 to 20 minutes. This allows the flavors to meld together and enhances the overall taste. Chilling also improves the texture.
Step 5: Prepare the Bread
Lightly toast the bread slices in a toaster or skillet until golden. This step adds a slight crispness and helps prevent the sandwich from becoming soggy. Let the bread cool slightly before assembling.
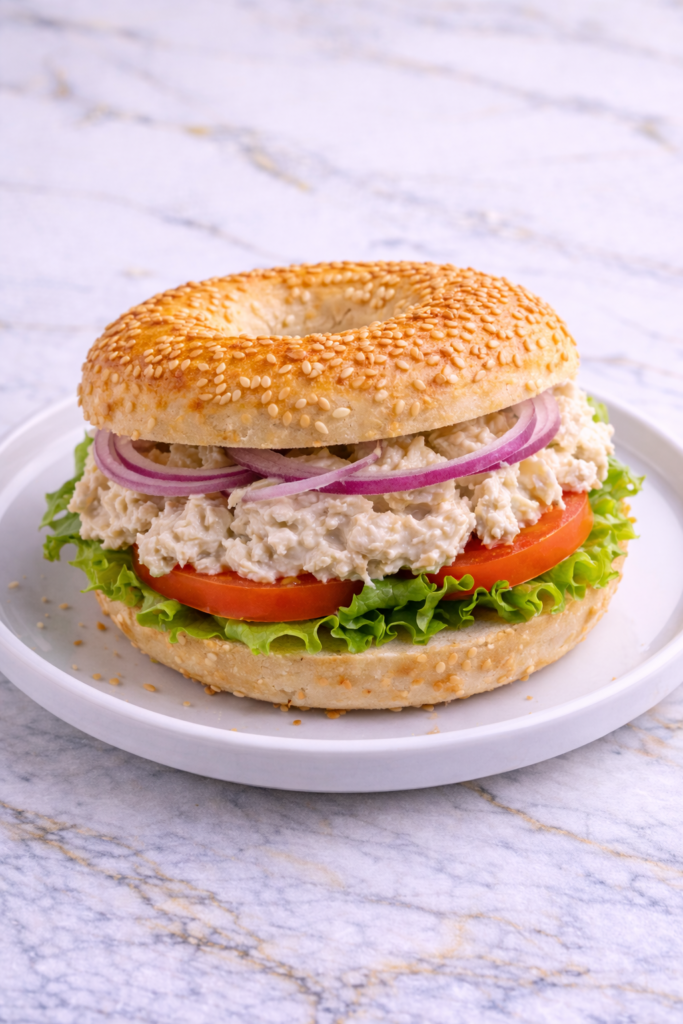
Step 6: Assemble the Sandwich
Place a lettuce leaf on one slice of bread, then add a generous scoop of tuna salad. Top with tomato slices and cover with the second slice of bread. Press gently to hold everything together.
Step 7: Slice and Serve
Use a sharp knife to cut the sandwich in half for easier serving. Serve immediately while the bread is still fresh and slightly crisp. This ensures the best texture and flavor.
Serving Suggestions
This sandwich pairs wonderfully with a side of crispy potato chips or kettle chips. The crunch of the chips complements the creamy tuna salad perfectly. It creates a simple and satisfying lunch combination.
For a lighter option, serve the sandwich with a fresh green salad. A tangy vinaigrette helps balance the richness of the tuna. This pairing keeps the meal refreshing and well-rounded.
You can also serve it alongside a warm bowl of soup for a comforting meal. Tomato soup or vegetable soup works especially well. This combination is great for cooler days.
Fresh fruit like apple slices, grapes, or berries adds a natural sweetness to the plate. The contrast in flavors makes the meal feel more complete. It’s also a great option for family lunches.
For gatherings, cut the sandwiches into smaller portions and serve on a platter. This makes them easy to share and perfect for casual entertaining. They’re always a crowd-pleasing option.
Leftovers and Storage
Store leftover tuna salad in an airtight container in the refrigerator for up to three days. Keeping it sealed helps maintain freshness and prevents it from absorbing other flavors. Stir before serving to refresh the texture.
Avoid storing assembled sandwiches for long periods, as the bread can become soggy. It’s best to keep the components separate until ready to eat. This ensures the best quality and texture.
If the tuna salad thickens after refrigeration, you can stir in a small amount of mayonnaise or a splash of lemon juice. This helps restore its creamy consistency. Adjust seasoning if needed.
Freezing is not recommended for tuna salad, as the texture of the mayonnaise can change when thawed. Fresh preparation yields the best results. Proper storage ensures the best flavor and quality.
Nutrition and Benefits
- Tuna is a great source of lean protein, helping support muscle health and keeping you full longer. It makes this sandwich both satisfying and nourishing.
- The addition of celery and onion provides fiber and essential nutrients. These ingredients also add a refreshing crunch to the dish.
- Using whole grain bread can increase fiber intake and provide longer-lasting energy. It’s a simple way to make the meal more balanced.
- Making tuna salad at home allows you to control ingredients like salt and fat. This helps create a healthier version compared to store-bought options.
- Optional add-ins like avocado or yogurt can boost nutritional value while adding variety. This makes the recipe adaptable to different dietary needs.
Recipe FAQ
Can I use a different type of tuna?
Yes, you can use tuna packed in oil or even fresh cooked tuna if preferred. Each option offers a slightly different flavor and texture. Just be sure to adjust the seasoning as needed.
How do I keep the sandwich from getting soggy?
Toasting the bread and adding lettuce between the tuna and bread helps create a barrier. This prevents moisture from soaking into the bread. Assembling just before serving also helps.
Can I make this recipe healthier?
You can substitute part of the mayonnaise with Greek yogurt for a lighter option. Adding more vegetables can also boost nutrition. Small changes can make a big difference.
What can I use instead of mayonnaise?
Greek yogurt, mashed avocado, or a combination of both work well as substitutes. These options still provide creaminess while changing the flavor slightly. Choose based on your preference.
Is this recipe good for meal prep?
Yes, the tuna salad holds up well in the refrigerator for several days. Store it separately from bread and toppings for best results. This makes it a convenient option for quick meals.
Can I add extra ingredients?
Absolutely, ingredients like chopped pickles, herbs, or boiled eggs can enhance flavor and texture. These additions allow you to customize the salad. It’s easy to adapt to your taste.
What bread works best for this sandwich?
Whole grain, sourdough, or even a soft sandwich bread all work well. Choose something sturdy enough to hold the filling. Toasting helps improve both texture and flavor.
A Simple Classic That Never Disappoints
Once you make this at home, it’s going to be hard to settle for a basic tuna sandwich ever again.
The filling comes out creamy, well-seasoned, and flavorful in a way that makes even a simple lunch feel worth sitting down for.
I love having a batch of this ready in the fridge for quick lunches throughout the week because it comes together fast and holds up really well.
Pile it onto your favorite bread with some fresh toppings and you have something that feels complete and satisfying every time. Simple to make and always reliable. I hope it becomes a lunchtime staple in your kitchen.