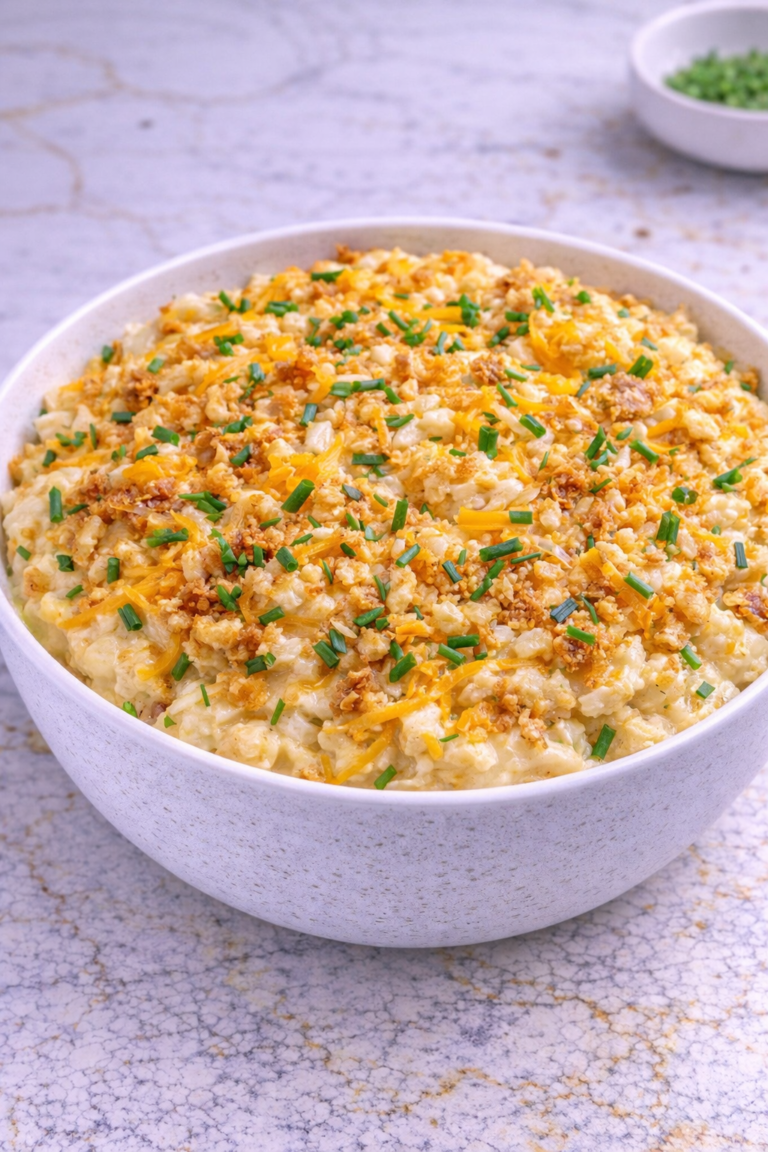
Some recipes never go out of style, and Old Fashioned Mac and Cheese is one of those dishes that always feels right at home on the table.
With creamy cheese sauce, tender pasta, and a golden baked top, it brings the kind of comfort that makes everyone eager for dinner.
I first started making this recipe when I wanted a dependable homemade version that tasted like the classic casseroles I remembered growing up.
It quickly became a family favorite because it is rich, cozy, and simple enough for weeknights while still feeling special for holidays and gatherings.

Why You’ll Love This Recipe
This recipe delivers everything people love about classic macaroni and cheese. The sauce is creamy, the cheese flavor is rich and satisfying, and the baked top adds a wonderful golden finish that feels homemade in the best way.
It is also practical for busy households. The ingredients are simple, the steps are straightforward, and the dish can be prepared ahead when needed.
Families love how versatile it is. Serve it as a main dish with vegetables or as a side for barbecue, chicken, or holiday meals, and it always fits right in.
Serves: 6 people
This recipe makes six generous servings as a main dish or more as a side dish. It can easily be doubled for potlucks, holidays, or larger family meals.
Ingredients You’ll Need
For the Pasta
- 1 pound elbow macaroni
- 1 tablespoon salt for pasta water
For the Cheese Sauce
- 4 tablespoons butter
- 1/4 cup all-purpose flour
- 3 cups whole milk, warmed
- 1 cup heavy cream
- 1 teaspoon salt
- 1/2 teaspoon black pepper
- 1/2 teaspoon garlic powder
- 1/2 teaspoon onion powder
- 1/2 teaspoon paprika
- 2 teaspoons Dijon mustard (optional)
For the Cheese
- 3 cups sharp cheddar cheese, shredded
- 2 cups mild cheddar cheese, shredded
- 1 cup mozzarella or Monterey Jack cheese, shredded
- 1/2 cup Parmesan cheese, grated
For the Topping
- 1/2 cup breadcrumbs or crushed buttery crackers
- 2 tablespoons melted butter
Freshly shredded cheese melts more smoothly than pre-shredded cheese. If possible, shred the cheese yourself for the creamiest sauce.
Pro Tips
Cook the pasta just until al dente. It will continue cooking in the oven, so slightly firm pasta helps prevent a mushy final dish.
Warm the milk before adding it to the roux. Warm milk blends more smoothly and helps create a creamy sauce with fewer lumps.
Add the cheese off the heat or over very low heat. This helps the sauce stay smooth and prevents graininess.
Reserve a little extra shredded cheese for the top if you love a bubbly golden finish. It adds extra richness and beautiful color.
Do not skip seasoning the sauce. Mac and cheese needs enough salt and spices to bring out the flavor of the cheese.
For families with younger children, use a milder cheese blend if preferred. Sharp cheddar gives more flavor, but mild cheddar is often more kid-friendly.
Tools You’ll Need
- Large pot for boiling pasta
- Colander
- Large saucepan or skillet
- Whisk
- Wooden spoon or spatula
- Measuring cups
- Measuring spoons
- Cheese grater
- 9×13-inch baking dish
- Mixing bowl for topping
A heavy saucepan helps prevent scorching while making the cheese sauce. It also distributes heat more evenly for smoother results.
Substitutions and Variations
Use shells, cavatappi, or rotini instead of elbow macaroni if desired. Shapes with ridges or curves hold the sauce especially well.
Swap whole milk for 2% milk if you prefer a slightly lighter version. You can also replace the cream with more milk.
Cheddar is classic, but Colby, Gouda, Gruyère, Monterey Jack, or fontina all make delicious additions. Mixing cheeses creates deeper flavor.
For a smoky variation, add smoked cheddar or a little smoked paprika. This gives the dish a cozy, rich twist.
If you need a gluten-free version, use gluten-free pasta and a gluten-free flour blend for the sauce. Gluten-free breadcrumbs can be used for topping.
Add cooked bacon, diced ham, or shredded chicken for a heartier main dish. These mix-ins turn the casserole into a complete meal.
For extra vegetables, stir in cooked broccoli, peas, spinach, or roasted cauliflower before baking. This is an easy way to add color and balance.
If you prefer stovetop mac and cheese, skip the baking step and serve once the cheese sauce and pasta are combined. It will be extra creamy.
For a spicier version, add cayenne, hot sauce, or diced jalapeños. A little heat pairs nicely with rich cheese sauce.
To make it extra crunchy, use crushed crackers mixed with butter for the topping instead of breadcrumbs. This old-fashioned touch is always a hit.

Make Ahead Tips
This recipe is perfect for preparing ahead when you know the day will be busy. You can shred the cheese, cook the pasta, and make the sauce earlier in the day so assembly takes only a few minutes later.
For best texture, slightly undercook the pasta if assembling ahead. This helps it stay tender after baking and prevents it from becoming too soft.
You can fully assemble the dish, cover tightly, and refrigerate it for up to 24 hours before baking. Let it sit at room temperature for about 20 minutes before placing it in the oven.
If baking from chilled, add a few extra minutes to the baking time. This helps the center heat through evenly.
Instructions
Step 1: Cook the Pasta
Bring a large pot of salted water to a boil. Add the elbow macaroni and cook until just al dente according to package directions, usually 1 to 2 minutes less than fully done.
Drain the pasta well and set aside. Toss lightly with a small bit of butter if needed to prevent sticking while you make the sauce.
Step 2: Prepare the Oven and Baking Dish
Preheat the oven to 375°F. Lightly grease a 9×13-inch baking dish with butter or nonstick spray.
Having the dish ready makes assembly quick once the sauce is finished. This helps keep the pasta warm as well.
Step 3: Make the Roux
In a large saucepan or deep skillet, melt the 4 tablespoons butter over medium heat. Sprinkle in the flour and whisk continuously for 1 to 2 minutes.
The mixture should look smooth and lightly golden. Cooking the flour briefly removes any raw flour taste.
Step 4: Add the Milk and Cream
Slowly pour in the warmed milk while whisking constantly. Add the heavy cream and continue whisking until smooth.
Cook over medium heat for 4 to 6 minutes, stirring often, until the sauce thickens enough to coat the back of a spoon.
Step 5: Season the Sauce
Stir in the salt, black pepper, garlic powder, onion powder, paprika, and Dijon mustard if using. Mix well so the seasoning is evenly distributed.
Taste and adjust seasoning if needed. Proper seasoning brings out the full flavor of the cheese.
Step 6: Add the Cheese
Reduce the heat to low. Add the sharp cheddar, mild cheddar, mozzarella or Monterey Jack, and Parmesan a handful at a time, stirring after each addition.
Continue stirring until the cheese melts completely and the sauce is smooth and creamy. Avoid boiling once the cheese is added.
Step 7: Combine Pasta and Sauce
Add the drained macaroni to the cheese sauce. Stir gently until every piece of pasta is evenly coated.
The mixture should look rich and creamy. If it seems too thick, stir in a small splash of milk.
Step 8: Fill the Baking Dish
Pour the macaroni mixture into the prepared baking dish and spread evenly. Smooth the top gently with a spatula.
Mix the breadcrumbs or crushed crackers with the melted butter, then sprinkle evenly over the top.
Step 9: Bake Until Golden
Bake uncovered for 20 to 25 minutes, or until hot and bubbling around the edges. The topping should be golden brown.
If you want extra color, broil for 1 to 2 minutes at the end while watching closely.
Step 10: Rest and Serve
Remove from the oven and let the mac and cheese rest for 10 minutes. This helps it set slightly for easier serving.
Scoop onto plates and serve warm. The sauce will stay creamy while the top remains crisp.
Serving Suggestions
Serve this mac and cheese as a main dish with a simple green salad or roasted vegetables. The freshness balances the rich cheese sauce beautifully.
Pair it with fried chicken, baked chicken, pork chops, or meatloaf for a comforting family dinner. It works especially well as a hearty side.
Add barbecue favorites like ribs, pulled pork, or grilled sausage for gatherings and cookouts. Mac and cheese is always welcome at those meals.
For holiday tables, serve it alongside ham, turkey, or roast beef. It fits naturally with festive comfort food menus.
Offer hot sauce, black pepper, or chopped herbs at the table for easy finishing touches. Everyone can season their own portion.
Serve leftovers in smaller bowls for lunch with sliced tomatoes or fruit on the side. It reheats wonderfully and feels just as comforting the next day.
Leftovers and Storage
Allow leftovers to cool slightly before storing. Transfer to an airtight container and refrigerate for up to 4 days.
To reheat, place portions in the microwave with a splash of milk stirred in to help loosen the sauce. Heat in short intervals, stirring between each round.
For oven reheating, place the mac and cheese in a covered baking dish at 350°F until warmed through. Add a little milk if needed to restore creaminess.
You can freeze leftovers for up to 2 months in freezer-safe containers. Thaw overnight in the refrigerator before reheating.
Nutrition and Benefits
- Cheese provides protein and calcium, helping make the dish filling and satisfying.
- Homemade sauce allows you to control the ingredients and seasoning.
- Pasta offers comforting energy and pairs well with vegetables or proteins.
- The recipe can be adjusted with lighter milk, added vegetables, or different cheeses.
- Baking creates a crisp topping and warm casserole texture many families love.
- This dish works as both a main meal and a versatile side dish.
Recipe FAQ
Can I make this without baking it?
Yes, simply serve it after mixing the pasta with the cheese sauce. It will be extra creamy and ready even faster.
Why is my cheese sauce grainy?
Cheese sauce can become grainy if overheated. Add cheese over low heat and avoid boiling after the cheese is added.
Can I use pre-shredded cheese?
Yes, but freshly shredded cheese usually melts more smoothly. Pre-shredded cheese often contains anti-caking agents that affect texture.
How do I keep mac and cheese creamy?
Use enough sauce, do not overbake, and add a splash of milk when reheating leftovers. These steps help maintain a creamy texture.
Can I add meat?
Absolutely. Bacon, ham, chicken, or sausage are all delicious additions that turn it into a heartier meal.
What pasta shapes work best?
Elbows are classic, but shells, cavatappi, and rotini are also excellent because they hold sauce well.
Can I make it ahead of time?
Yes, assemble the casserole up to one day ahead and refrigerate. Bake when ready to serve.
Conclusion
A Classic Comfort Dish Worth Making Again
This Old Fashioned Mac and Cheese is the kind of dependable recipe that brings warmth and comfort to any table. It uses simple ingredients, familiar steps, and delivers creamy, cheesy results every single time.
It is worth making again because it fits holidays, weeknight dinners, and family gatherings so easily. With its cozy flavor, crowd-pleasing appeal, and reliable homemade goodness, this is a dish families happily return to again and again.