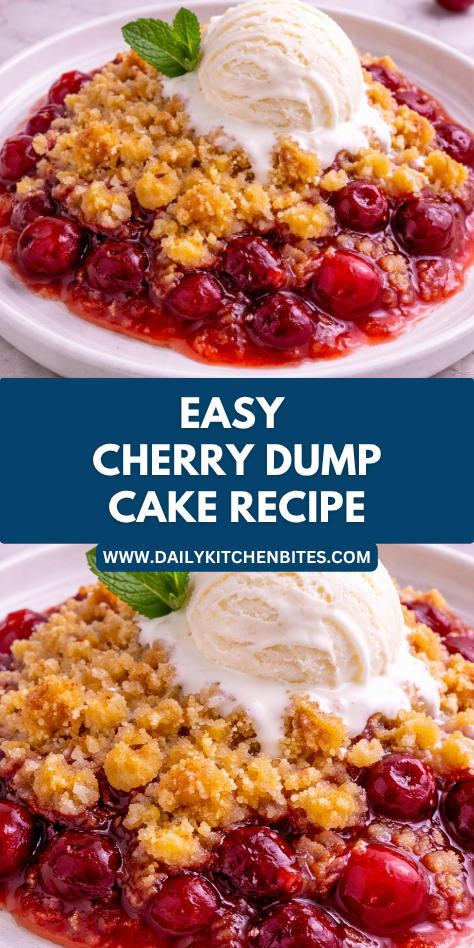
Some desserts become favorites because they are wonderfully simple and always disappear fast, and Cherry Dump Cake is one of those treasured recipes in our home.
Warm cherries, buttery cake topping, and the easiest preparation make it the kind of dessert everyone hopes will be on the table.
I first started making this recipe when I needed a last-minute dessert that still felt homemade and comforting.
It quickly became a family tradition because it uses pantry staples, takes only minutes to assemble, and comes out warm, sweet, and delicious every single time.
Why You’ll Love This Recipe
This recipe delivers everything people love in an easy dessert. Juicy cherry filling bubbles underneath a golden buttery cake topping that tastes like a cross between cobbler and crisp.
It is also wonderfully practical for busy households. There is no mixer, no complicated batter, and very little cleanup involved.
Families love how dependable it is. Whether for holidays, potlucks, or weeknight treats, it always feels comforting and crowd-pleasing.
Serves: 8 people
This recipe makes about eight generous servings, depending on portion size. It can easily be doubled for larger gatherings using two pans.
Ingredients You’ll Need
For the Dump Cake
- 2 cans cherry pie filling (21 ounces each)
- 1 box yellow cake mix (about 15.25 ounces)
- 3/4 cup unsalted butter, melted
- 1 teaspoon vanilla extract (optional)
- 1/2 teaspoon almond extract (optional)
Optional Add-Ins
- 1/2 cup chopped pecans or walnuts
- 1/2 teaspoon cinnamon
- 1 cup crushed pineapple, drained
- 1/2 cup chocolate chips
For Serving
- Vanilla ice cream
- Whipped cream
- Fresh cherries if in season
Cherry pie filling gives the classic sweet-tart flavor and convenient texture that makes this dessert so easy.
Pro Tips
Spread the cherry filling evenly in the pan so every serving has a good fruit layer.
Sprinkle the dry cake mix evenly across the top without stirring it into the fruit. Keeping the layers separate creates the classic texture.
Drizzle the melted butter over as much of the cake mix surface as possible. This helps prevent dry powdery spots.
Use a fork lightly over the top after adding butter if you notice dry patches. This can help distribute moisture without fully mixing layers.
Bake until the fruit is bubbling around the edges and the top is golden brown. That is the best sign it is ready.
For families with younger children, serve with vanilla ice cream to balance the tart cherry flavor.
Tools You’ll Need
- 9×13-inch baking dish
- Measuring cups
- Small bowl for melted butter
- Spoon or spatula
- Oven mitts
A glass or ceramic baking dish works especially well because it holds heat nicely and lets you see the bubbling fruit edges.
Substitutions and Variations
Use white cake mix, butter cake mix, or spice cake mix instead of yellow cake mix. Each creates a slightly different flavor.
Swap cherry pie filling for blueberry, apple, peach, or mixed berry filling. The same easy method still works beautifully.
Add crushed pineapple with the cherries for a bright sweet variation. Drain well if using canned pineapple.
Use salted butter if that is what you have. It can create a pleasant sweet-salty balance.
For a richer topping, slice cold butter thinly and place it over the dry mix instead of melting it.
Add chopped nuts for crunch and texture. Pecans pair especially well with cherries.
If you enjoy almond flavor, use almond extract because it pairs beautifully with cherries.
Sprinkle cinnamon into the cake mix layer for a warm spiced version.
For a chocolate-cherry twist, scatter chocolate chips over the fruit before adding cake mix.
You can also make individual portions in smaller ramekins for special occasions or easier serving.
Make Ahead Tips
This dessert is excellent for planning ahead because it requires very little last-minute effort. You can spread the cherry filling in the baking dish, cover it, and refrigerate it several hours before baking. Add the cake mix and butter just before it goes into the oven for the best topping texture.
You can also bake the dump cake earlier in the day and warm it gently before serving. It stays delicious at room temperature for several hours, making it ideal for gatherings and holidays.
If preparing for a potluck, bake it in a transport-friendly dish and cover once cooled slightly.
Keep ice cream or whipped cream chilled until serving time.
Instructions
Step 1: Preheat the Oven
Preheat your oven to 350°F. Lightly grease a 9×13-inch baking dish with butter or nonstick spray.
A prepared dish helps with easier serving and cleanup later. Starting with a fully heated oven also helps the topping brown evenly.
Step 2: Add the Cherry Filling
Open the cans of cherry pie filling and spread them evenly across the bottom of the baking dish. Use a spoon or spatula to create a smooth layer from corner to corner.
If using vanilla or almond extract, stir it gently into the cherry filling now. This adds extra depth of flavor.
Step 3: Add Optional Fruit Extras
If using crushed pineapple or another add-in that belongs in the fruit layer, scatter it evenly over the cherries.
Keep the fruit layer level so the topping bakes evenly over the entire dish.
Step 4: Sprinkle the Cake Mix
Open the cake mix and sprinkle the dry powder evenly over the cherry layer. Cover all visible fruit as evenly as possible.
Do not stir the cake mix into the fruit. Keeping the layers separate creates the classic dump cake texture.
Step 5: Add Optional Dry Toppings
If using cinnamon, chopped nuts, or chocolate chips, sprinkle them over the dry cake mix now.
These additions create extra flavor and texture without changing the easy method.
Step 6: Add the Butter
Slowly drizzle the melted butter across the entire surface of the cake mix. Try to moisten as much of the dry mix as possible.
If you notice dry spots, gently tap or drag a fork over the surface to help spread the butter. Avoid fully mixing the layers.
Step 7: Bake the Cake
Place the dish in the oven and bake for 45 to 55 minutes. The top should become golden brown and the cherry filling should bubble around the edges.
If the top browns too quickly, loosely tent with foil during the final part of baking.
Step 8: Cool Slightly
Remove the dump cake from the oven and let it rest for 10 to 15 minutes. The filling will be extremely hot right out of the oven.
This short cooling time also helps the texture settle for easier scooping.
Step 9: Serve Warm
Spoon generous portions into bowls or onto dessert plates. Be sure to scoop down into the cherry layer so each serving has fruit and topping.
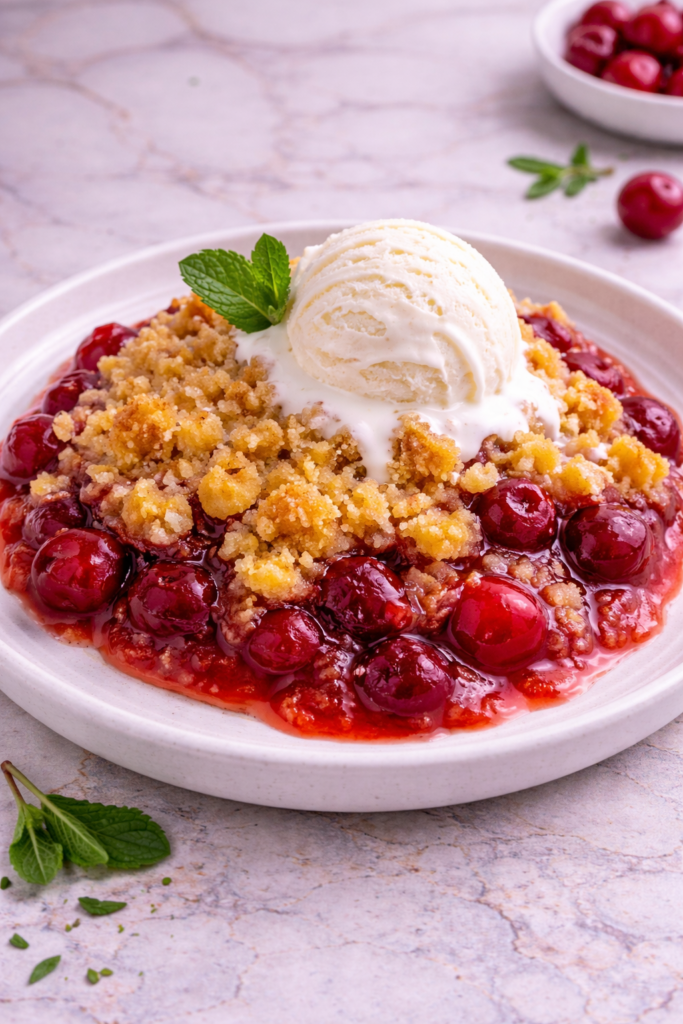
Serve warm for the most comforting texture and flavor.
Step 10: Add Finishing Touches
Top each serving with vanilla ice cream or whipped cream if desired. The cold creamy topping pairs beautifully with the warm cherries.
Fresh cherries or chopped nuts also make lovely finishing touches.
Serving Suggestions
Serve warm with a scoop of vanilla ice cream for the classic pairing. The melting ice cream balances the sweet cherry filling perfectly.
Add freshly whipped cream for a lighter topping that still feels special.
Pair with coffee or tea after dinner for an easy dessert course. It is especially cozy during cooler months.
Serve smaller portions on a dessert table beside cookies and brownies for parties or potlucks.
Use leftovers as a sweet brunch treat with yogurt or whipped cream.
For holidays, garnish with toasted nuts or fresh mint for a simple finished look.
Leftovers and Storage
Allow leftovers to cool fully before storing. Cover the baking dish tightly or transfer portions to airtight containers and refrigerate for up to 4 days.
To reheat, warm individual servings in the microwave in short intervals until heated through. Larger portions can be reheated in a 325°F oven.
The topping will soften somewhat after storage, but the flavor remains delicious. Reheating in the oven helps restore some texture.
You can freeze cooled portions in freezer-safe containers for up to 2 months. Thaw overnight in the refrigerator before reheating.
Nutrition and Benefits
- This dessert uses simple pantry staples for quick homemade comfort.
- Cherry filling provides fruity flavor that balances the buttery topping.
- The recipe requires no mixer or complicated baking steps.
- It is easy to scale for parties, potlucks, and holidays.
- Optional nuts add texture and richness.
- Warm fruit desserts often feel satisfying with modest portions.
Recipe FAQ
Why is it called dump cake?
It is called dump cake because the ingredients are layered or “dumped” into the pan with very little mixing. This makes it one of the easiest desserts to prepare.
Can I use fresh cherries?
Fresh cherries can be used, but they need to be sweetened and cooked into a filling first. Canned pie filling is the quickest option.
Why are there dry spots on top?
Dry spots usually happen when the butter does not cover enough of the cake mix. Drizzle evenly and patch dry areas before baking.
Can I make this ahead of time?
Yes, bake it earlier in the day and warm before serving. It is great for gatherings and holidays.
What cake mix works best?
Yellow cake mix is classic, but white, butter, spice, or chocolate cake mix also work well.
Can I freeze dump cake?
Yes, cool it fully and freeze portions in airtight containers. Reheat after thawing for best texture.
Is it better warm or cold?
Many people prefer it warm because the topping is softer and the fruit is more comforting. Cold leftovers are still very tasty.
Conclusion
A Sweet Classic Worth Making Again
This Cherry Dump Cake is the kind of dependable dessert that makes homemade baking feel wonderfully easy. It uses simple ingredients, quick steps, and delivers warm fruity comfort with a golden buttery topping every time.
It is worth making again because it fits holidays, potlucks, family dinners, and last-minute dessert needs so naturally. With reliable results, crowd-pleasing flavor, and effortless preparation, this is a recipe everyone will be happy to enjoy again and again.