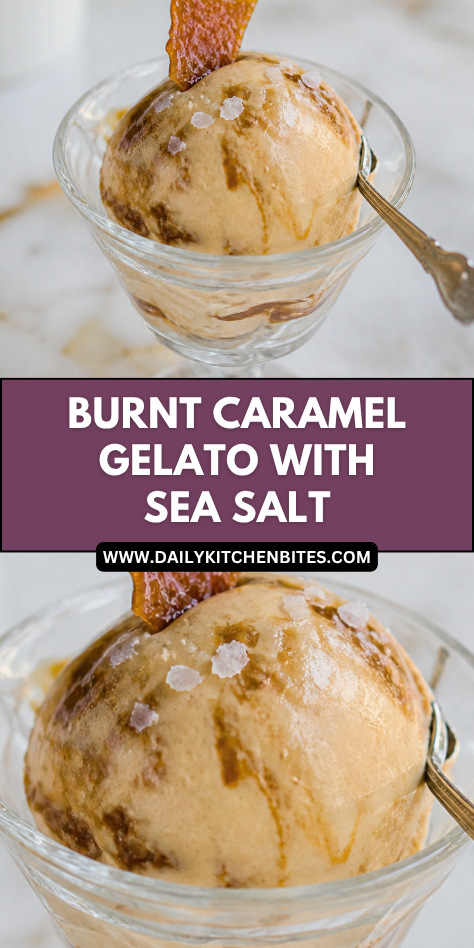
I make Burnt Caramel and Sea Salt Gelato when I want a frozen dessert that feels rich, smooth, and a little more special than a regular scoop of ice cream. The caramel is cooked until it turns deep amber, which gives the gelato a bold, toasty flavor that tastes warm even when the dessert is cold.
This is the kind of recipe I like to make when we want something slow and homemade for the freezer. It does take a little patience, especially when making the caramel, but the final gelato is creamy, silky, and full of that sweet-salty flavor that makes everyone go back for another spoonful.
Why You’ll Love This Recipe
Burnt Caramel and Sea Salt Gelato has a deep caramel flavor that is not too sweet. The sugar cooks until it has a slightly bitter edge, then cream, milk, egg yolks, and sea salt soften it into a smooth frozen dessert.
It is a lovely recipe for family dinners, holidays, birthdays, or quiet weekends when you want dessert ready ahead of time. Since gelato needs time to chill and freeze, it is perfect for making the day before you plan to serve it.
The texture is creamy and dense, just like good gelato should be. A small scoop feels satisfying, and the sea salt keeps the caramel flavor balanced instead of heavy.
Serves: 8 people
This recipe makes about 1 quart of gelato, which serves 8 people in small scoops. Since the flavor is rich, smaller portions work well, especially if you serve it with cookies, brownies, fruit, or a simple drizzle of caramel.
Ingredients You’ll Need
For the Burnt Caramel Base
- 1 cup granulated sugar
- ¼ cup water
- 2 tablespoons light corn syrup, optional but helpful
- 2 cups whole milk, warmed
- 1 cup heavy cream, warmed
- ½ teaspoon fine sea salt
- 1 teaspoon vanilla extract
For the Custard
- 5 large egg yolks
- ¼ cup granulated sugar
- 1 tablespoon cornstarch
For Finishing
- ½ teaspoon flaky sea salt, plus more to taste
- 1 tablespoon caramel sauce, optional for serving
- ¼ cup chopped toasted pecans, optional for serving
- Waffle cones or crisp cookies, optional for serving
Granulated sugar is the base of the caramel. Cooking it until deep amber gives the gelato its bold toasted flavor.
Water helps the sugar melt evenly at the beginning. It gives you a little more control, which is helpful if you are new to making caramel.
Light corn syrup is optional, but it can help keep the sugar from crystallizing. If you do not have it, you can still make the recipe with just sugar and water.
Whole milk gives the gelato a smooth base without making it too heavy. Gelato usually uses more milk than cream, which gives it a dense but still creamy texture.
Heavy cream adds richness and helps the caramel taste soft and rounded. Warming the milk and cream before adding them to the caramel helps prevent splattering and makes mixing easier.
Fine sea salt goes into the base so the flavor is balanced throughout. Flaky sea salt is added at the end for little pops of salty crunch.
Egg yolks give the gelato its custard-like texture. They help thicken the base and make the finished gelato smooth.
Cornstarch gives the custard a little extra stability. It helps the gelato churn nicely and gives the texture a gentle creaminess.
Vanilla adds warmth and rounds out the deep caramel flavor. It does not take over, but it makes the gelato taste fuller and more finished.
Optional toppings like caramel sauce, toasted pecans, waffle cones, or crisp cookies are not required. They add texture and make the gelato feel more like a dessert shop treat at home.
Pro Tips
Use a heavy-bottomed saucepan for the caramel. Thin pans can heat unevenly, which makes the sugar more likely to burn in spots.
Warm the milk and cream before adding them to the caramel. Cold dairy can cause the caramel to seize and splatter more, so warm dairy is safer and easier to stir in.
Watch the caramel closely once it starts to change color. It can move from pale gold to deep amber very quickly, so stay near the stove.
Do not stir the sugar too much while it cooks. Swirling the pan gently is better because stirring can sometimes cause crystals to form.
Add the warm dairy slowly and carefully. The caramel will bubble up, so pour a little at a time and use a long spoon or whisk.
Chill the gelato base completely before churning. A cold base churns better, freezes faster, and gives the smoothest texture.
Do not skip the sea salt. The salt balances the sweetness and brings out the deep, toasty flavor of the burnt caramel.
Tools You’ll Need
- Heavy-bottomed medium saucepan
- Small saucepan
- Heatproof whisk
- Wooden spoon or silicone spatula
- Large mixing bowl
- Medium mixing bowl
- Measuring cups
- Measuring spoons
- Fine mesh strainer
- Instant-read thermometer
- Ice cream maker
- Freezer-safe container with lid
- Plastic wrap or parchment paper
- Ladle
- Rubber spatula
A heavy-bottomed saucepan is important for making caramel because it spreads heat more evenly. This helps the sugar cook at a steady pace and lowers the chance of hot spots.
A small saucepan is helpful for warming the milk and cream before they go into the caramel. Warm dairy is easier to blend into hot sugar and helps the sauce stay smoother.
A fine mesh strainer gives the gelato base a silky finish. It catches any bits of cooked egg or caramel that did not fully dissolve.
An instant-read thermometer is helpful for beginners because custard needs gentle heat. It should thicken without boiling, and a thermometer makes that easier to control.
An ice cream maker is needed to churn the gelato into a creamy texture. Make sure the freezer bowl is fully frozen if your machine uses one.
A freezer-safe container with a lid keeps the churned gelato protected while it firms up. Pressing plastic wrap or parchment directly on the surface helps prevent ice crystals.
Substitutions and Variations
Make It Without Corn Syrup
Leave out the corn syrup and make the caramel with only sugar and water. Be careful not to stir too much, and gently swirl the pan if the sugar needs help melting evenly.
Use Brown Sugar for a Softer Flavor
Replace ¼ cup of the granulated sugar in the custard with light brown sugar. This gives the gelato a softer caramel note while keeping the burnt caramel flavor at the center.
Add Toasted Nuts
Fold in ¼ cup finely chopped toasted pecans, almonds, or hazelnuts after churning. The nuts add crunch and pair beautifully with the sea salt and caramel.
Make It Extra Salty-Sweet
Sprinkle a little flaky sea salt over each scoop right before serving. This gives the gelato a bright salty finish without making the whole batch too salty.
Add Chocolate Swirls
Drizzle in ¼ cup melted dark chocolate or fudge sauce during the last minute of churning. This adds a rich ribbon of chocolate while still letting the burnt caramel flavor shine.
Make Ahead Tips
Burnt Caramel and Sea Salt Gelato is a perfect make-ahead dessert because the base needs time to chill before churning. I like to make the custard the day before, refrigerate it overnight, then churn it the next day when it is fully cold.
The caramel base can be prepared up to 2 days ahead. Keep it covered in the refrigerator, then whisk it well before adding it to the ice cream maker.
If your ice cream maker uses a freezer bowl, make sure the bowl is frozen for at least 24 hours before churning. A fully frozen bowl helps the gelato set faster and gives it a smoother texture.
You can also make the full gelato several days ahead of serving. Store it in a freezer-safe container with parchment or plastic wrap pressed against the surface to help prevent ice crystals.
For the best texture, move the gelato to the refrigerator for 10 to 15 minutes before scooping. This softens it just enough without letting it melt too much.
Instructions
Step 1: Warm the Milk and Cream
Add the whole milk and heavy cream to a small saucepan. Warm over low heat until steaming, but do not let it boil.
Keep the warm dairy nearby while you make the caramel. Warm milk and cream are safer to add to hot caramel because they reduce splattering and help the mixture blend more smoothly.
Step 2: Start the Caramel
Add 1 cup granulated sugar, water, and corn syrup if using to a heavy-bottomed saucepan. Place the pan over medium heat and let the sugar dissolve.
Avoid stirring once the mixture starts bubbling. If needed, gently swirl the pan to help the sugar cook evenly.
Step 3: Cook to Deep Amber
Continue cooking the sugar mixture until it turns a deep amber color and smells toasty. This usually takes 8 to 12 minutes, depending on your pan and stove.
Watch closely near the end because caramel darkens quickly. You want a bold burnt caramel flavor, but the sugar should not turn black or smell harsh.
Step 4: Add the Warm Dairy
Remove the caramel from the heat. Slowly pour in the warm milk and cream a little at a time, whisking carefully as the mixture bubbles up.
The caramel may steam and foam, so work slowly and keep your face and hands back from the pan. Keep whisking until the caramel dissolves into the dairy.
Step 5: Add Salt and Vanilla
Stir in the fine sea salt and vanilla extract. Return the saucepan to low heat if any caramel pieces remain.
Whisk gently until the base looks smooth. Do not boil the mixture, because it will be heated again with the egg yolks.
Step 6: Whisk the Egg Yolks
In a medium mixing bowl, whisk together the egg yolks, ¼ cup granulated sugar, and cornstarch. Whisk until the mixture looks pale, thick, and smooth.
This step helps the yolks blend into the hot caramel base more evenly. It also lowers the chance of small cooked egg bits forming.
Step 7: Temper the Eggs
Slowly ladle about ½ cup of the warm caramel mixture into the egg yolk mixture while whisking constantly. Add another ½ cup in the same slow way.
This gently warms the eggs before they go into the saucepan. Tempering keeps the custard smooth and helps prevent scrambling.
Step 8: Cook the Custard
Pour the tempered egg mixture back into the saucepan with the remaining caramel base. Cook over low to medium-low heat, stirring constantly with a spatula or wooden spoon.
Cook until the custard thickens enough to coat the back of a spoon, or until it reaches about 170°F to 175°F. Do not let it boil, because boiling can make the custard grainy.
Step 9: Strain and Chill
Pour the custard through a fine mesh strainer into a clean bowl. This removes any small bits and gives the gelato a smoother texture.
Let the base cool for 20 to 30 minutes at room temperature, then cover and refrigerate for at least 4 hours. Overnight chilling gives the best flavor and texture.
Step 10: Churn the Gelato
Pour the cold custard base into your ice cream maker. Churn according to the machine’s directions, usually 20 to 30 minutes, until it looks thick and creamy.
The gelato should have a soft-serve texture when it is done churning. Add the flaky sea salt during the last minute so it spreads through the gelato without fully dissolving.
Step 11: Freeze Until Firm
Transfer the churned gelato to a freezer-safe container. Press parchment paper or plastic wrap directly on the surface, then cover with a lid.
Freeze for 3 to 4 hours, or until firm enough to scoop. Let it sit briefly before serving if it becomes very hard.
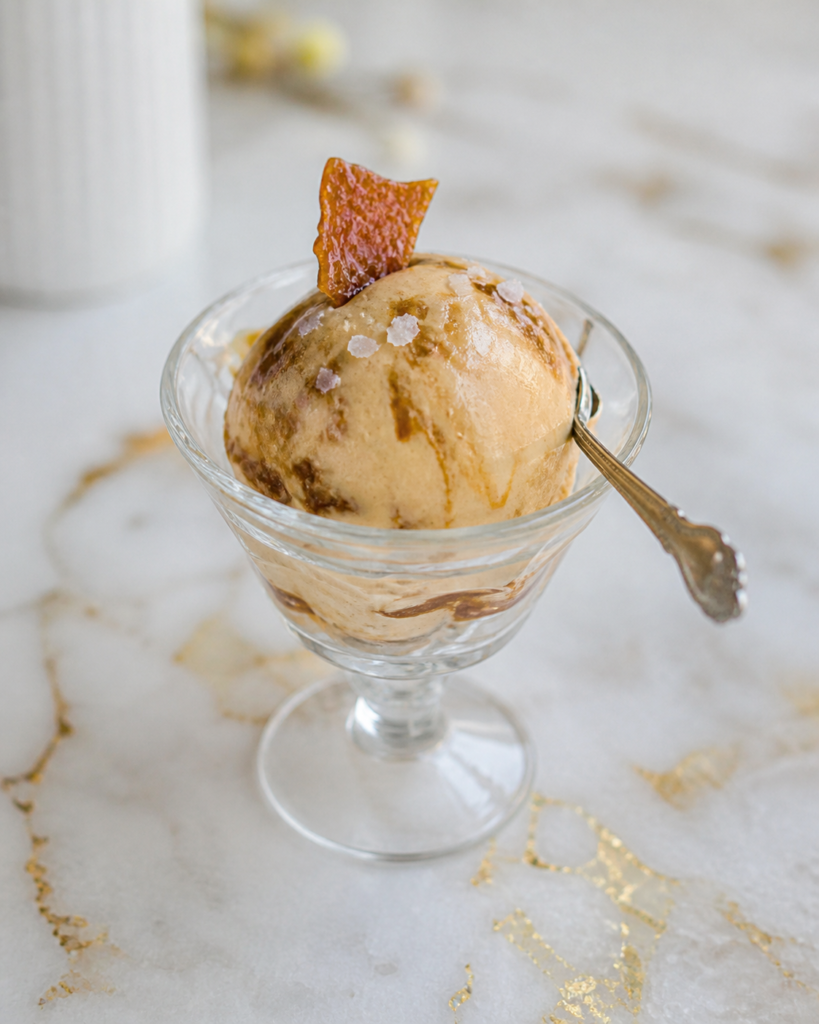
Step 12: Serve
Scoop the Burnt Caramel and Sea Salt Gelato into small bowls or cones. Add a tiny pinch of flaky sea salt, caramel sauce, or toasted pecans if desired.
Serve it cold and slightly softened for the creamiest texture. Small scoops are perfect because the caramel flavor is rich and deep.
Serving Suggestions
Serve this gelato in small bowls with a light sprinkle of flaky sea salt. The salt brings out the deep caramel flavor and keeps each bite balanced.
A drizzle of caramel sauce makes it feel extra special. Use just a little so the gelato does not become too sweet.
Toasted pecans, almonds, or hazelnuts add a lovely crunch. Their nutty flavor fits naturally with the deep caramel base.
This gelato is wonderful beside warm brownies or chocolate cake. The cold salted caramel flavor balances rich chocolate beautifully.
For a simple dessert plate, serve it with crisp cookies or waffle cones. The crunch is a nice contrast to the smooth, dense gelato.
You can also serve a small scoop with baked apples, pear crisp, or apple pie. The burnt caramel flavor pairs well with warm fruit desserts.
Leftovers and Storage
Store leftover Burnt Caramel and Sea Salt Gelato in a freezer-safe container with a tight lid. Press parchment paper or plastic wrap directly onto the surface before closing the container to help reduce ice crystals.
For the best texture, enjoy the gelato within 1 to 2 weeks. It will still be safe longer if stored properly, but homemade gelato tastes smoothest when fresh.
If the gelato becomes too firm, let it sit in the refrigerator for 10 to 15 minutes before scooping. This softens it gently without melting the edges too quickly.
Avoid leaving the container out on the counter for a long time. Repeated melting and refreezing can make the texture icy.
Keep strong-smelling foods away from the gelato in the freezer. Dairy-based desserts can pick up freezer odors if they are not sealed well.
Do not store toppings mixed into the container unless they freeze well. Add caramel sauce, nuts, cookies, or extra flaky salt right before serving for the best texture.
Nutrition and Benefits
- This gelato is rich and satisfying, so a small scoop feels like a complete dessert. The deep caramel flavor helps a little portion go a long way.
- Whole milk and cream create a smooth, dense texture. They give the gelato its creamy body without needing extra stabilizers.
- Egg yolks help thicken the custard and give the gelato a silky finish. They also help the base churn into a smoother frozen dessert.
- Sea salt balances the sweetness of the caramel. It makes the flavor deeper and keeps the gelato from tasting flat or overly sweet.
- Homemade gelato lets you control the flavor and toppings. You can keep it simple or serve it with nuts, cookies, fruit, or chocolate for a special dessert.
Recipe FAQ
What does burnt caramel taste like?
Burnt caramel tastes deeper and toastier than regular caramel. It has a slight bitter edge that balances the sweetness. When mixed with milk, cream, and sea salt, it becomes rich, smooth, and very flavorful.
How dark should the caramel be?
The caramel should be deep amber, close to the color of dark honey or copper. It should smell nutty and toasted, not smoky or harsh. If it turns black, it has gone too far and will taste bitter.
Why did my caramel seize when I added the dairy?
Caramel can seize if the milk and cream are too cold or added too quickly. Warm the dairy first and pour it in slowly while whisking. If small caramel pieces form, return the pan to low heat and stir until they dissolve.
Can I make this without an ice cream maker?
You can make a no-churn style version, but the texture will be different. Freeze the chilled custard in a shallow container and stir it every 30 minutes for several hours. It will be less smooth than churned gelato, but still tasty.
Why is my gelato icy?
Gelato can become icy if the base was not chilled enough, the freezer bowl was not fully frozen, or the container was not sealed well. Churn a very cold base and store it with wrap pressed on the surface. Avoid melting and refreezing.
Can I reduce the salt?
Yes, you can reduce the fine sea salt to ¼ teaspoon and use less flaky salt at the end. The flavor will be sweeter and softer. I still recommend using a little salt because it balances the caramel.
How long should I churn gelato?
Most ice cream makers need 20 to 30 minutes. The gelato is ready when it looks thick, creamy, and similar to soft serve. It will firm up more after several hours in the freezer.
A Deeply Creamy Caramel Scoop to Savor
Burnt Caramel and Sea Salt Gelato is a slow, comforting dessert with a rich flavor that feels worth the extra care. The deep caramel, smooth custard, and gentle sea salt come together into a frozen treat that tastes homemade and special.
It is a lovely recipe to make ahead for family dinners, holidays, or quiet weekends when dessert should feel memorable. With its creamy texture, balanced sweetness, and toasty caramel flavor, this gelato is worth making again.