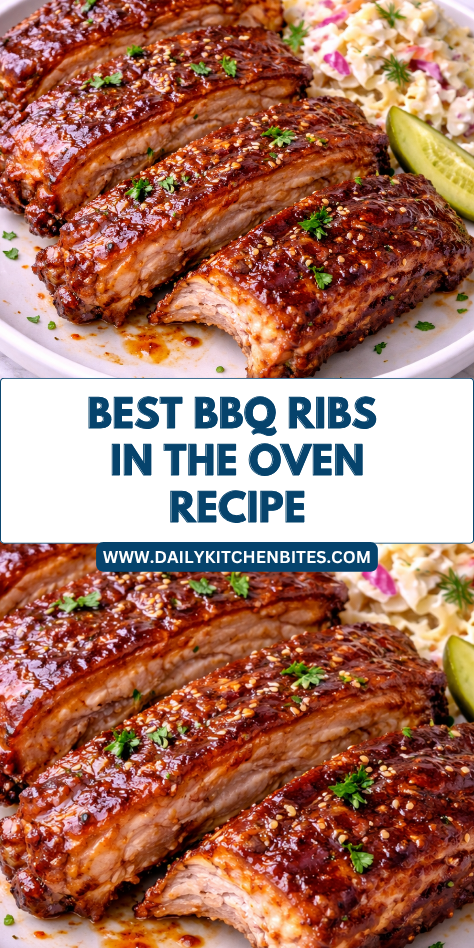
Some meals feel like a celebration the moment they come to the table, and BBQ Ribs in the Oven is one of those recipes in our home.
Tender ribs coated in sticky sauce and full of smoky flavor always bring everyone into the kitchen a little early.
I first started making oven ribs when I wanted that slow-cooked barbecue taste without needing a smoker or grill.
It quickly became a family favorite because the method is simple, the results are dependable, and the ribs turn out juicy, flavorful, and wonderfully tender every time.
Why You’ll Love This Recipe
This recipe delivers everything people love about barbecue ribs. The meat becomes tender in the oven, the seasoning adds deep flavor, and the final layer of sauce turns glossy and delicious.
It is also practical for home cooks. The oven does most of the work, the ingredients are easy to find, and there is no need to manage outdoor cooking equipment.
Families love how special this meal feels while still being easy enough to make at home. Serve it for weekends, holidays, or anytime you want a crowd-pleasing dinner.
Serves: 4 people
This recipe makes about four generous servings, depending on the size of the rib racks and appetite levels. It can easily be doubled for gatherings using multiple pans.
Ingredients You’ll Need
For the Ribs
- 2 racks baby back ribs or St. Louis style ribs (about 4 to 5 pounds total)
- 2 tablespoons yellow mustard or olive oil (for helping seasoning stick)
For the Dry Rub
- 2 tablespoons brown sugar
- 1 tablespoon paprika
- 1 teaspoon smoked paprika
- 1 tablespoon garlic powder
- 1 tablespoon onion powder
- 1 teaspoon salt
- 1 teaspoon black pepper
- 1 teaspoon chili powder
- 1/2 teaspoon cayenne pepper (optional)
- 1 teaspoon dry mustard powder
For Finishing
- 1 1/2 cups barbecue sauce, divided
- 2 tablespoons honey (optional for extra glaze)
- Fresh parsley for garnish (optional)
Optional Side Ingredients
- Coleslaw
- Cornbread
- Baked beans
- Roasted potatoes
Baby back ribs cook a little faster and are leaner, while St. Louis style ribs are meatier and richer. Both work beautifully with this method.
Pro Tips
Remove the thin membrane from the back of the ribs if it is still attached. This helps the seasoning penetrate and creates more tender ribs.
Pat the ribs dry before adding mustard and seasoning. A dry surface helps the rub stick better and promotes better texture.
Wrap the ribs tightly in foil during the first bake. This traps moisture and helps the meat become tender.
Cook low and slow for the best results. Rushing ribs at high heat can leave them tough instead of tender.
Brush sauce on near the end of cooking. Adding it too early can cause sugars to darken too quickly.
For families with children, serve sauce on the side as well. Some may prefer lighter sauce while others want extra.
Tools You’ll Need
- Large sheet pan or roasting pan
- Aluminum foil
- Sharp knife
- Cutting board
- Small bowls for rub and sauce
- Measuring spoons
- Pastry brush
- Tongs
- Paper towels
A rimmed sheet pan is especially helpful because it catches juices and keeps the oven clean. Heavy-duty foil also works best for wrapping ribs securely.
Substitutions and Variations
Use baby back ribs, spare ribs, or St. Louis style ribs depending on preference and availability. Cooking time may vary slightly by thickness.
Use your favorite store-bought barbecue sauce or homemade sauce. Sweet, smoky, spicy, or tangy sauces all work well.
If you prefer less sweetness, reduce the brown sugar in the rub. You can also skip the honey glaze.
For a spicier version, add extra cayenne, hot sauce, or chipotle powder to the rub or sauce.
If you enjoy a Carolina-style flavor, use a vinegar-based barbecue sauce instead of a thick tomato-based sauce.
For a smoky boost without a grill, add a little liquid smoke to the barbecue sauce. Use sparingly, as a little goes a long way.
If you need a lower-sodium version, use reduced-sodium seasoning blends and barbecue sauce.
For a garlic-forward variation, increase the garlic powder in the rub and add minced garlic to the sauce.
You can also finish the ribs under the broiler instead of on a grill. This helps caramelize the sauce beautifully.
Serve the finished ribs with pickles or sliced onions for a classic barbecue plate.
Make Ahead Tips
This recipe is excellent for planning ahead when you want an easier mealtime. Remove the membrane, season the ribs, and wrap them tightly up to 24 hours in advance. Refrigerating them overnight allows the dry rub to settle into the meat for even better flavor.
You can also bake the ribs until tender earlier in the day, then cool and refrigerate them. When ready to serve, simply sauce and finish them in the oven.
Barbecue sauce can be mixed with honey ahead of time and stored in the refrigerator. Having everything ready makes the final steps quick and simple.
For gatherings, cook multiple racks in advance and finish them just before guests arrive. This keeps hosting stress low and dinner right on time.
Instructions
Step 1: Preheat the Oven
Preheat your oven to 300°F. Line a large sheet pan or roasting pan with foil for easier cleanup.
Low heat is key for tender ribs. It gives the connective tissue time to soften while keeping the meat juicy.
Step 2: Prepare the Ribs
Place the ribs bone-side up on a cutting board. If the thin membrane is still attached, loosen one corner with a knife, grip it with a paper towel, and pull it away.
Pat both sides dry with paper towels. Dry ribs hold the seasoning better and roast more evenly.
Step 3: Make the Dry Rub
In a small bowl, combine brown sugar, paprika, smoked paprika, garlic powder, onion powder, salt, black pepper, chili powder, cayenne if using, and dry mustard powder. Stir until evenly mixed.
This blend gives the ribs sweet, smoky, savory flavor with just a little warmth. Adjust spice levels to your preference.
Step 4: Season the Ribs
Rub both racks lightly with yellow mustard or olive oil. This helps the seasoning stick and adds a little moisture.
Sprinkle the dry rub generously over both sides of the ribs, pressing it gently into the meat. Make sure the racks are evenly coated.
Step 5: Wrap and Bake
Place each rack meat-side up on foil. Wrap tightly in a sealed packet so steam stays inside while baking.
Place the wrapped ribs on the prepared pan and bake for 2 1/2 to 3 hours. Baby back ribs may finish sooner, while meatier racks may need the full time.
Step 6: Check for Tenderness
Carefully open one foil packet, watching for hot steam. The ribs are ready when the meat has pulled back from the bones slightly and a fork slides in with little resistance.
If they need more time, rewrap and continue baking in 15-minute increments. Tenderness matters more than exact minutes.
Step 7: Add the Sauce
Remove the ribs from the foil and place them directly on the lined pan. Stir honey into the barbecue sauce if using.
Brush a generous layer of sauce over the top of each rack. Save some sauce for serving if desired.
Step 8: Finish the Ribs
Increase the oven temperature to 425°F. Return the ribs to the oven uncovered for 10 to 15 minutes until the sauce is glossy and lightly caramelized.
For extra charred edges, broil for 1 to 3 minutes at the end while watching closely. Sugary sauces can darken quickly.
Step 9: Rest and Slice
Remove the ribs from the oven and let them rest for 10 minutes. Resting helps the juices settle and makes slicing easier.
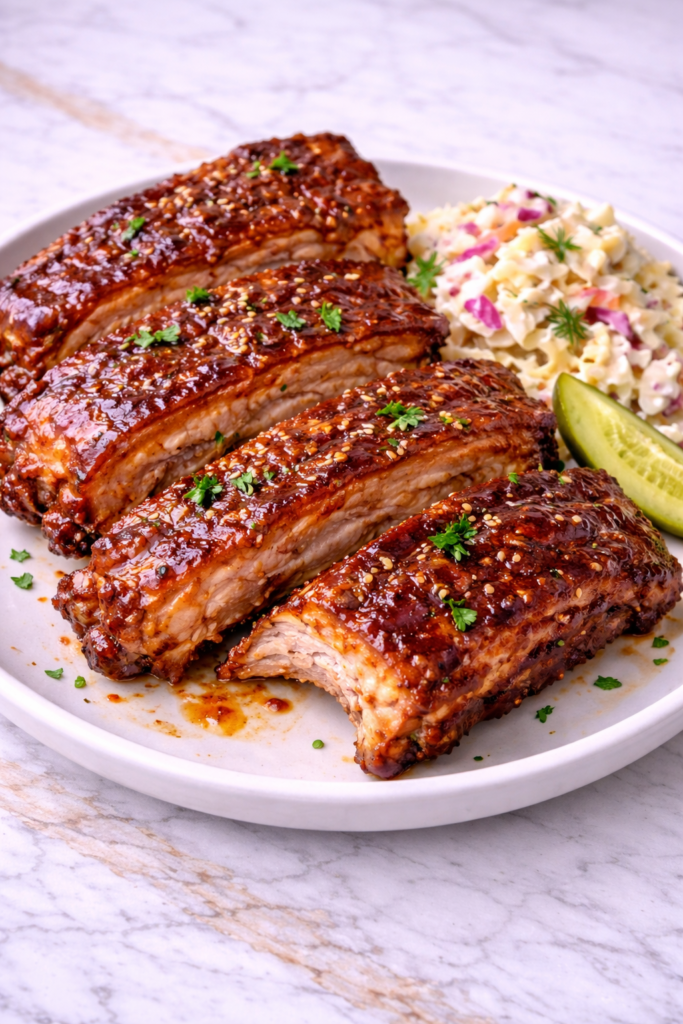
Use a sharp knife to cut between the bones into individual ribs or portions. Serve warm with extra sauce if desired.
Serving Suggestions
Serve these ribs with creamy coleslaw for a classic barbecue pairing. The cool crunch balances the rich sticky sauce beautifully.
Add baked beans, corn on the cob, or cornbread for a hearty family-style meal. These sides always feel right with ribs.
Roasted potatoes, potato salad, or fries make satisfying choices when you want a bigger dinner plate. They pair wonderfully with barbecue flavors.
A crisp green salad with vinaigrette adds freshness and balance. This is especially nice for heavier weekend meals.
Offer pickles, sliced onions, or jalapeños at the table. These simple toppings add brightness and contrast.
For gatherings, slice the ribs into smaller portions and arrange on a platter with extra sauce for easy serving.
Leftovers and Storage
Allow leftover ribs to cool slightly before storing. Place them in an airtight container or wrap tightly in foil and refrigerate for up to 4 days.
To reheat, place ribs in a baking dish with a splash of water, cover with foil, and warm at 300°F until heated through. This helps keep them moist.
You can also microwave individual portions in short intervals, though the oven gives the best texture. Brush with extra sauce before reheating if desired.
For freezing, wrap cooled ribs tightly and freeze for up to 2 months. Thaw overnight in the refrigerator before reheating.
Nutrition and Benefits
- Pork ribs provide protein that helps make the meal filling and satisfying.
- Homemade seasoning lets you control salt, sweetness, and spice levels.
- Oven cooking makes barbecue-style ribs accessible without outdoor equipment.
- Serving with vegetables or salads can create a more balanced plate.
- The recipe works well for family dinners, gatherings, and make-ahead meals.
- Leftovers reheat nicely for easy lunches or second dinners.
Recipe FAQ
How do I know when ribs are done?
Ribs are done when the meat is tender and has pulled back from the bones slightly. A fork should slide in easily between the bones.
Can I use spare ribs instead of baby back ribs?
Yes, spare ribs work very well. They are usually larger and may need a little extra cooking time.
Do I have to remove the membrane?
It is strongly recommended. Removing it helps tenderness and allows seasoning to reach the meat better.
Can I make these ahead of time?
Yes, bake the ribs until tender ahead of time, then sauce and finish later. This is ideal for entertaining.
What if I do not like sweet barbecue sauce?
Use a tangy or spicy sauce instead. The recipe works with many barbecue styles.
Can I cook ribs faster at a higher temperature?
You can, but low and slow gives the best tender results. Higher heat often makes ribs less tender.
Can I finish these on the grill?
Absolutely. After baking, brush with sauce and grill briefly for smoky charred edges.
Conclusion
A Backyard Classic Worth Making Again
These BBQ Ribs in the Oven are the kind of dependable recipe that makes any meal feel special and comforting. They use simple ingredients, easy steps, and deliver tender meat with sticky flavorful sauce every time.
They are worth making again because they fit family dinners, weekend cravings, and casual gatherings so naturally. With reliable results, big flavor, and no grill required, this is a meal everyone will be happy to enjoy again and again.