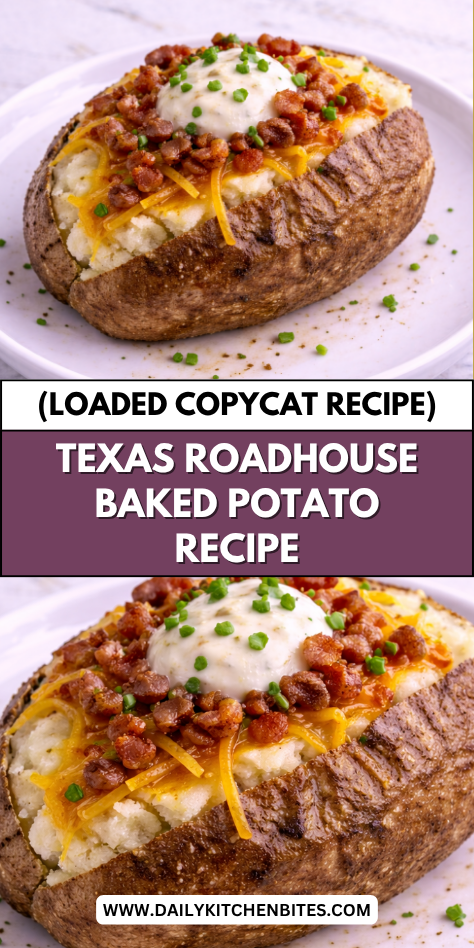
A loaded baked potato from Texas Roadhouse is one of those sides that almost steals the show from the main dish. That fluffy inside, crispy skin, and all those toppings piled on top make it hard to share.
A lot of people think getting that same result at home is complicated, but it really isn’t. I’ve made these more times than I can count and the method is simpler than you’d expect.
This post walks you through everything so yours comes out just as good every single time.
Why You’ll Love This Recipe
This baked potato is the perfect combination of crispy skin and soft, fluffy inside. The contrast in textures makes every bite enjoyable, while the toppings add layers of flavor. It’s simple, but incredibly satisfying.
Another reason to love this recipe is how customizable it is. You can load it up with your favorite toppings or keep it classic with butter and sour cream. It works for different tastes and preferences.
Families love this recipe because it’s easy to make and fun to customize. Everyone can build their own potato just the way they like it. It’s a great addition to any meal.
Serves: 4 people
This recipe makes four large baked potatoes, perfect for family meals or small gatherings. You can easily adjust the number based on your needs. It’s simple to scale up or down.
Ingredients You’ll Need
- 4 large russet potatoes
- 2 tablespoons olive oil
- 1 teaspoon kosher salt
Toppings
- 4 tablespoons unsalted butter
- 1 cup shredded cheddar cheese
- ½ cup sour cream
- 4 slices bacon, cooked and crumbled
- 2 tablespoons chopped green onions
- Salt and freshly ground black pepper, to taste
Pro Tips
Choose large russet potatoes for the best texture. They have a fluffy interior and crisp skin.
Scrub the potatoes well before baking. Clean skin ensures better flavor and texture.
Rub the potatoes with oil and salt before baking. This helps create a crispy skin.
Bake directly on the oven rack for even cooking. This allows heat to circulate.
Do not wrap potatoes in foil if you want crispy skin. Foil traps moisture.
Check doneness by inserting a fork. It should slide in easily.
Tools You’ll Need
- Baking sheet (optional for drips)
- Knife
- Cutting board
- Fork
Substitutions and Variations
You can use sweet potatoes instead of russet potatoes for a different flavor. This adds a natural sweetness.
For a lighter version, use Greek yogurt instead of sour cream. It provides a similar texture.
You can add different cheeses like Monterey Jack or mozzarella. Each adds a unique flavor.
Include toppings like chili or broccoli for variety. This makes the dish more filling.
For a vegetarian version, skip the bacon or use a plant-based alternative.

Make Ahead Tips
Baked potatoes are easy to prepare ahead, making them perfect for busy days or planned meals. You can bake the potatoes up to 2 days in advance and store them in the refrigerator. Keep them uncut and wrapped loosely to maintain their texture.
When ready to serve, reheat the potatoes in the oven at 350°F until warmed through. This helps restore the crispy skin. Avoid microwaving if you want to keep the texture as close to fresh as possible.
You can also prepare all the toppings ahead of time and store them separately in the refrigerator. This makes assembling the loaded potatoes quick and convenient. It’s especially helpful when serving a group.
Instructions
Step 1: Preheat the Oven
Preheat your oven to 425°F. This high temperature helps create a crispy skin while keeping the inside fluffy. Make sure the oven is fully heated before baking.
Step 2: Prepare the Potatoes
Scrub the potatoes thoroughly under running water to remove any dirt. Pat them dry with a towel. Use a fork to poke several holes in each potato.
Step 3: Season the Potatoes
Rub each potato with olive oil, making sure the skin is fully coated. Sprinkle kosher salt evenly over the surface. This helps create a flavorful, crispy skin.
Step 4: Bake the Potatoes
Place the potatoes directly on the oven rack. Bake for 50–60 minutes, or until the skin is crisp and a fork slides easily into the center. You can place a baking sheet below to catch any drips.
Step 5: Check for Doneness
Insert a fork or knife into the center of a potato. It should go in easily without resistance. If not, continue baking for a few more minutes.
Step 6: Slice and Fluff
Remove the potatoes from the oven and let them cool slightly. Slice each potato lengthwise and gently press the ends to open. Fluff the inside with a fork.
Step 7: Add Butter and Seasoning
Add a tablespoon of butter to each potato while it’s still hot. Sprinkle with a little salt and pepper. The butter will melt into the fluffy interior.
Step 8: Add Toppings
Top each potato with shredded cheese, sour cream, bacon, and green onions. Add toppings in layers for the best flavor. Customize as desired.
Step 9: Serve Warm
Serve the loaded baked potatoes immediately while warm. The cheese should be slightly melted and the toppings fresh. Enjoy right away.
Serving Suggestions
These loaded baked potatoes pair perfectly with steak or grilled chicken. The hearty texture complements protein-rich main dishes. It creates a balanced meal.
Serve them alongside barbecue dishes for a classic combination. The rich toppings work well with smoky flavors. It’s a crowd-pleasing pairing.
They also go well with simple salads or roasted vegetables. This adds freshness and balance to the meal. It keeps things well-rounded.
For a casual dinner, serve the potatoes as the main dish with extra toppings. This makes them filling and satisfying. It’s a great option for busy nights.
If hosting guests, set up a baked potato bar with various toppings. This allows everyone to customize their plate. It’s fun and interactive.
You can also pair them with soups for a comforting combination. The textures complement each other well. It’s perfect for cooler days.
Leftovers and Storage
Store leftover baked potatoes in an airtight container in the refrigerator for up to 3–4 days. Allow them to cool completely before storing. Proper storage helps maintain quality.
When reheating, use the oven at 350°F to restore the crispy skin. This takes about 15–20 minutes. Avoid microwaving if possible, as it can soften the skin.
If using the microwave, heat in short intervals to prevent drying out. You can wrap the potato in a damp paper towel. This helps retain moisture.
Store toppings separately when possible. This keeps everything fresh and prevents sogginess. Add toppings after reheating.
Freezing baked potatoes is not recommended, as the texture can change. Fresh preparation yields the best results. It’s best to enjoy them within a few days.
If the potatoes develop an off smell or texture, discard them. Always prioritize food safety. Proper handling is essential.
Nutrition and Benefits
- Potatoes are a great source of carbohydrates, providing energy for your day. They are filling and satisfying.
- They also contain fiber, especially when the skin is left on. This supports digestion and overall health.
- Making baked potatoes at home allows you to control toppings and portion sizes. This helps create a balanced meal.
- You can adjust the recipe by using lighter toppings like Greek yogurt or reduced-fat cheese. This improves nutritional value.
- Adding toppings like green onions provides additional flavor and nutrients. It enhances both taste and presentation.
Recipe FAQ
Why is my potato not fluffy inside?
This can happen if the potato is undercooked. Make sure it’s fully tender before removing it from the oven. Proper baking time is key.
Should I wrap potatoes in foil?
No, wrapping in foil traps moisture and prevents crispy skin. Bake them directly on the rack. This gives the best texture.
Can I microwave the potatoes?
Yes, but the skin won’t be as crispy. Microwaving is faster but changes texture. Oven baking is recommended.
What toppings work best?
Classic toppings include butter, cheese, sour cream, and bacon. You can also add vegetables or chili. Customize to your taste.
Can I make these ahead of time?
Yes, you can bake the potatoes in advance and reheat them. Keep toppings separate until serving. This helps maintain quality.
How do I get crispy skin?
Rub the potatoes with oil and salt, then bake at a high temperature. Avoid foil. This creates the perfect texture.
Can I use smaller potatoes?
Yes, adjust the cooking time accordingly. Smaller potatoes will cook faster. Check for doneness with a fork.
A Comforting Classic That Never Disappoints
Once you figure out how easy these are to make at home, they’ll show up on your dinner table all the time. The skin comes out perfectly crispy, the inside is soft and fluffy, and all those toppings bring it together just right.
I love making these on busy weeknights because they’re filling, satisfying, and don’t require much cleanup.
They work just as well as a side dish or a full meal on their own. It’s a simple recipe that always feels a little indulgent. I hope it becomes a staple in your kitchen just like it has in mine.