I’m so excited to share this Plant-Powered Instant Pot Chili with you today! It’s my go-to when I need something hearty, healthy, and hands-off on busy weeknights.
The beauty of this recipe? It transforms humble beans and veggies into a protein-packed comfort meal in under 30 minutes.
No meat, no problem—you’ll get all the rich, spicy flavors of traditional chili without the guilt. Want to know my secret trick for making this already simple dish even more weeknight-friendly?
Why You’ll Love this Plant-Powered Instant Pot Chili
When you’re craving comfort food but don’t want to spend hours in the kitchen, this plant-powered Instant Pot chili is your new best friend.
I’m talking about a hearty, protein-packed meal that practically makes itself in under 30 minutes.
What’s not to love? It’s incredibly versatile—swap in whatever beans you have on hand or add extra veggies lurking in your crisper drawer.
The hands-off cooking gives you time to, oh I don’t know, actually relax instead of stirring a pot.
Plus, those spices meld together beautifully under pressure. A warm bowl of this chili, topped with creamy avocado? Pure comfort without the guilt.
What Ingredients are in Plant-Powered Instant Pot Chili?
This plant-powered Instant Pot chili requires just a handful of pantry staples and fresh ingredients that create deep, rich flavor without any meat.
- 1 onion, diced
- 3 garlic cloves, minced
- 1 bell pepper, chopped
- 2 cans beans (black, kidney, pinto – your choice!)
- 1 can diced tomatoes
- 1 cup vegetable broth
- 2 tablespoons chili powder
- 1 teaspoon cumin
- 1 tablespoon olive oil
Feel free to customize this ingredient list based on what you have on hand—maybe add some corn, carrots, or even a diced sweet potato for extra heartiness and nutrition.

How to Make this Plant-Powered Instant Pot Chili
Step 1: Sauté the Aromatics
Heat 1 tablespoon of olive oil in your Instant Pot using the sauté function, then add your diced onion, minced garlic (3 cloves), and chopped bell pepper.
Cook until everything softens and becomes fragrant, usually about 3-4 minutes.
Step 2: Bloom the Spices
Add 2 tablespoons of chili powder and 1 teaspoon of cumin to the softened vegetables.
Stir continuously for about 30 seconds—this quick “blooming” of the spices releases their essential oils and deepens the flavor profile of your chili.
Step 3: Add the Main Ingredients
Pour in 2 cans of beans (any combination of black, kidney, or pinto works beautifully), 1 can of diced tomatoes with their juice, and 1 cup of vegetable broth.
Give everything a good stir to combine all those colorful ingredients.
Step 4: Pressure Cook
Close the Instant Pot lid, set the valve to the sealing position, and select the high pressure cooking setting for 8 minutes.
While this might seem quick, remember that the magic of pressure cooking means deep flavors develop in a fraction of the time.
The Instant Pot Duo Plus offers incredible versatility with multiple cooking functions perfect for this chili recipe and countless other dishes.
Step 5: Natural Release
Once the cooking cycle completes, let the Instant Pot naturally release pressure for 10 minutes.
This gentle cooling period allows the flavors to settle and meld together—rushed chili is never as good as patient chili.
Step 6: Quick Release and Serve
After the 10-minute natural release, carefully turn the valve to venting to release any remaining pressure.
Remove the lid, give your chili a good stir, and taste for seasoning—a pinch more salt might be needed depending on your broth.
Step 7: Garnish Your Creation
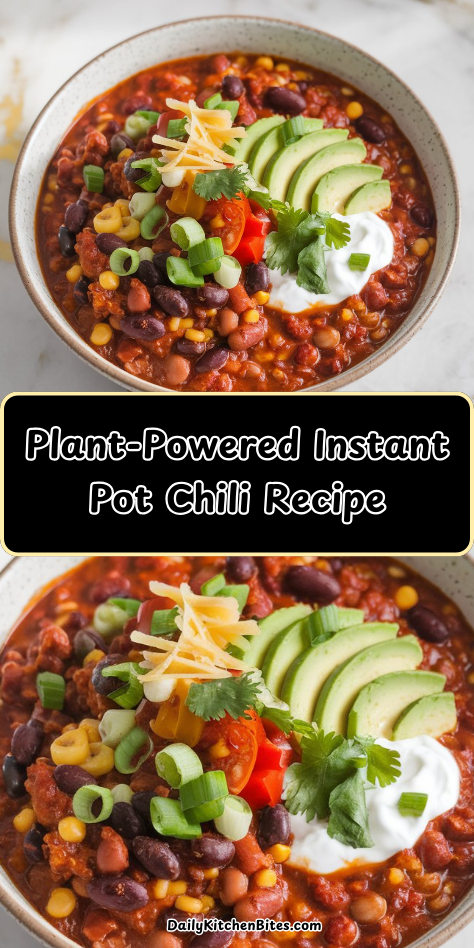
Ladle the steaming chili into bowls and top with your favorite garnishes.
Sliced avocado adds creaminess, a squeeze of lime brightens everything up, and fresh cilantro brings a pop of color and herbal freshness.
What to Serve with Plant-Powered Instant Pot Chili
This hearty vegan chili makes a perfect dinner centerpiece, but what you serve alongside it can turn a simple meal into something truly special.
A batch of warm cornbread with a drizzle of maple syrup provides that perfect sweet-savory contrast that chili practically begs for. For something lighter, a crisp green salad with a tangy vinaigrette cuts through the richness beautifully.
Want to lean into the Southwestern vibes? Tortilla chips for dipping or baked sweet potato fries on the side add wonderful texture.
And don’t forget about drinks—a citrusy lime sparkling water or even a cold beer complements those warming spices in the most invigorating way.
These simple pairings require minimal effort but maximize the comfort factor of your chili night.
Plant-Powered Instant Pot Chili Substitutions and Variations
- Seasonal Twists: Fall vibes? Add a diced sweet potato and a sprinkle of cinnamon. Summer abundance? Toss in fresh corn and garden tomatoes instead of canned.
- Topping Bar: Set out dairy-free sour cream, crushed tortilla chips, sliced green onions, nutritional yeast, or hot sauce for a DIY topping experience.
Leftovers and Storage for this Plant-Powered Instant Pot Chili
This chili actually gets better with time as the flavors deepen and meld together. To store:
- Refrigerator: Transfer cooled chili to airtight containers and refrigerate for up to 5 days. The spices will continue developing, making day-two chili even more flavorful than the first serving.
- Freezer: For longer storage, portion into freezer-safe containers or heavy-duty freezer bags and freeze for up to 3 months. Leave a bit of space for expansion.
- Reheating: Warm refrigerated chili in a saucepan over medium heat, adding a splash of vegetable broth if it’s thickened too much.
For frozen chili, thaw overnight in the refrigerator before reheating, or use your Instant Pot’s “steam” function for a quick warm-up.
A quick stir before serving brings everything back together beautifully, and those flavors? Even more harmonious than before.
Final Thoughts
This hearty plant-based chili strikes that perfect balance between convenience and comfort. The magic happens when those simple ingredients—beans, tomatoes, and warm spices—transform into something deeply satisfying under pressure.
What makes it special isn’t just the hands-off cooking method, but how it welcomes customization with whatever beans or toppings you have on hand.
Perfect for busy weeknights when you need dinner on the table with minimal fuss, or weekend meal prep when you want to stock up for the days ahead.
In just about 30 minutes of mostly passive cooking time, you’ve got a nourishing pot of goodness that warms from the inside out—proof that the simplest foods often provide the greatest comfort.