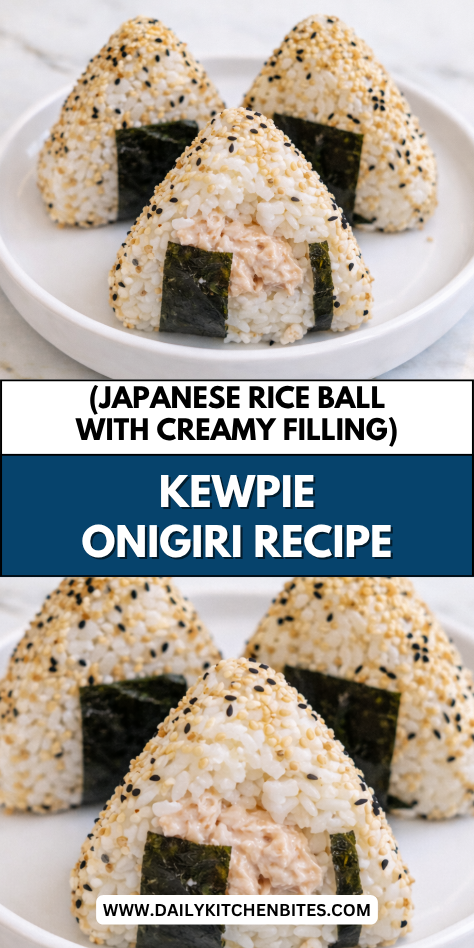
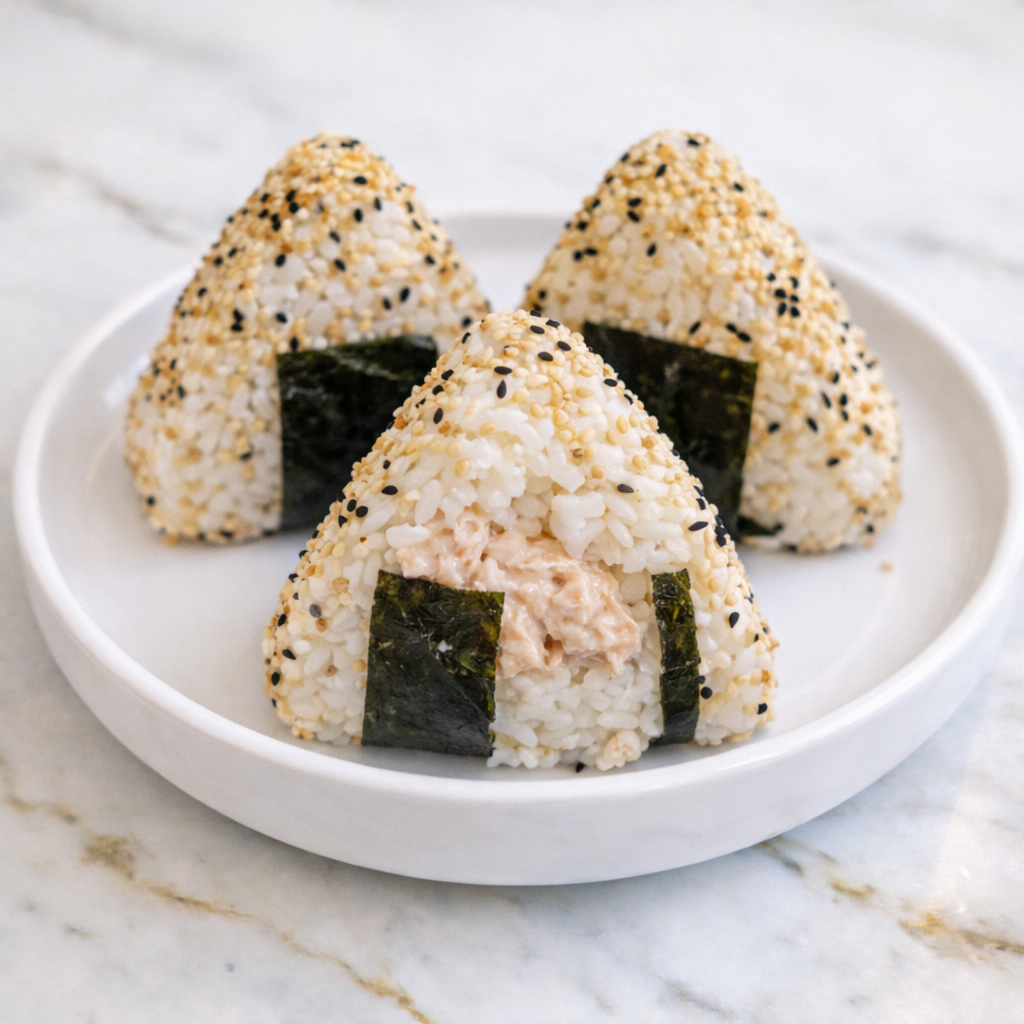
Onigiri are one of those Japanese staples that look simple but carry a lot more flavor and satisfaction than their size suggests.
Adding a Kewpie mayo based filling takes them from a basic rice ball to something creamy, savory, and genuinely hard to stop eating.
A lot of people have seen onigiri at Japanese restaurants or convenience stores but never considered making them at home. I put these together in my own kitchen and was surprised by how approachable the whole process really is.
This post walks you through every step so yours come out perfectly shaped, well seasoned, and filled with that rich, creamy center.
Why You’ll Love This Recipe
These Kewpie Onigiri combine soft, slightly sticky rice with a creamy, flavorful filling that makes every bite satisfying. The contrast between the simple rice and the rich center creates a balanced and delicious experience. It’s a comforting dish that feels both familiar and unique.
Another reason to love this recipe is how versatile and portable it is. You can customize the fillings, shape them easily, and take them on the go. They’re perfect for lunchboxes, picnics, or quick meals at home.
Serves: 4 people
This recipe makes about 6 to 8 onigiri, serving four people depending on portion size. You can easily double the recipe for larger batches. It’s great for sharing or meal prep.
Ingredients You’ll Need
For the Rice:
- 2 cups Japanese short-grain rice
- 2 1/2 cups water
- 1/2 tsp salt
For the Filling:
- 1/2 cup cooked chicken, tuna, or salmon (flaked)
- 3 tbsp Kewpie mayonnaise
- 1 tsp soy sauce
- 1/2 tsp black pepper
For Assembly:
- 4 sheets nori (cut into strips)
- Extra salt for seasoning hands
Optional Add-Ins:
- 1 tbsp chopped green onions
- 1/2 tsp sesame seeds
- 1 tsp chili flakes
Pro Tips
Use short-grain rice for the best texture and stickiness. This type of rice holds together well when shaping. It’s essential for authentic onigiri.
Rinse the rice thoroughly before cooking to remove excess starch. This helps achieve the right texture. It prevents the rice from becoming too gummy.
Let the rice cool slightly before shaping to avoid burning your hands. Warm rice is easier to work with than hot rice. It also helps maintain structure.
Wet your hands lightly and sprinkle with salt before shaping the rice. This prevents sticking and adds flavor. It’s a key step in forming the onigiri.
Don’t overfill the rice balls, as it can make them difficult to shape. A small amount of filling goes a long way. It keeps everything intact.
Press the rice firmly but gently to hold its shape without making it too dense. This creates a soft yet structured texture. Balance is important.
Tools You’ll Need
- Rice cooker or pot
- Mixing bowl
- Spoon
- Plastic wrap (optional)
- Cutting board
- Knife
Substitutions and Variations
If you don’t have Kewpie mayonnaise, you can use regular mayonnaise with a bit of rice vinegar. This helps mimic the tangy flavor. It’s an easy substitute.
You can use different fillings like cooked shrimp, canned tuna, or even mashed avocado. These options add variety and flavor. It’s easy to customize.
For a vegetarian version, use fillings like tofu, sautéed vegetables, or pickled ingredients. These still provide great taste and texture. It’s a flexible recipe.
Adding furikake seasoning to the rice can enhance the flavor. It adds a savory and slightly crunchy element. It’s a popular addition.
You can shape the onigiri into triangles or rounds depending on preference. Both styles work well. It’s a fun way to personalize the dish.
Make Ahead Tips
Kewpie Onigiri are excellent for making ahead, especially if you need quick meals or snacks throughout the day. You can prepare the rice and filling separately up to one day in advance. Store both in airtight containers in the refrigerator and assemble when ready to eat.
If you want to fully assemble the onigiri ahead of time, wrap each one tightly in plastic wrap to keep them from drying out. This helps maintain their soft texture and shape. Store them in the refrigerator for up to one day for best results.
For lunchboxes or packed meals, you can make them the night before and keep them chilled. Let them sit at room temperature for a few minutes before eating to soften slightly. This improves the texture and flavor.
Avoid freezing onigiri, as the rice can become dry and lose its texture when thawed. Fresh or refrigerated storage works best. Proper preparation ensures the best taste and consistency.
Instructions
Step 1: Cook the Rice
Rinse the rice under cold water until the water runs clear. Combine the rice and water in a rice cooker or pot and cook according to instructions. Once done, let it rest for a few minutes.
Step 2: Season the Rice
Transfer the cooked rice to a bowl and gently mix in salt while it is still warm. Be careful not to mash the rice. This adds subtle flavor to the base.
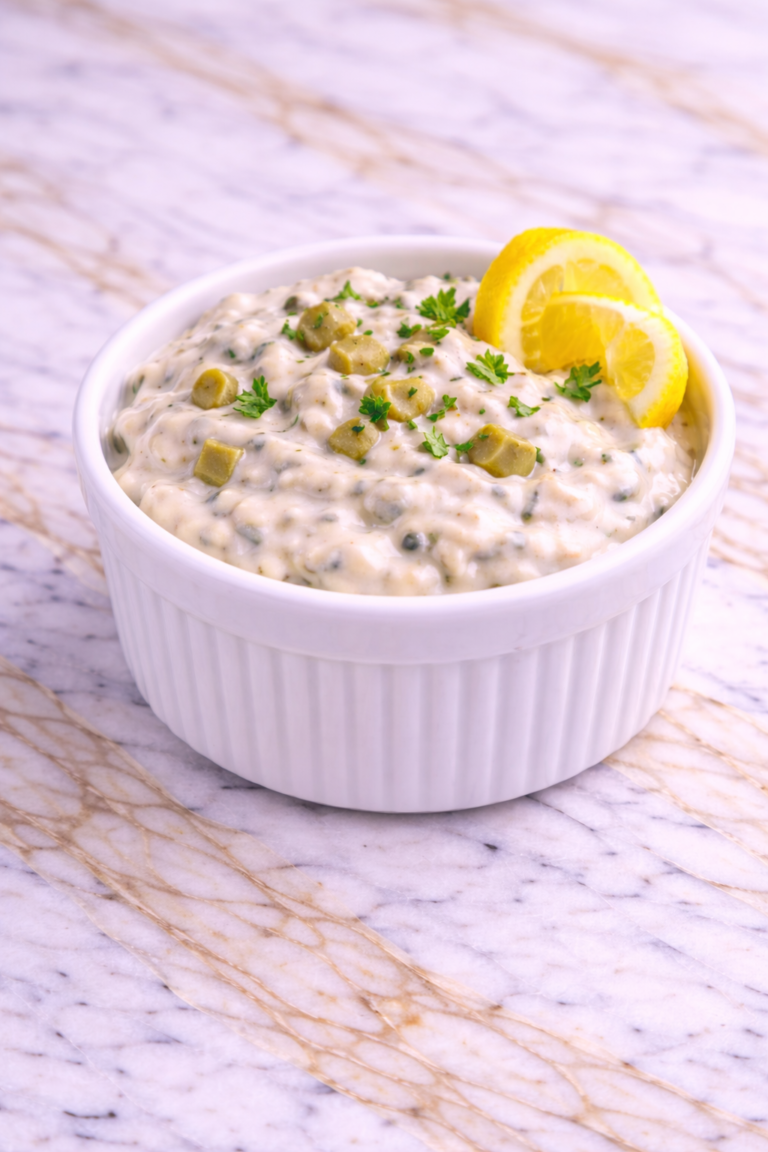
Step 3: Prepare the Filling
In a small bowl, mix the cooked chicken, tuna, or salmon with Kewpie mayonnaise, soy sauce, and black pepper. Stir until well combined and creamy. Set aside.
Step 4: Prepare Your Hands
Lightly wet your hands with water and sprinkle a small amount of salt on them. This prevents sticking and adds flavor. It also makes shaping easier.
Step 5: Form the Base
Take a handful of warm rice and flatten it slightly in your palm. Create a small indentation in the center. This will hold the filling.
Step 6: Add the Filling
Place a small spoonful of the creamy filling into the indentation. Be careful not to overfill. This helps maintain the shape.
Step 7: Shape the Onigiri
Gently fold the rice around the filling and press into a triangle or round shape. Apply light pressure to hold everything together. Repeat with remaining ingredients.
Step 8: Add Nori and Serve
Wrap a strip of nori around each onigiri or place it on the side. Serve immediately or store as needed. Enjoy while fresh for the best texture.
Serving Suggestions
These onigiri are perfect as a quick snack or light meal. Their portable size makes them easy to enjoy anytime. They’re great for busy days.
Serve them with a bowl of miso soup for a comforting and balanced meal. The warm soup pairs well with the soft rice. It creates a classic combination.
They also work well as part of a lunchbox with fresh fruit and vegetables. This makes for a simple and satisfying meal. It’s ideal for both kids and adults.
For gatherings, arrange them on a platter with different fillings. This adds variety and makes them visually appealing. It’s a fun way to serve guests.
You can also pair them with pickled vegetables for added flavor contrast. The tanginess complements the creamy filling. It enhances the overall dish.
Leftovers and Storage
Store leftover onigiri in an airtight container in the refrigerator for up to one day. Wrap them individually to prevent drying out. Proper storage helps maintain texture.
If the rice becomes slightly firm after refrigeration, let the onigiri sit at room temperature for a few minutes before eating. This helps soften the texture. It improves the overall experience.
Avoid reheating in the microwave, as this can change the texture of the rice. Gentle warming is better if needed. Fresh is always best.
Keep the nori separate if storing for longer periods, as it can become soggy. Add it just before serving. This keeps it crisp.
For best flavor and texture, enjoy the onigiri as soon as possible. Freshly made always tastes best. Proper handling helps extend their quality.
Nutrition and Benefits
- Rice provides carbohydrates that offer energy and make the dish filling. It’s a simple and satisfying base.
- The protein from chicken, tuna, or salmon helps support muscle health and keeps you full. It adds nutritional value.
- Kewpie mayonnaise adds richness and enhances flavor, creating a creamy filling. Using it in moderation helps maintain balance.
- Adding vegetables or herbs can increase fiber and vitamins. This helps create a more balanced meal.
- Preparing onigiri at home allows you to control ingredients and customize flavors. This makes it a versatile and wholesome option.
Recipe FAQ
Can I use regular rice instead of short-grain rice?
Short-grain rice is recommended because it is stickier and holds its shape better. Long-grain rice may not stick as well. It can make shaping difficult.
Can I use regular mayonnaise instead of Kewpie?
Yes, but the flavor will be slightly different. Adding a bit of rice vinegar can help mimic the tanginess. It’s an easy substitute.
How do I keep onigiri from falling apart?
Use warm, sticky rice and press gently but firmly when shaping. Avoid overfilling. Proper technique helps them hold together.
Can I make onigiri ahead of time?
Yes, they can be made a day in advance and stored in the refrigerator. Wrap them to keep them fresh. For best results, enjoy them soon after making.
What fillings work best?
Tuna, salmon, and chicken are popular choices, but you can also use vegetables or tofu. Choose based on your preference. It’s very customizable.
Is this recipe kid-friendly?
Yes, the mild flavor and fun shape make it appealing to kids. You can adjust the filling to suit their taste. It’s a great family option.
Can I add seasoning to the rice?
Yes, adding furikake or sesame seeds can enhance the flavor. It’s a simple way to add variety. Adjust based on your taste.
A Simple and Satisfying Japanese Favorite
Once you make onigiri at home, they are going to become your go-to for quick lunches, snacks, and even packed meals throughout the week.
The Kewpie filling adds a creaminess that pairs so well with the lightly seasoned rice and the whole thing comes together without a lot of fuss or special equipment.
I love making a batch of these on weekends and having them ready to grab whenever I need something satisfying and portable.
They are simple, filling, and taste far better than anything you would pull from a package. I hope they become a fun and reliable staple in your kitchen.