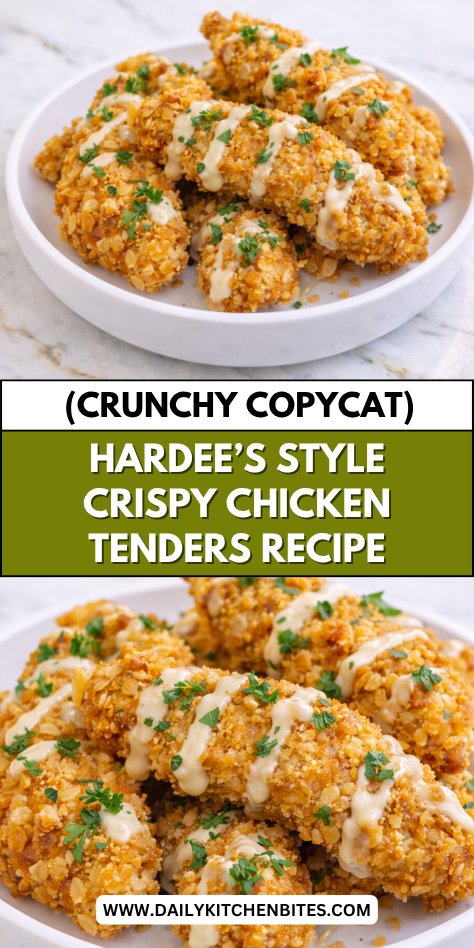
I grew up ordering chicken tenders from Hardee’s and that extra crunchy, well-seasoned coating always stood out from every other fast food version I tried.
Getting that same satisfying crunch at home feels like something only a deep fryer can achieve, but the right technique makes it very doable in your own kitchen.
A lot of homemade chicken tender recipes end up soft or bland in a way that just doesn’t compare to the real thing. This recipe walks you through every step so yours comes out golden, crunchy, and full of that classic Hardee’s flavor from the very first bite.
Why You’ll Love This Recipe
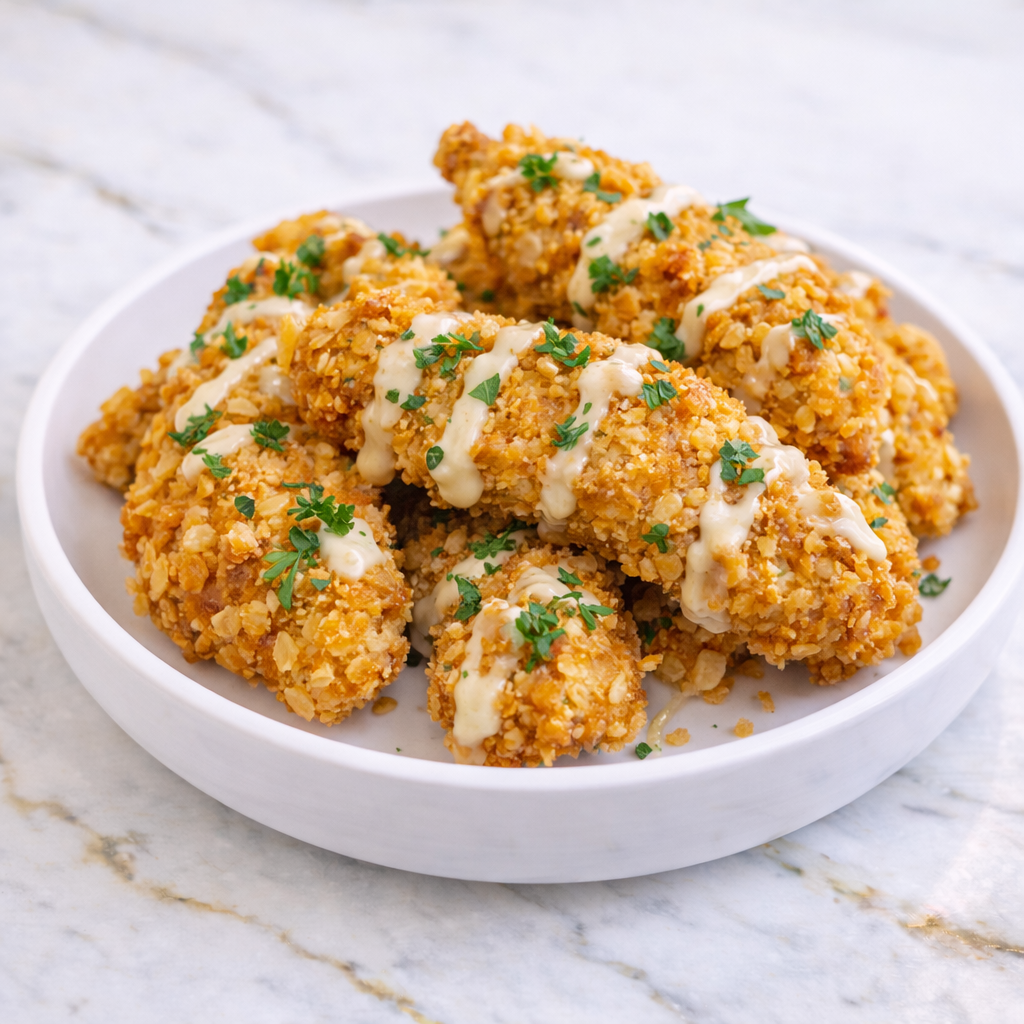
These Hardee’s Style Crispy Chicken Tenders deliver a crunchy, flavorful coating with juicy chicken inside. The seasoning blend creates that classic fast-food taste, while the homemade method gives you better control over quality and freshness. Every bite has that satisfying crisp.
Another reason to love this recipe is how versatile it is. You can serve the tenders as a main dish, snack, or appetizer, and pair them with a variety of dipping sauces. It’s a family-friendly recipe that’s easy to enjoy.
Serves: 4 people
This recipe makes about 12 to 16 chicken tenders, serving four people depending on portion size. You can easily scale it up for larger groups. It’s perfect for sharing.
Ingredients You’ll Need
For the Chicken:
- 1.5 lbs chicken tenders or chicken breast cut into strips
For the Marinade:
- 1 cup buttermilk
- 1 tsp salt
- 1/2 tsp black pepper
For the Coating:
- 1 1/2 cups all-purpose flour
- 1/2 cup cornstarch
- 1 tsp paprika
- 1 tsp garlic powder
- 1/2 tsp onion powder
- 1/2 tsp salt
- 1/4 tsp black pepper
For Frying:
- Oil for frying
Pro Tips
Marinate the chicken in buttermilk for at least 30 minutes to tenderize it and add flavor. Longer marinating times can improve the texture even more. It makes a big difference.
Use a combination of flour and cornstarch for the coating to achieve extra crispiness. Cornstarch helps create a lighter, crunchier texture. It’s key for that signature crunch.
Season the flour mixture well to ensure the coating is flavorful. This step builds layers of taste. Don’t skip it.
Press the coating firmly onto the chicken to help it adhere. This prevents it from falling off أثناء frying. It also creates a thicker crust.
Fry the chicken at the right temperature, around 350°F, to ensure even cooking. Too hot and the outside burns, too cool and it becomes greasy. Temperature control is important.
Let the fried chicken rest on a wire rack instead of paper towels to keep it crispy. This prevents sogginess. It helps maintain texture.
Tools You’ll Need
- Mixing bowls
- Tongs
- Large skillet or deep fryer
- Wire rack
- Paper towels
- Thermometer (optional)
Substitutions and Variations
If you don’t have buttermilk, you can make a substitute by mixing milk with a little lemon juice or vinegar. Let it sit for a few minutes before using. It works well.
You can use chicken thighs instead of breast for a juicier option. Thighs tend to stay more tender. It’s a great alternative.
For a baked version, you can cook the tenders in the oven or air fryer. The texture will be slightly different but still crispy. It’s a lighter option.
Add cayenne pepper or chili powder to the coating for a spicier version. This creates a bold flavor. Adjust to your taste.
You can also experiment with different seasonings like Italian herbs or smoked paprika. This adds variety to the recipe. It’s easy to customize.
Make Ahead Tips
These Hardee’s Style Crispy Chicken Tenders are perfect for prepping ahead, especially if you’re planning for a busy day or a gathering. You can marinate the chicken in buttermilk up to 24 hours in advance and store it covered in the refrigerator. This helps tenderize the meat and deepen the flavor.
You can also mix the dry coating ingredients ahead of time and store them in an airtight container. This makes the breading process quicker when you’re ready to cook. Having everything prepared saves time and effort.
If you want to go a step further, you can bread the chicken a few hours in advance and keep it refrigerated until frying. This helps the coating stick better during cooking. It also streamlines the process.
For best results, fry the chicken just before serving. This ensures maximum crispiness and the best texture. A little preparation makes a big difference.
Instructions
Step 1: Marinate the Chicken
In a bowl, combine the buttermilk, salt, and black pepper. Add the chicken tenders and ensure they are fully submerged. Cover and refrigerate for at least 30 minutes.
Step 2: Prepare the Coating
In a separate bowl, mix together the flour, cornstarch, paprika, garlic powder, onion powder, salt, and black pepper. Stir until evenly combined. This creates a flavorful coating.
Step 3: Heat the Oil
Pour oil into a large skillet or deep fryer and heat to about 350°F. Use a thermometer if possible for accuracy. Proper temperature is key for crispiness.
Step 4: Coat the Chicken
Remove the chicken from the marinade, letting excess drip off. Dredge each piece in the flour mixture, pressing firmly to coat. Make sure each piece is fully covered.
Step 5: Fry the Chicken
Carefully place the coated chicken into the hot oil. Fry in batches for about 4 to 5 minutes per side, or until golden brown and cooked through. Avoid overcrowding the pan.
Step 6: Drain the Chicken
Remove the chicken from the oil and place it on a wire rack. This allows excess oil to drain while keeping the coating crispy. Avoid stacking the pieces.
Step 7: Rest Before Serving
Let the chicken rest for a few minutes before serving. This helps the coating set and the juices redistribute. It improves the overall texture.
Step 8: Serve
Serve the chicken tenders hot with your favorite dipping sauces. Enjoy them fresh for the best crunch. They’re perfect for sharing.
Serving Suggestions
These chicken tenders are perfect served with classic dipping sauces like ranch, honey mustard, or barbecue sauce. The creamy and tangy flavors complement the crispy coating. It’s a classic pairing.
Serve them with fries or potato wedges for a complete meal. The combination is hearty and satisfying. It’s great for casual dinners.
They also pair well with a fresh salad for a lighter option. The crisp vegetables balance the richness of the chicken. This creates a more balanced plate.
You can use them in wraps or sandwiches for a fun twist. Add lettuce and sauce for extra flavor. It’s a great way to enjoy leftovers.
For gatherings, serve them as an appetizer with a variety of dips. This makes them easy to share. They’re always a crowd favorite.
Leftovers and Storage
Store leftover chicken tenders in an airtight container in the refrigerator for up to three days. Allow them to cool completely before storing. This helps maintain their texture.
To reheat, use an oven or air fryer to restore crispiness. Heat at a moderate temperature until warmed through. This works better than microwaving.
Avoid microwaving if possible, as it can make the coating soft. If needed, reheat in short intervals. This helps prevent overcooking.
Freezing is possible for up to two months. Store in a freezer-safe container and reheat directly from frozen in the oven. This helps retain texture.
For best flavor and texture, enjoy the tenders fresh or within a couple of days. Proper storage and reheating help maintain quality.
Nutrition and Benefits
- Chicken provides a good source of protein, helping support muscle health and keep you full. It makes this dish satisfying.
- Using buttermilk helps tenderize the chicken naturally. It also adds flavor without extra effort.
- Frying creates a crispy texture that enhances the eating experience. Moderation helps maintain balance.
- Making this recipe at home allows you to control ingredients and seasoning. This helps create a more balanced option.
- Pairing with vegetables or lighter sides can improve the overall nutritional balance. It creates a well-rounded meal.
Recipe FAQ
Can I bake these chicken tenders instead of frying?
Yes, you can bake them at 400°F for about 20 to 25 minutes, flipping halfway. They won’t be as crispy but still delicious. It’s a lighter option.
How do I keep the coating from falling off?
Press the coating firmly onto the chicken and avoid moving it too much أثناء frying. Letting it rest before cooking also helps. Proper technique is key.
Can I use chicken breasts instead of tenders?
Yes, just cut the chicken into strips. This works just as well. Adjust cooking time as needed.
What oil is best for frying?
Neutral oils like vegetable or canola oil are ideal. They have a high smoke point and don’t affect flavor. This ensures the best results.
Can I make these spicy?
Yes, add cayenne pepper or hot sauce to the coating or marinade. This creates a bold flavor. Adjust to your preference.
Are these chicken tenders kid-friendly?
Yes, the crispy texture and mild flavor make them a hit with kids. You can adjust seasoning to keep them simple. They’re great for family meals.
How do I know when the chicken is fully cooked?
The internal temperature should reach 165°F. The outside should be golden and crispy. Proper cooking ensures safety.
A Crispy Favorite You’ll Want Again and Again
Once you make chicken tenders this way, the fast food version is going to feel unnecessary on nights when a craving hits.
That golden, crunchy coating and juicy chicken inside come together in a way that always satisfies and impresses anyone sitting at the table.
I love making a big batch of these on weekends because they reheat well and taste just as good the next day with your favorite dipping sauce on the side. Simple ingredients, the right technique, and a result that delivers every single time.
I hope they become your go-to homemade chicken tender recipe from here on out.