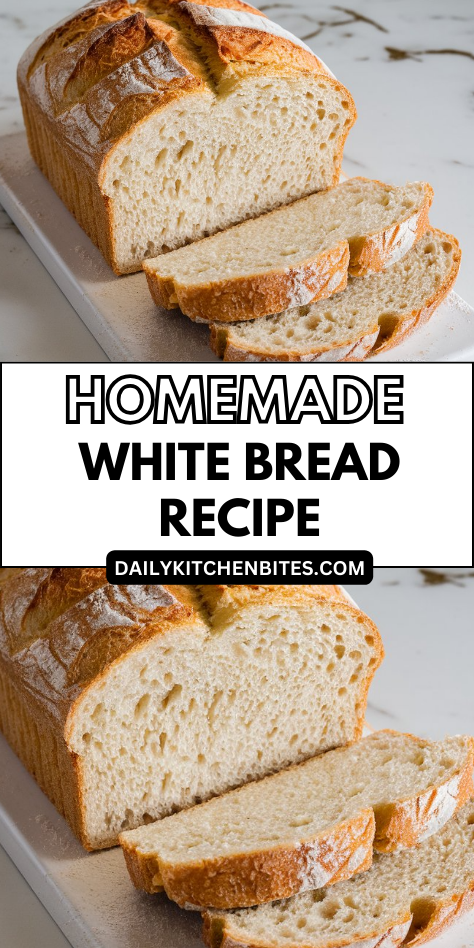
I’ll be honest with you – there’s something almost magical about the smell of fresh bread wafting through your kitchen, and this fluffy white bread recipe delivers every single time.
You know that soft, pillowy texture you get from the fancy bakery down the street? Well, turns out you can nail it at home with just six simple ingredients and a little patience.
Trust me, once you see how ridiculously easy this is, you’ll wonder why you ever bothered with store-bought loaves.
Why You’ll Love this Fluffy Homemade White Bread
When I tell you this bread will change your kitchen game, I’m not being dramatic – I’m being honest.
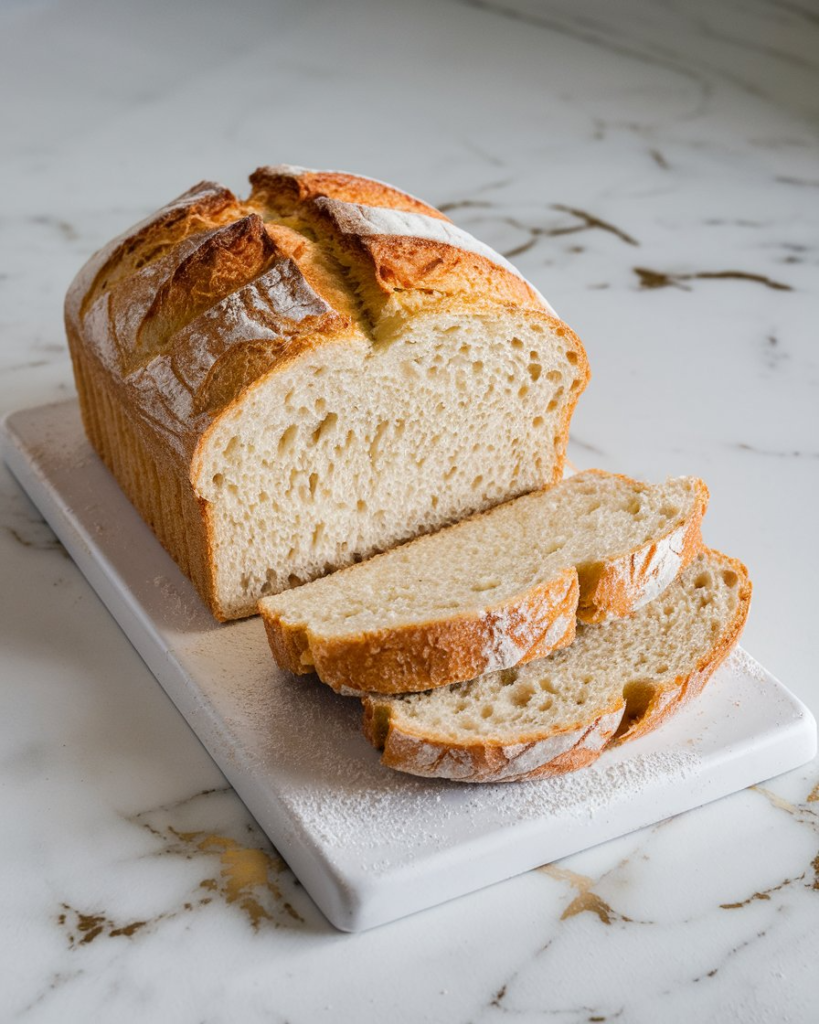
This fluffy white bread delivers that perfect, pillowy texture you’ve been craving. It’s incredibly soft, with a tender crumb that practically melts in your mouth.
The crust? Golden and gorgeous, but not tough like store-bought loaves.
What really gets me is how your entire house transforms into a bakery – that warm, yeasty aroma floating through every room.
Plus, you control every single ingredient. No weird preservatives or unpronounceable chemicals. Just pure, simple bread that tastes like childhood comfort.
What Ingredients are in Fluffy Homemade White Bread?
You’ll be amazed at how few simple ingredients it takes to create this bakery-worthy loaf.
- 3 cups (360g) all-purpose or bread flour
- 1–1¼ cups warm water (105–115°F/40–46°C)
- 2 teaspoons active dry yeast
- 1 tablespoon sugar
- 1½ teaspoons salt
- 1 tablespoon butter or oil
The beauty of this recipe lies in its simplicity – most of these pantry staples are probably sitting in your kitchen right now, and the water temperature is the only thing that requires a bit of attention since too hot will kill your yeast and too cool won’t activate it properly.
How to Make this Fluffy Homemade White Bread
Step 1
First things first, grab that 1 tablespoon of sugar and 2 teaspoons of active dry yeast and dissolve them in your warm water (remember, that magic temperature zone of 105–115°F).
Let this mixture sit for about 5–10 minutes until it gets all foamy and bubbly – think of it as your yeast waking up and stretching after a long nap.
Step 2: Mix Your Dry Ingredients
While your yeast is doing its thing, combine the 3 cups of flour and 1½ teaspoons of salt in a large bowl.
This is the perfect time to give everything a quick whisk together, because nobody wants a bite of bread that’s unexpectedly salty.
Step 3: Combine Wet and Dry Ingredients
Pour that foamy yeast mixture and 1 tablespoon of butter (or oil, if that’s your preference) right into your flour mixture.
Stir it all together until you get what we lovingly call a “shaggy” dough – it’ll look messy and rough, kind of like my hair on Monday mornings, but that’s exactly what we want.
Step 4: Knead Until Smooth and Elastic
Time to get your hands dirty and knead that dough for 8–10 minutes until it transforms from shaggy mess to smooth, elastic perfection.
You’ll know it’s ready when the dough feels soft and springs back when you poke it – like a tiny, carb-filled trampoline.
Step 5: First Rise
Plop your beautiful dough into a greased bowl, cover it with a damp towel or plastic wrap, and let it rise until it doubles in size.
This usually takes about an hour, which is just enough time to clean up your flour-dusted kitchen or wonder why bread making always looks easier on cooking shows.
Step 6: Shape and Second Rise
Once your dough has puffed up like a proud balloon, punch it down (so satisfying, right?) and shape it into a loaf.
Place it in your greased bread pan and let it rise again for 30–45 minutes until it’s nicely rounded over the top.
Step 7: Bake to Golden Perfection
Slide that gorgeous loaf into a preheated 350°F oven and bake for 30–35 minutes until it’s golden brown and sounds hollow when you tap the bottom.
The hollow sound is your bread’s way of saying “I’m done” – much more reliable than my usual guessing games.
Step 8: Cool and Finish
Let your bread cool for at least 15 minutes before slicing (I know, the waiting is torture), and if you want an extra-soft crust, brush the top with a little butter while it’s still warm.
Trust me, this final touch turns good bread into absolutely irresistible bread.
For consistently perfect results every time, investing in premium baking appliances can make a significant difference in achieving that bakery-quality texture and rise.
What to Serve with Fluffy Homemade White Bread
This fluffy white bread is basically a blank canvas begging for delicious toppings, and honestly, the possibilities are endless.
For breakfast, slather on some creamy butter with honey or your favorite jam – strawberry always wins in my book.
At lunch, it makes incredible grilled cheese sandwiches or simple turkey clubs that’ll make you forget about store-bought bread forever.
For dinner, serve thick slices alongside hearty soups or stews for some serious comfort food vibes.
Want something sweet? Try it toasted with cinnamon butter or as French toast on weekend mornings.
Even plain with a cold glass of milk hits different when it’s homemade.
Fluffy Homemade White Bread Substitutions and Variations
While I absolutely love this basic white bread recipe as written, sometimes I get that itch to switch things up, and honestly, this dough is pretty forgiving when it comes to tweaks and changes.
You can swap half the all-purpose flour for whole wheat flour for a nuttier flavor, though you might need extra water since whole wheat drinks it up.
Want something richer? Replace the water with milk for a softer crumb.
Herbs like rosemary or thyme work beautifully kneaded in.
Even a handful of seeds—sunflower, sesame, whatever’s hanging around your pantry—adds nice texture and makes you feel fancy.
Leftovers and Storage for this Fluffy Homemade White Bread
Once you’ve got that gorgeous loaf cooling on your counter, you’ll want to know how to keep it fresh because nobody likes sad, stale bread.
I always wait until it’s completely cool before slicing—trust me on this one. Store your bread in a plastic bag or airtight container at room temperature for up to three days.
Need it to last longer? Pop it in the freezer for up to three months. Just slice before freezing so you can grab pieces as needed.
Day-old bread makes killer French toast, and stale bread? Perfect for breadcrumbs.
Final Thoughts for Fluffy Homemade White Bread
There’s something deeply satisfying about making bread from scratch—the way your kitchen fills with that unmistakable aroma, the simple pleasure of kneading dough with your hands, the pride when you pull out a perfectly golden loaf.
This white bread recipe delivers all that comfort without any fuss or fancy ingredients.
It’s perfect for lazy Sunday afternoons when you want to fill the house with homey smells, or when you’re planning ahead for busy weekday mornings and want fresh bread for toast and sandwiches. Sometimes the most ordinary things bring the greatest joy.