I have always thought tiramisu was one of those desserts that feels intimidating to make at home until you actually try it and realize how approachable it really is.
Dom DeLuise had a deep love for Italian food and a way of making even the most indulgent dishes feel warm and inviting rather than complicated or out of reach.
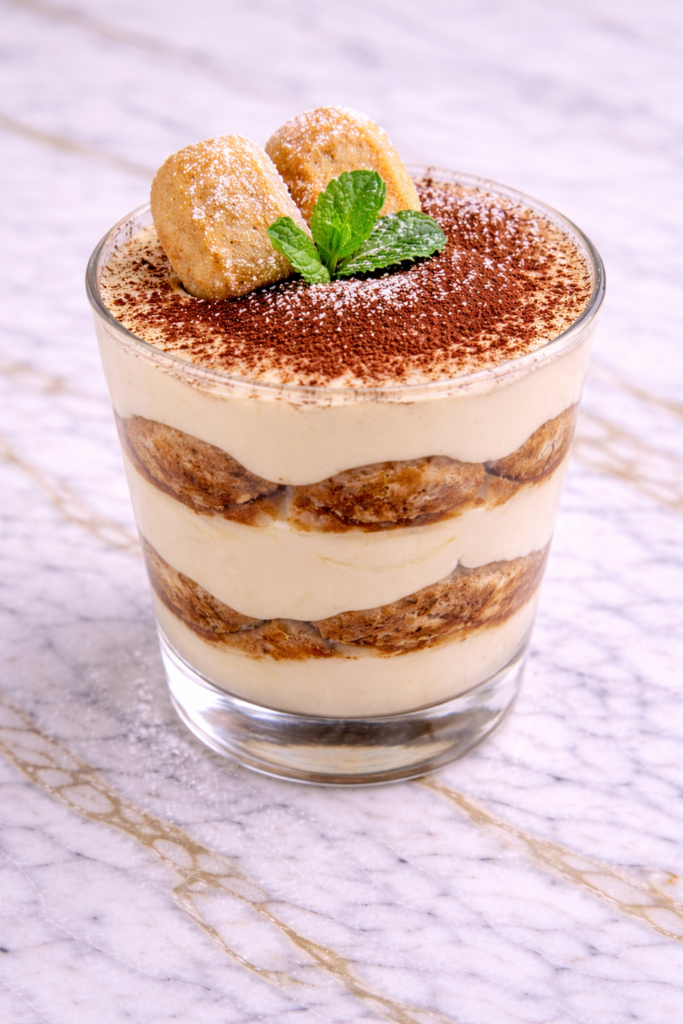
That creamy, coffee-soaked layered dessert with a dusting of cocoa on top is the kind of thing that makes a whole table go quiet after the first bite.
This recipe channels that same generous Italian spirit so yours comes out rich, creamy, and completely worth making from scratch.

Why You’ll Love This Recipe
This Dom DeLuise style tiramisu is creamy, rich, and perfectly balanced with coffee and cocoa flavors. The mascarpone filling is light yet indulgent, and the espresso adds a deep, aromatic touch.
It’s also a no-bake dessert, making it ideal for entertaining or preparing ahead. With just a bit of assembly, you can create a dessert that looks and tastes impressive.
Serves: 6–8 people
This recipe makes enough to serve six to eight people, depending on portion size. It’s perfect for gatherings, holidays, or special occasions.
What You’ll Need
- 1 cup strong brewed espresso (cooled)
- 2 tbsp sugar (for coffee mixture)
- 24–30 ladyfinger biscuits
- 1 cup heavy cream
- 8 oz mascarpone cheese
- 1/2 cup granulated sugar
- 1 tsp vanilla extract
- 2 tbsp cocoa powder (for dusting)
Pro Tips
Use strong espresso for the best flavor. The coffee is a key component, so a rich brew makes a big difference.
Do not soak the ladyfingers too long. A quick dip is enough to absorb flavor without making them soggy.
Use high-quality mascarpone cheese for a smooth and creamy texture. This is essential for the filling.
Whip the cream until soft peaks form before folding it into the mascarpone. This keeps the mixture light and airy.
Chill the tiramisu for at least 4 hours, preferably overnight. This allows the layers to set and the flavors to meld beautifully.
Dust with cocoa powder just before serving for the best presentation. This keeps it fresh and visually appealing.
Tools You’ll Need
- Mixing bowls
- Hand mixer or whisk
- Spatula
- Shallow dish (for dipping)
- 8×8 or similar serving dish
Substitutions and Variations
You can use decaffeinated coffee if you prefer to avoid caffeine. The flavor will still be rich and enjoyable.
Add a splash of coffee liqueur for a more traditional flavor. This enhances the depth of the dessert.
If mascarpone is unavailable, a mixture of cream cheese and heavy cream can be used as a substitute. The texture will differ slightly.
For a chocolate twist, add shaved chocolate between layers. This creates extra richness.
You can also make individual servings in cups for a more elegant presentation.
Make Ahead Tips
Tiramisu is one of those desserts that truly shines when made ahead, making it perfect for entertaining or planning a stress-free gathering. In fact, it’s best when given enough time to chill and set properly.
You can assemble the entire tiramisu up to 24 hours in advance and store it covered in the refrigerator. This resting time allows the flavors to meld together beautifully, creating that signature creamy, coffee-infused taste. The texture also improves as the layers firm up.
If you’re preparing for a special occasion, you can even make it two days ahead. Just be sure to keep it tightly covered so it doesn’t absorb any refrigerator odors.
For best presentation, wait to dust the cocoa powder until just before serving. This keeps it looking fresh and prevents it from becoming moist or dull in color.
Instructions
Step 1: Prepare the Coffee Mixture
In a shallow dish, combine the cooled espresso with 2 tablespoons of sugar. Stir until the sugar dissolves completely. Set aside for dipping.
Step 2: Whip the Cream
In a mixing bowl, whip the heavy cream until soft peaks form. This creates a light and airy base for the filling.
Step 3: Prepare the Mascarpone Mixture
In another bowl, combine mascarpone cheese, sugar, and vanilla extract. Mix until smooth and creamy.
Step 4: Combine the Mixtures
Gently fold the whipped cream into the mascarpone mixture. Mix until fully combined but still light and fluffy.
Step 5: Dip the Ladyfingers
Quickly dip each ladyfinger into the espresso mixture. Do not soak—just a quick dip is enough to absorb flavor.
Step 6: Layer the Base
Arrange a layer of dipped ladyfingers in the bottom of your serving dish. Place them closely together to form a solid base.
Step 7: Add Cream Layer
Spread half of the mascarpone mixture evenly over the ladyfingers. Smooth the surface with a spatula.
Step 8: Repeat Layers
Add another layer of dipped ladyfingers, followed by the remaining mascarpone mixture. Smooth the top evenly.
Step 9: Chill the Dessert
Cover and refrigerate for at least 4 hours, preferably overnight. This allows the layers to set and flavors to develop.
Step 10: Dust and Serve
Before serving, dust the top with cocoa powder. Slice and serve chilled.
Serving Suggestions
Tiramisu is a show-stopping dessert on its own, but it pairs beautifully with a few simple additions. Serve it with a freshly brewed cup of coffee or espresso to enhance the rich flavors of the dessert.
For a lighter pairing, serve alongside fresh berries like strawberries or raspberries. The natural sweetness and slight tartness provide a refreshing contrast to the creamy layers.
If you’re hosting a dinner party, consider serving tiramisu in individual glasses or cups. This creates an elegant presentation and makes serving easier.
You can also add a small drizzle of chocolate sauce or a sprinkle of shaved chocolate for an extra indulgent touch.
Leftovers and Storage
Store leftover tiramisu in the refrigerator, covered tightly with plastic wrap or in an airtight container, for up to three days. The flavors will continue to develop, making it just as delicious the next day.
Avoid leaving tiramisu at room temperature for extended periods, as it contains dairy. Keep it chilled until ready to serve.
Freezing tiramisu is possible, though the texture may change slightly. If freezing, wrap it tightly and store for up to one month. Thaw in the refrigerator before serving.
For best quality, enjoy within a few days. The creamy texture and balanced flavors are at their peak when fresh.
Nutrition and Benefits
- This dessert provides a rich source of energy from its combination of cream, sugar, and biscuits. It’s best enjoyed in moderation.
- Coffee adds depth of flavor and contains antioxidants, contributing to its appeal.
- Making tiramisu at home allows you to control the ingredients and sweetness level.
- Using high-quality mascarpone and cream enhances both flavor and texture.
- Pairing with fruit can add a fresh element and balance the richness.
Recipe FAQ
Can I make tiramisu without alcohol?
Yes, this recipe is alcohol-free. You can optionally add liqueur, but it’s not necessary.
How do I keep the ladyfingers from getting soggy?
Dip them quickly in the coffee mixture rather than soaking them. This keeps the texture balanced.
Can I use instant coffee instead of espresso?
Yes, strong instant coffee can be used as a substitute. Adjust the strength to your taste.
Can I make this dessert ahead of time?
Absolutely. It’s best when made ahead and chilled for several hours or overnight.
Can I use cream cheese instead of mascarpone?
Yes, though the flavor and texture will be slightly different. Mixing with cream can help mimic mascarpone.
Is this recipe kid-friendly?
Yes, especially since it can be made without alcohol. You can also use decaf coffee if preferred.
How do I get clean slices when serving?
Use a sharp knife and wipe it clean between cuts. This helps maintain neat layers.
A Classic Dessert That Feels Like a Celebration
Once you make tiramisu at home, the store bought version is going to feel like a pale imitation of what this dessert is actually capable of being.
Those creamy layers soaked in coffee with that delicate cocoa finish create something that feels elegant and indulgent without requiring professional skills or hard to find ingredients.
I love making this the night before a dinner gathering because it sets up beautifully in the fridge and tastes even better after a full night of resting.
A dessert that always impresses and never disappoints from the very first spoonful. I hope it becomes your go-to Italian dessert for every special occasion.