I made these cranberry orange bisconies because I couldn’t stop thinking about the ones from Costco. You know the ones — tender like a muffin but shaped like a scone, with that sweet citrusy aroma and chewy cranberry bits tucked inside. Every time I pick up a pack, they disappear before the weekend’s over, so I figured it was time to bring that magic home.
Turns out, they’re easier to make than I thought — no mixer, just one bowl, and a light hand. These bake up golden, slightly crisp on the edges, soft in the center, and perfect with a mug of tea or a lazy morning coffee. I even froze a few, and they reheat like a dream.

Why You’ll Love This Recipe
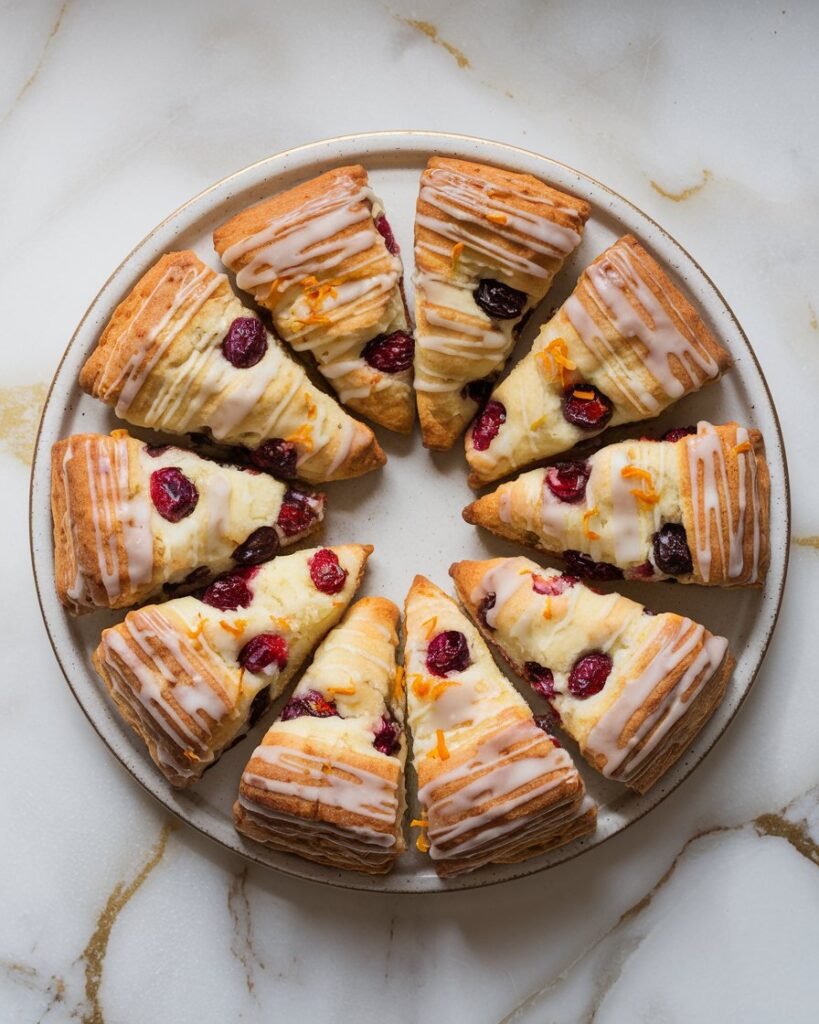
These cranberry orange bisconies taste like a cozy morning, straight from your own oven. They’re tender like a muffin top, have the golden crispness of a scone, and are bursting with real orange zest and chewy dried cranberries in every bite.
This recipe is perfect if you love the Costco version but want to make a fresh batch at home — no preservatives, no guessing. The dough comes together fast, no mixer needed, and they freeze beautifully. Great for breakfast, gifting, or just treating yourself with something warm and citrusy.
What You’ll Need
For the bisconies
- 2 cups all-purpose flour
- ½ cup granulated sugar
- 1 tablespoon baking powder
- ½ teaspoon baking soda
- ½ teaspoon salt
- 1 tablespoon orange zest (from 1–2 oranges)
- ½ cup (1 stick) unsalted butter, cold and cubed
- 1 cup dried cranberries
- ¾ cup buttermilk (plus 1–2 tablespoons if needed)
- 1 teaspoon vanilla extract
For the glaze (optional)
- ½ cup powdered sugar
- 1–2 tablespoons orange juice
- Additional orange zest for garnish (optional)
Pro Tips
- Use cold butter straight from the fridge — this gives bisconies their soft crumb and light texture.
- Don’t overwork the dough — it’s okay if it looks a little rough or shaggy.
- Zest the orange before juicing it to avoid frustration later.
- If the dough feels too dry, add 1 tablespoon of buttermilk at a time to bring it together.
- Let them cool completely before glazing to avoid a runny mess.
Tools You’ll Need
- Mixing bowl
- Pastry cutter or two forks
- Measuring cups and spoons
- Citrus zester
- Baking sheet
- Parchment paper
- Small whisk or spoon (for glaze)
Substitutions & Variations
- No buttermilk? Use ¾ cup milk + 1 tablespoon lemon juice or vinegar (let sit 5 minutes).
- Dried cranberries: Swap for dried cherries or chopped dried apricots.
- Orange zest: Lemon zest works well for a lemon-berry twist.
- Add-ins: White chocolate chips or chopped pecans add sweetness and crunch.
- Gluten-free: Use a 1:1 gluten-free flour blend (with xanthan gum).
Make Ahead Tips
You can mix and shape the dough, then refrigerate it (covered) for up to 24 hours before baking. You can also freeze the unbaked triangles on a tray, then store in a freezer bag for up to 2 months. Bake straight from frozen, adding 2–3 extra minutes.
Baked bisconies also freeze well — once cooled, wrap tightly and freeze for a quick breakfast treat.
Instructions
1. Preheat and Prep
Preheat your oven to 400°F. Line a baking sheet with parchment paper and set aside.
2. Mix Dry Ingredients
In a large mixing bowl, whisk together flour, sugar, baking powder, baking soda, salt, and orange zest.
3. Cut in Butter
Add the cold, cubed butter to the flour mixture. Use a pastry cutter or two forks to work the butter into the flour until the mixture resembles coarse crumbs.
4. Add Cranberries
Stir in the dried cranberries evenly through the dough.
5. Add Wet Ingredients
Pour in buttermilk and vanilla extract. Mix just until the dough starts to come together. It should be soft and slightly sticky, but not wet. If it’s too dry, add a tablespoon of buttermilk.
6. Shape the Dough
Turn the dough out onto a floured surface. Gently pat it into a circle about ¾ inch thick. Cut into 8–10 wedges like a pizza.
7. Bake
Transfer wedges to your prepared baking sheet, spacing them slightly apart. Bake for 15–18 minutes, or until golden brown and the tops spring back lightly when touched.
8. Cool and Glaze
Let cool completely before drizzling with glaze. For glaze, whisk together powdered sugar and orange juice until smooth. Drizzle over cooled bisconies and top with extra zest, if desired.
Serving Suggestions
- Serve warm with coffee, tea, or hot cocoa
- Add to a weekend brunch spread with eggs, fruit, and bacon
- Pair with a citrus yogurt dip for a snack twist
- Pack into lunchboxes or gift bags — they travel well
- Make minis for party platters or showers
Leftovers & Storage
Store cooled bisconies in an airtight container at room temperature for up to 3 days. For longer storage, keep them in the fridge for up to 5 days or freeze them (glazed or unglazed) for up to 2 months.
To reheat, warm in a low oven or microwave for 15–20 seconds. If frozen, thaw at room temperature, then reheat as desired.
Nutrition & Benefits
These bisconies are naturally sweetened with orange zest and cranberries, and they’re made with simple ingredients you probably already have at home. They’re a nice alternative to overly sweet pastries, offering a pop of citrus and a soft, satisfying texture. Cranberries bring antioxidants and fiber, and you control the sugar — especially in the glaze.
Recipe FAQ
What makes a bisconie different from a scone?
Bisconies are softer and more muffin-like than traditional scones — a cross between a biscuit and a scone.
Can I make these vegan?
Yes — use plant-based butter, non-dairy milk with vinegar for buttermilk, and a simple vegan glaze.
Do I have to glaze them?
Nope. They’re lightly sweet on their own, but the glaze adds a nice finish.
Can I use fresh cranberries?
Dried works best, but chopped fresh cranberries can be used — increase the sugar slightly to balance tartness.
How do I prevent dry bisconies?
Use cold butter, don’t overmix, and watch the bake time — they’re done when lightly golden and springy.
The Final Crumb
These cranberry orange bisconies are soft, citrusy, and full of that bakery-fresh comfort I crave when I want something special without making a big fuss. They’ve got just the right amount of sweetness, and they hold up beautifully whether you’re serving a crowd or just baking a quiet batch for yourself. Honestly, they’ve replaced store-bought pastries in my house — and I’m not mad about it.