I’m always on the lookout for dinner solutions that don’t require a PhD in culinary arts, and this Instant Pot Taco Pasta hits all the right notes.
Who doesn’t love the marriage of taco flavors with comforting pasta? It’s my go-to when the clock is ticking and hungry faces are staring at me.
One pot, minimal prep, maximum flavor—what’s not to love? The best part isn’t just the simplicity, though; it’s how this dish transforms everyday ingredients into something that’ll make your family think you’ve been cooking all day.
Why You’ll Love this Instant Pot Taco Pasta
If you’re searching for a dinner that combines two family favorites into one incredible meal, this Instant Pot Taco Pasta is about to become your new weeknight hero. I’m talking about the perfect marriage of zesty tacos and comforting pasta, all in under 30 minutes.
What’s not to love? It’s a one-pot wonder that saves on cleanup while delivering maximum flavor. The pasta soaks up all that savory beef broth and taco seasoning, creating something magical.
Plus, it’s customizable—throw in extra veggies, adjust the spice level, or pile on different toppings based on what your family enjoys.
What Ingredients are in Instant Pot Taco Pasta?
This hearty one-pot meal comes together with simple ingredients you probably already have in your kitchen.
- 1 lb ground beef
- 1 onion, diced
- 2 tbsp taco seasoning
- 3 cups beef broth
- 8 oz pasta shells
- 1 cup salsa
- 1 cup shredded cheese
For those who like to customize, consider adding optional toppings like sour cream, fresh cilantro, or diced avocado—and don’t forget, you can always kick up the heat with some diced jalapeños if your family enjoys spicier dishes.
How to Make this Instant Pot Taco Pasta
Step 1: Brown the Meat and Onions
Using the Sauté function on your Instant Pot, cook 1 lb of ground beef and 1 diced onion until the meat is no longer pink.
This creates that foundational flavor base that makes taco pasta so satisfying.
The Instant Pot Duo Plus offers multiple cooking functions beyond pressure cooking, making it the perfect versatile tool for this recipe.
Step 2: Season the Mixture
Sprinkle 2 tablespoons of taco seasoning over the browned meat and stir well to coat everything evenly.
The spices will bloom in the hot pot, releasing their flavors and creating that classic taco profile we’re looking for.
Step 3: Add the Liquid and Pasta
Pour in 3 cups of beef broth, then add 8 oz of pasta shells and 1 cup of salsa, giving everything a good stir.
Making sure all pasta is submerged in the liquid helps it cook evenly—nobody wants crunchy pasta surprises.
Step 4: Pressure Cook
Close the Instant Pot lid, set the valve to the sealing position, and cook on high pressure for 4 minutes.
While that mightn’t sound like much time, the magic of pressure cooking means perfect pasta without the wait.
Step 5: Quick Release the Pressure
When the cooking cycle completes, carefully perform a quick release of pressure.
I always use a wooden spoon handle to turn the valve—keeps my fingers safe from that steam!
Step 6: Add the Cheese
Stir in 1 cup of shredded cheese until it’s completely melted into the pasta mixture.
This creates that creamy, cheesy texture that transforms this from good to can’t-stop-eating-it delicious.
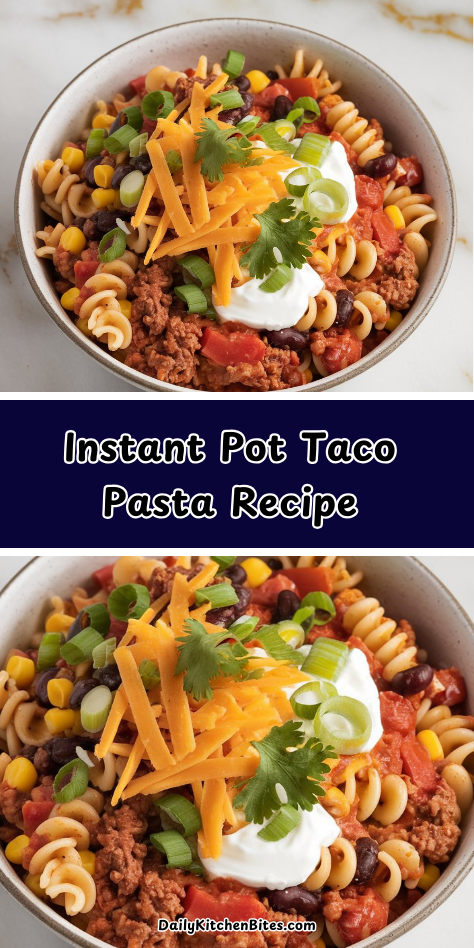
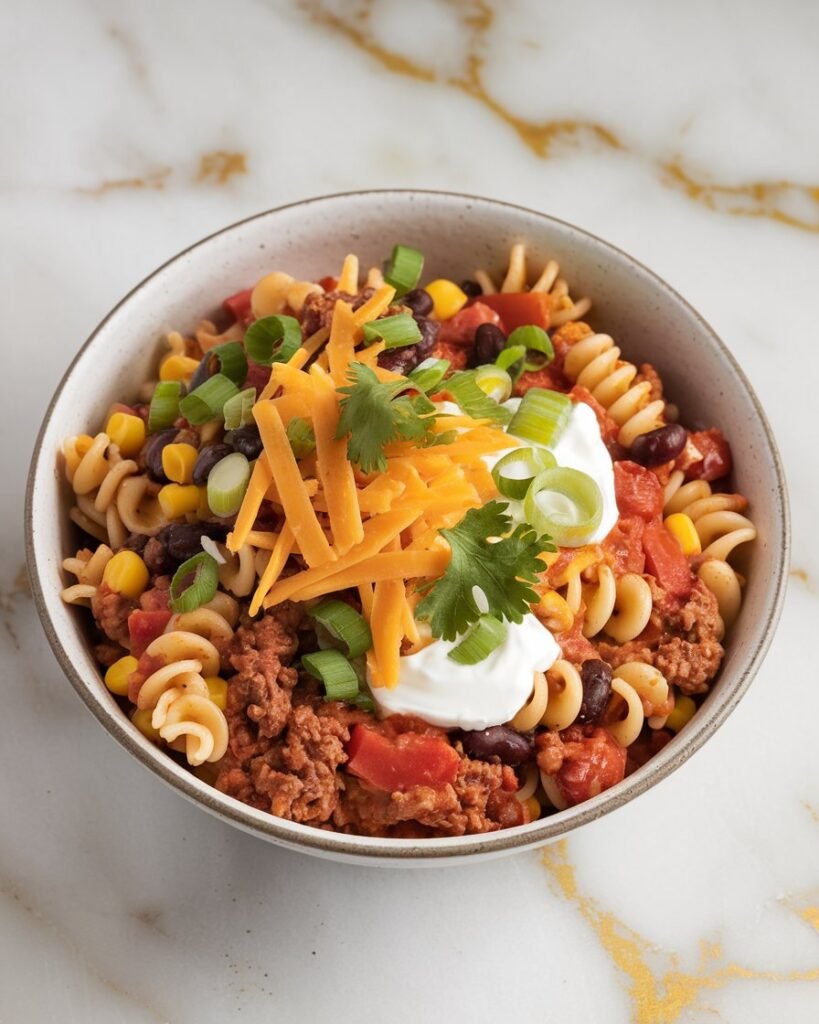
Step 7: Garnish and Serve
Transfer to serving bowls and top with your choice of garnishes like sour cream, chopped cilantro, or diced avocado.
For those who like it hot, a few jalapeño slices on top really take this dish to the next level.
What to Serve with Instant Pot Taco Pasta
This hearty taco pasta makes a fantastic dinner on its own, but a few simple sides can turn it into a complete fiesta.
A crisp green salad with cilantro-lime dressing cuts through the richness beautifully. For something more substantial, warm corn tortillas or tortilla chips on the side let everyone scoop up any saucy bits left in their bowls.
Need a veggie? Quick-roasted corn with a sprinkle of chili powder echoes those taco flavors.
And don’t forget something to drink—a cold Mexican beer or a family-friendly agua fresca complements those spicy notes perfectly.
For dessert, keep it simple with cinnamon-sugar sopapillas that take just minutes to prepare while your pasta rests.
Instant Pot Taco Pasta Substitutions and Variations
• Topping bar: Set out diced avocado, pickled red onions, crushed tortilla chips, lime wedges, and hot sauce—let everyone customize their bowl!
Leftovers and Storage for this Instant Pot Taco Pasta
This taco pasta stores beautifully in airtight containers in the refrigerator for up to 4 days—and honestly, the flavors meld and deepen overnight, making day-two pasta sometimes even more delicious than fresh!
For storage:
- Refrigerate promptly in sealed containers within two hours of cooking
- Freeze portions for up to 3 months in freezer-safe containers
When reheating, add a splash of broth or water to prevent dryness, then:
- Microwave: Heat in 30-second intervals, stirring between each
- Stovetop: Warm gently over medium-low heat with a tablespoon of liquid
The pasta might absorb more liquid while stored, which can actually intensify the taco flavors.
If freezing, thaw overnight in the refrigerator before reheating for best texture.
Final Thoughts
This Instant Pot Taco Pasta brings together two beloved comfort foods in one spectacular dish that feels like a warm hug at the end of a long day.
The magical combination of savory taco flavors with tender pasta creates something greater than the sum of its parts—all ready in under 30 minutes.
Perfect for those chaotic weeknights when you’re juggling homework, activities, and the eternal question of “what’s for dinner?”
The versatility makes it ideal for picky eaters too, as everyone can customize their bowl with their favorite toppings.
In a world of complicated recipes, sometimes the simplest ones become our most treasured family classics.