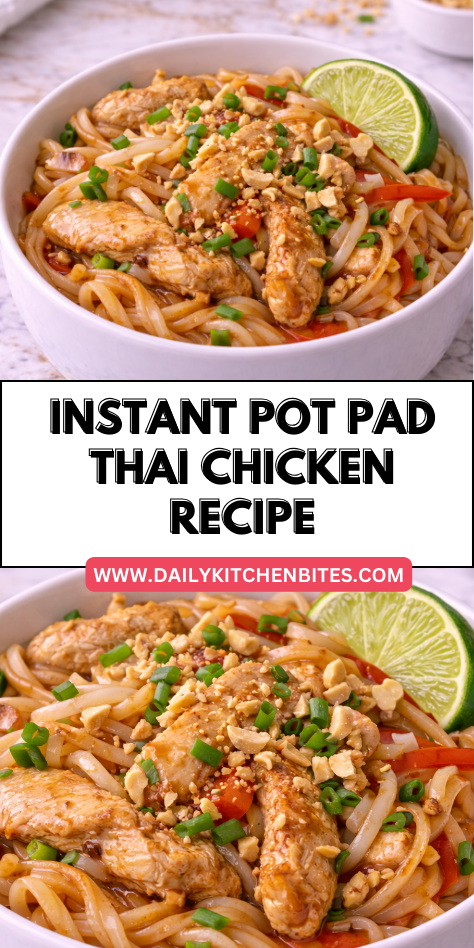
I’ve discovered the ultimate weeknight dinner savior: Instant Pot Pad Thai Chicken. Can you believe restaurant-quality pad thai is possible in under 30 minutes at home? The magic happens when tender chicken, rice noodles, and that perfect balance of sweet-salty-spicy sauce come together in just one pot.
No more juggling multiple pans or waiting for takeout. The best part? That authentic flavor without the fuss.
Trust me, there’s something about the way these ingredients transform that’ll make you rethink your dinner routine.
Why You’ll Love this Instant Pot Pad Thai Chicken
If you’re craving authentic Thai flavors but don’t want to spend hours in the kitchen, this Instant Pot Pad Thai Chicken will quickly become your new favorite weeknight dinner.
I’m talking about the perfect balance of sweet, salty, tangy, and spicy all in one bowl—ready in under 30 minutes.
What’s not to love about a one-pot meal that delivers restaurant-quality results? The pressure cooking seals in flavor while perfectly tenderizing the chicken.
And those rice noodles? They absorb all that sauce without getting mushy. Customizable heat levels make it family-friendly, too.
What Ingredients are in Instant Pot Pad Thai Chicken?
Let’s dive right into what makes this Instant Pot Pad Thai Chicken so incredibly flavorful—a perfect blend of authentic Thai ingredients that come together in harmony.
- 1 pound chicken breast, thinly sliced
- 8 ounces rice noodles
- 3 tablespoons fish sauce
- 2 tablespoons brown sugar
- 2 tablespoons lime juice
- 1 tablespoon sriracha sauce
- 2 eggs, beaten
- 2 cloves garlic, minced
- 1 cup bean sprouts
- ¼ cup peanuts, crushed
- Green onions for garnish
How to Make this Instant Pot Pad Thai Chicken
Step 1: Sauté the Garlic
Heat your Instant Pot on sauté mode and add a splash of oil, then toss in your 2 cloves of minced garlic.
Give it a swirl until the kitchen fills with that irresistible aroma, usually about 30 seconds.
Step 2: Brown the Chicken
Add 1 pound of thinly sliced chicken breast to the pot, stirring occasionally until it’s nicely browned on all sides.
This creates that foundational flavor we’re looking for—no bland chicken in our pad thai, thank you very much.
Step 3: Add the Sauce and Noodles
Time for the magic to happen! Stir in 8 ounces of rice noodles, 3 tablespoons of fish sauce, 2 tablespoons of brown sugar, 2 tablespoons of lime juice, 1 tablespoon of sriracha, and ¾ cup of water.
Make sure all those noodles get coated and submerged in the liquid.
Step 4: Pressure Cook
Close that lid, set the valve to sealing position, and pressure cook on high for just 3 minutes.
Seems too short, doesn’t it? But trust me, rice noodles cook incredibly fast, and we don’t want them turning to mush.
Step 5: Quick Release and Add Eggs
When the timer beeps, perform a quick pressure release (careful of that steam!) and open the pot.
Pour in your 2 beaten eggs and stir continuously until they’re set, creating lovely little ribbons throughout the dish.
Step 6: Add Bean Sprouts
Gently fold in 1 cup of bean sprouts while everything’s still hot.
The residual heat will soften them just enough while maintaining that signature crunch that makes pad thai so texturally interesting.
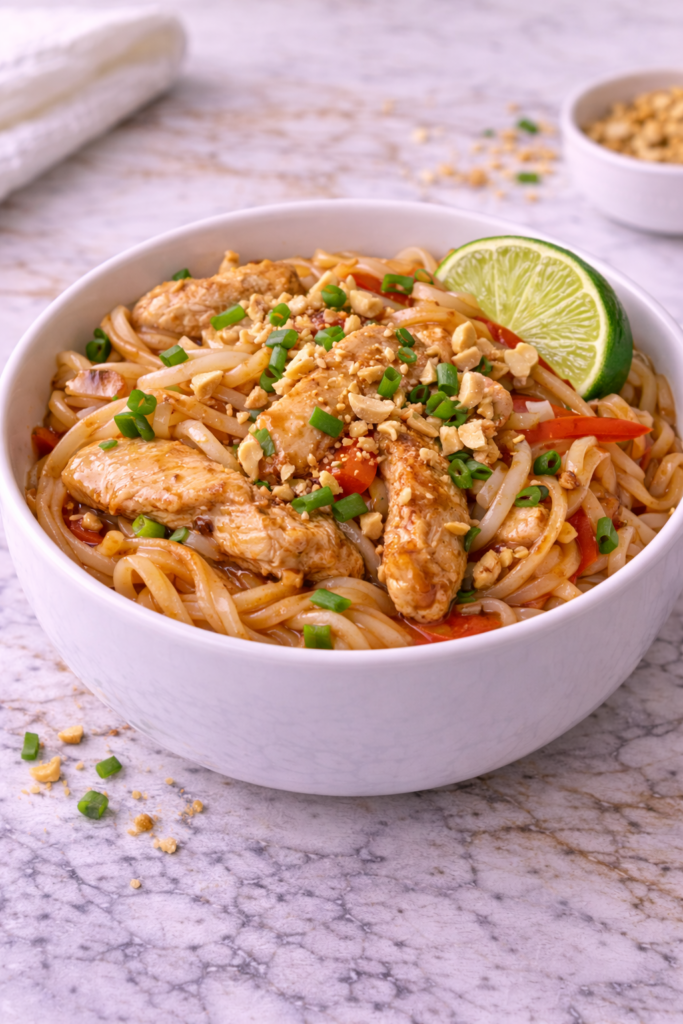
Step 7: Garnish and Serve
Transfer your masterpiece to a serving dish and sprinkle with ¼ cup of crushed peanuts and sliced green onions.
This final flourish isn’t just pretty—it adds essential crunch and freshness that elevates the entire dish.
Step 8: Customize to Taste
Give it a final taste and adjust as needed—maybe a squeeze more lime for brightness, an extra drizzle of sriracha for heat, or a touch more fish sauce for that umami depth.
The beauty of pad thai is in making it perfectly yours.
For even more consistent and professional results, consider preparing your ingredients with a premium food processor that makes quick work of chopping garlic, slicing chicken, and crushing peanuts.
What to Serve with Instant Pot Pad Thai Chicken
This quick-and-easy pad thai makes a perfect weeknight dinner that doesn’t need much accompaniment, but a few simple sides can turn it into a more complete meal.
A simple cucumber salad with rice vinegar and sesame oil provides a cool, crisp contrast to the warm noodles. For something warm, try some vegetable potstickers or a small bowl of egg drop soup on the side.
To drink, nothing beats a cold Thai iced tea or a lime-infused sparkling water to cut through the richness.
And if you’re feeling fancy but short on time, pick up some mango sticky rice for dessert—the sweetness pairs wonderfully with the savory, slightly spicy pad thai.
For a finishing touch, set out extra lime wedges and sriracha so everyone can adjust their plate to taste.
Instant Pot Pad Thai Chicken Substitutions and Variations
- Protein options: Swap chicken for shrimp (cook 1 minute), tofu (press and cube first), or thinly sliced beef.
- Gluten-free: Verify your fish sauce is gluten-free and use tamari instead of soy sauce if adding any.
- Vegetarian/vegan: Replace chicken with extra-firm tofu and use 1 tablespoon soy sauce mixed with ½ teaspoon sugar instead of fish sauce.
Skip eggs or use plant-based egg substitute.
- Lower sugar: Substitute brown sugar with monk fruit sweetener or coconut sugar.
- Veggie boost: Add thinly sliced bell peppers, shredded carrots, or baby spinach after pressure cooking.
- Heat level: Adjust sriracha or add red pepper flakes for spice lovers.
- Extra toppings: Try fresh cilantro, lime wedges, thinly sliced radishes, or crispy fried shallots.
- No fish sauce? Mix 1 tablespoon soy sauce with ¼ teaspoon anchovy paste (or skip anchovy for vegetarian version).
Leftovers and Storage for this Instant Pot Pad Thai Chicken
This Pad Thai stores beautifully for 3-4 days in an airtight container in the refrigerator.
The flavors actually develop overnight, making next-day leftovers something to look forward to!
To reheat, add a splash of water (about 1-2 tablespoons) to prevent dryness, then warm in the microwave for 1-2 minutes, stirring halfway through.
For best texture, you can also reheat in a skillet over medium heat.
Quick tips:
- Store noodles and garnishes separately if possible to prevent sogginess
- Not recommended for freezing as rice noodles tend to become mushy when thawed
- Add fresh lime juice and a sprinkle of fresh garnishes when serving leftovers to brighten the flavors
For meal prep, consider storing the sauce separately and cooking fresh noodles when ready to eat.
Final Thoughts
This Instant Pot Chicken Pad Thai brings authentic Thai street food flavors right to your kitchen with remarkably little effort.
The perfect balance of tangy, sweet, and savory notes transforms everyday chicken and rice noodles into something truly special. It’s my go-to recipe for those weeknights when I’m craving something exotic but don’t have hours to spend in the kitchen.
The pressure cooker does most of the work, condensing what would typically be a complex cooking process into just minutes.
This dish shines brightest when shared around a table with family, the aromatic steam rising from plates as chopsticks plunge into that perfect first bite of noodles wrapped in silky egg and crunchy peanuts.