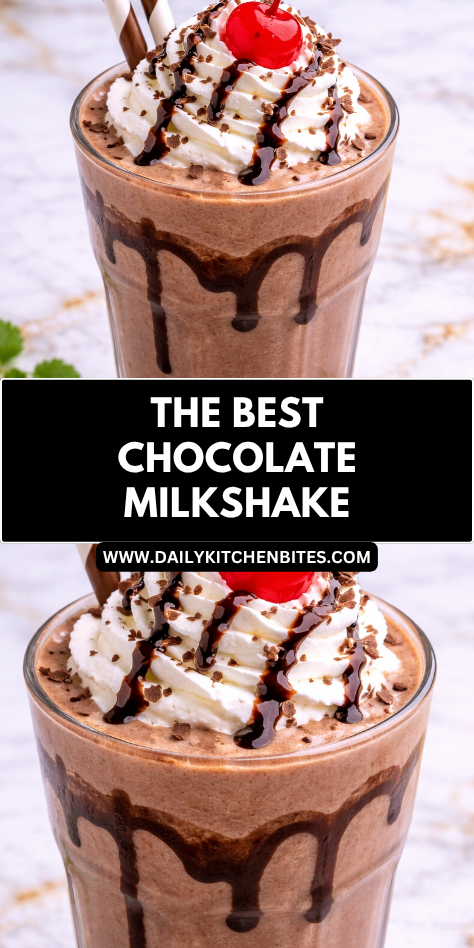
Some treats never go out of style, and The Best Chocolate Milkshake is one of those timeless favorites in my kitchen.
Thick, creamy, and rich with chocolate flavor, it feels like the kind of simple pleasure that instantly brightens the day. Whether served after dinner or as a weekend surprise, it always brings smiles to the table.
I love this recipe because it turns a handful of familiar ingredients into something that tastes like an old-fashioned diner treat.
It is quick to make, easy to customize, and always satisfying. On warm afternoons or family movie nights, this milkshake is one of the easiest ways to make the moment feel a little more fun.
Why You’ll Love This Recipe
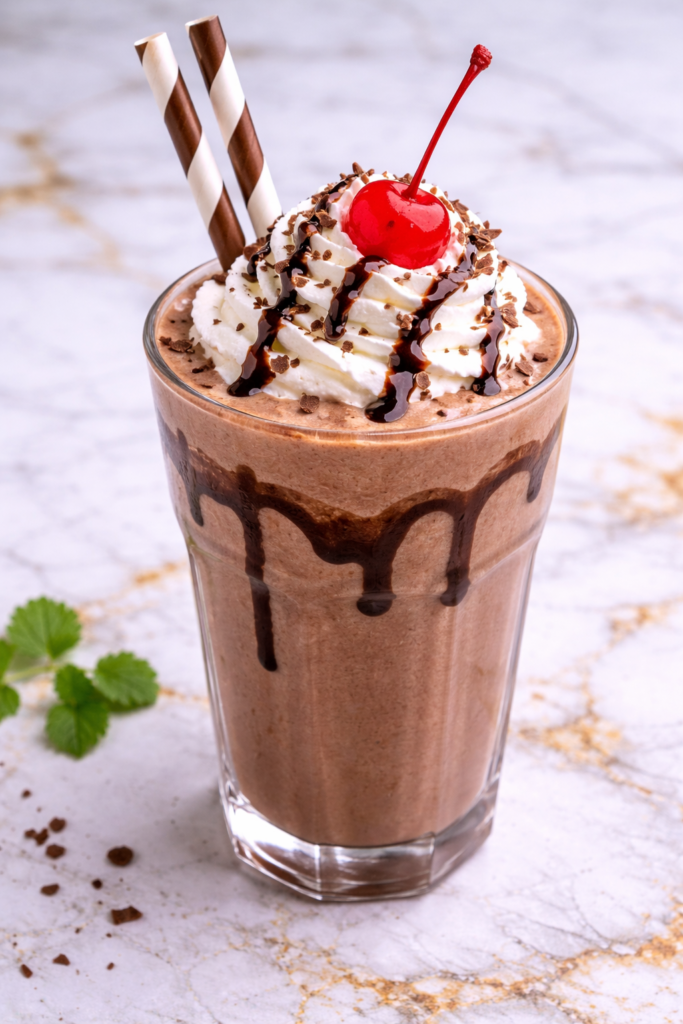
The Best Chocolate Milkshake is smooth, creamy, and packed with deep chocolate flavor. It blends into a thick and frosty drink that feels indulgent while being wonderfully simple to make.
This recipe is especially practical because it comes together in just minutes. With ice cream, milk, and chocolate, you can make a special treat without baking or complicated steps.
Another reason to love it is how easy it is to customize. Make it extra rich, add toppings, blend in cookies, or adjust the thickness to suit your family’s preferences. It is one of those dependable treats everyone can enjoy.
Serves: 2 people
This recipe makes two generous milkshakes or three smaller servings for children. It can easily be doubled for family nights or parties.
Ingredients You’ll Need
For the Milkshake
- 4 cups chocolate ice cream
- 1/2 cup whole milk
- 3 tablespoons chocolate syrup
- 1 teaspoon vanilla extract
- Pinch of salt
Optional Toppings
- Whipped cream
- Extra chocolate syrup
- Chocolate shavings
- Sprinkles
- Mini chocolate chips
- Crushed cookies
- Maraschino cherries
Optional Mix-Ins
- 2 tablespoons peanut butter
- 1 tablespoon cocoa powder
- 1/4 cup cold coffee
- 2 sandwich cookies
- 1 banana
- 1 tablespoon malted milk powder
Pro Tips
- Use well-frozen ice cream for the thickest milkshake texture. Soft ice cream melts too quickly and can make the shake thin.
- Start with less milk, then add more as needed. It is much easier to thin a shake than to thicken it afterward.
- Chill the glasses in the freezer for 10 minutes before serving. This helps the milkshake stay frosty longer.
- Blend only until smooth. Overblending can melt the ice cream and reduce thickness.
- Drizzle chocolate syrup inside the glasses before pouring in the shake for a fun diner-style presentation.
- Serve immediately after blending for the best texture and flavor.
Tools You’ll Need
- Blender
- Ice cream scoop
- Measuring cups
- Measuring spoons
- Tall serving glasses
- Long spoons
- Straws (optional)
- Rubber spatula
Substitutions and Variations
Chocolate ice cream gives the richest flavor, but vanilla ice cream with added cocoa powder or extra chocolate syrup also works very well. This can be helpful if vanilla is what you already have at home.
Whole milk creates a creamy texture, though 2% milk or plant-based milk can be used. Oat milk and almond milk both blend nicely depending on preference.
If you like a darker chocolate flavor, add unsweetened cocoa powder or use dark chocolate syrup. This gives a richer, more intense result.
For a mocha version, blend in a little cold coffee or espresso. Chocolate and coffee are a classic pairing.
Peanut butter lovers can add a spoonful of peanut butter for a chocolate-peanut butter shake. It creates a thick and satisfying variation.
A banana makes the milkshake naturally sweeter and extra creamy. It also blends beautifully with chocolate flavor.
Malted milk powder adds an old-fashioned soda fountain flavor many people love. Just a tablespoon can make a big difference.
For cookies and cream style, blend in chocolate sandwich cookies. This adds texture and extra sweetness.
If you want a lighter version, use frozen yogurt or light ice cream. The texture may be slightly thinner but still delicious.
Chocolate chips or shaved chocolate can be blended in for tiny bits of texture. Add them near the end for the best effect.
For children, decorate the glasses with whipped cream and sprinkles. It makes the treat feel extra festive.
For a grown-up dessert, top with chocolate curls and a dusting of cocoa powder. It creates a more elegant finish.
Mint extract can be added for a chocolate mint version. Use only a tiny amount because it is strong.
Caramel sauce drizzled into the shake creates a chocolate caramel combination that is always popular.
If serving a crowd, create a milkshake bar with toppings and mix-ins so everyone can customize their own glass.
No matter how you adapt it, the creamy chocolate base is what makes this milkshake such a classic favorite.
Make Ahead Tips
The Best Chocolate Milkshake is best enjoyed fresh, but there are still a few ways to prep ahead and make serving easier. You can measure the milk, chocolate syrup, and vanilla in advance and keep them chilled in the refrigerator until ready to blend.
Serving glasses can be placed in the freezer for 10 to 15 minutes before making the milkshakes. This helps keep the drink cold and thick longer once poured.
If you are hosting a party, set out toppings such as whipped cream, sprinkles, crushed cookies, and chocolate syrup ahead of time. A simple milkshake topping station makes serving fun and easy.
You can also pre-scoop the ice cream onto a tray and freeze it again briefly. This speeds up blending time and helps keep the shake thick.
Instructions
Step 1: Chill the Glasses
Place two tall glasses in the freezer for 10 minutes if desired. This helps the milkshake stay frosty and thick.
Step 2: Add Ingredients to Blender
Add the chocolate ice cream, whole milk, chocolate syrup, vanilla extract, and pinch of salt to the blender jar.
Step 3: Blend Until Smooth
Blend on medium speed for 20 to 30 seconds until smooth and creamy. Stop as soon as everything is combined.
Step 4: Adjust Thickness
If the milkshake is too thick, add a splash more milk and pulse briefly. If it is too thin, add another scoop of ice cream and blend again.
Step 5: Decorate the Glasses
Drizzle chocolate syrup inside the chilled glasses if desired. This creates a classic diner-style look.
Step 6: Pour the Milkshake
Divide the milkshake evenly between the glasses. Use a spatula to help guide the thick shake from the blender if needed.
Step 7: Add Toppings
Top with whipped cream, chocolate shavings, sprinkles, cherries, or your favorite finishing touches.
Step 8: Serve Immediately
Serve right away with straws and long spoons. Milkshakes are best enjoyed while thick and cold.
Serving Suggestions
The Best Chocolate Milkshake is perfect alongside burgers and fries for a classic diner-style meal. It turns an ordinary dinner into something extra fun.
Serve it after pizza night or family movie night as an easy dessert everyone looks forward to. It feels special with very little effort.
Pair it with warm brownies or chocolate chip cookies for an extra indulgent treat. The contrast of warm baked goods and cold milkshake is always popular.
For birthdays or celebrations, top with candles, sprinkles, and extra whipped cream. It makes a simple dessert feel festive.
Smaller portions in mini glasses are ideal for children or dessert samplers. This also works well for parties.
For a summer afternoon snack, enjoy the milkshake with fresh strawberries or banana slices on the side.
Leftovers and Storage
Milkshakes are best enjoyed immediately after blending for the ideal thick and creamy texture. If left standing too long, they naturally melt and thin out.
If you do have leftovers, store them in a covered container or jar in the freezer for up to 1 day. The texture will become firmer, more like soft ice cream.
Let the frozen leftover milkshake sit at room temperature for 10 to 15 minutes before stirring and serving again. You can also reblend with a splash of milk.
Refrigerating leftovers is not ideal because the shake becomes thin and loses its frosty texture quickly.
If making ahead for later the same day, keep it in the freezer rather than the refrigerator whenever possible.
Nutrition and Benefits
- Milkshakes can be a fun occasional treat made with familiar ingredients.
- Milk and ice cream provide calcium and dairy-based protein.
- Homemade versions allow control over ingredients and portion sizes.
- You can customize sweetness and thickness to suit preferences.
- Adding fruit like banana can increase nutrients and creaminess.
- Making treats at home can be budget-friendly compared with buying desserts out.
Recipe FAQ
How do I make a thicker chocolate milkshake?
Use less milk and very firm ice cream. Start with the smallest amount of milk and add more only if needed. Chilled glasses also help keep it thick.
Can I use vanilla ice cream instead of chocolate?
Yes, vanilla ice cream works very well. Add extra chocolate syrup or cocoa powder for the chocolate flavor. It still turns out delicious.
Why is my milkshake too thin?
Usually this happens from too much milk or overblending. Add another scoop of ice cream and blend briefly to thicken it. Work quickly so it stays cold.
Can I make this dairy-free?
Yes, use dairy-free ice cream and your favorite plant-based milk. Oat milk and almond milk are both popular choices. The texture may vary slightly by brand.
What blender works best for milkshakes?
Most standard blenders work well. A high-powered blender blends quickly, but avoid overmixing. Pulse only until smooth.
Can I add mix-ins?
Absolutely. Cookies, peanut butter, banana, coffee, caramel, or malted milk powder are all excellent additions. Add mix-ins in small amounts so the shake stays thick.
How many servings does this make?
This recipe makes two generous servings or three smaller portions. It is easy to double for a family or party.
A Sweet Classic Worth Making Again
The Best Chocolate Milkshake is the kind of timeless treat that never loses its charm. Thick, creamy, and rich with chocolate flavor, it brings simple joy to family nights, celebrations, and everyday moments alike.
Because it is quick to make, easy to customize, and always a crowd-pleaser, this recipe is one you will return to often. Once you pour those frosty glasses and take the first sip, it is sure to become a favorite worth making again.