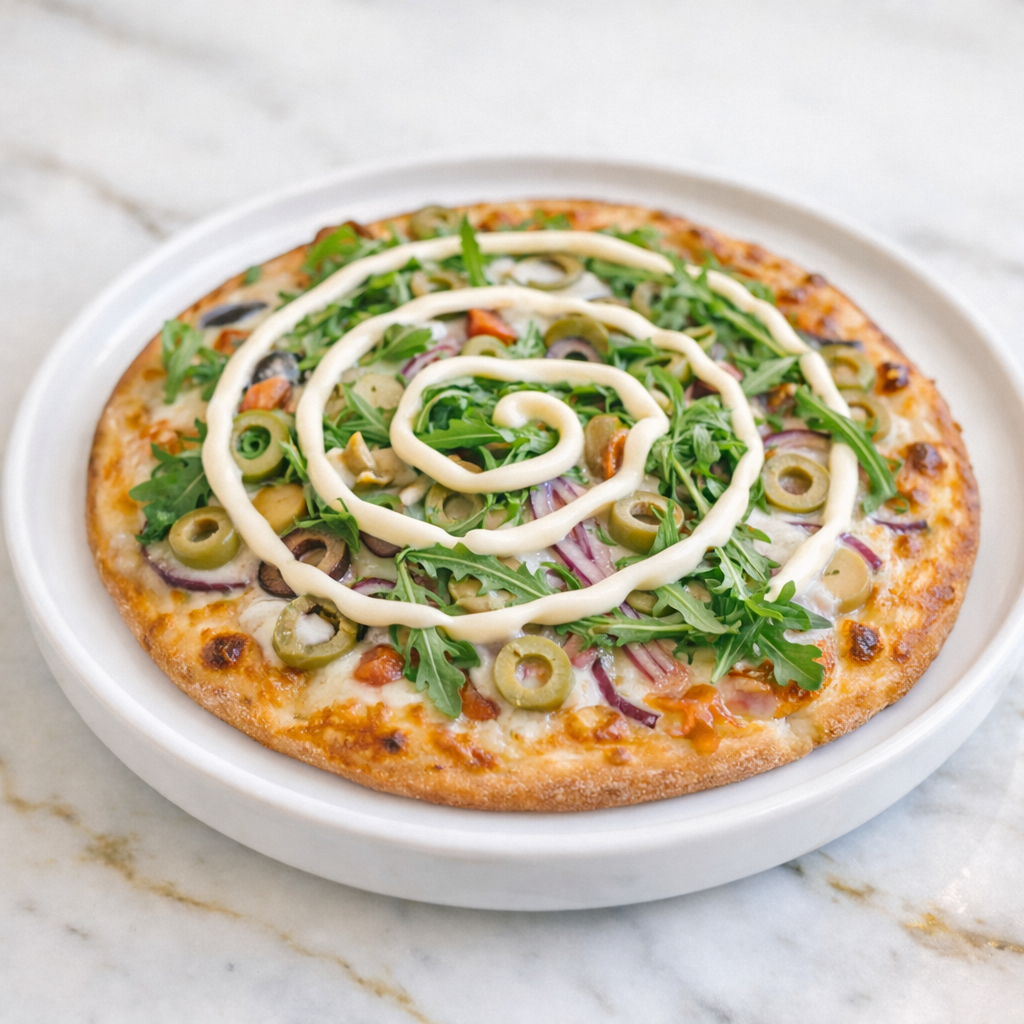
Pizza night gets a lot more interesting when Kewpie mayo enters the picture. Using it as a base instead of traditional tomato sauce gives the whole pizza a creamy, rich flavor that pairs surprisingly well with briny olives and melted cheese.
It sounds like an unusual combination, but it works in a way that’s hard to explain until you try it. I put this together in my own kitchen and it quickly became one of my favorite ways to make homemade pizza.
This post walks you through every step so yours comes out creamy, cheesy, and full of bold flavor.

Why You’ll Love This Recipe
This Kewpie Olive Pizza brings a creamy, savory twist to traditional pizza that stands out right away. The Kewpie mayo base creates a rich and smooth layer that pairs perfectly with melted cheese and the bold flavor of olives. Every bite is packed with a balance of textures and flavors that feels both indulgent and satisfying.
Another reason this recipe is so appealing is how simple and customizable it is. You can easily adjust the toppings based on your preferences or what you have on hand. It’s a great way to try something new while still keeping the comfort of a classic pizza.
Serves: 4 people
This recipe makes one large pizza that serves about four people comfortably. You can easily double the recipe for a larger group or make smaller individual pizzas. It’s flexible and works well for different occasions.
Ingredients You’ll Need
For the Pizza:
- 1 pizza dough (store-bought or homemade)
- 1/2 cup Kewpie mayonnaise
- 1 1/2 cups shredded mozzarella cheese
- 1/2 cup green olives, sliced
- 1/4 cup black olives, sliced
- 1/4 cup red onion, thinly sliced
For Flavor:
- 1 tbsp olive oil
- 1/2 tsp garlic powder
- 1/4 tsp black pepper
Optional Add-Ins:
- 1/4 cup grated Parmesan cheese
- 1/2 cup cooked chicken or bacon
- 1 tbsp chopped parsley
Pro Tips
Use a good-quality pizza dough for the best texture and flavor. Whether homemade or store-bought, letting the dough come to room temperature before stretching makes it easier to work with. This helps create a better crust.
Spread the Kewpie mayonnaise evenly but not too thick. A thin, even layer creates the perfect creamy base without overpowering the other ingredients. It also helps the pizza cook evenly.
Pre-bake the crust for a few minutes before adding toppings if you prefer a crispier base. This step helps prevent the center from becoming too soft. It’s especially helpful when using a creamy sauce.
Slice the olives evenly so they distribute well across the pizza. This ensures every bite has a balanced flavor. It also improves the overall presentation.
Use a blend of cheeses if you want extra depth of flavor. Mozzarella provides meltiness, while Parmesan adds a sharp finish. This combination works especially well with the creamy base.
Bake the pizza at a high temperature for the best results. A hot oven helps create a crisp crust and bubbly, melted cheese. It’s key to achieving that classic pizza texture.
Tools You’ll Need
- Baking sheet or pizza stone
- Rolling pin (optional)
- Cutting board
- Sharp knife
- Measuring cups and spoons
- Oven
Substitutions and Variations
If you don’t have Kewpie mayonnaise, you can use regular mayonnaise with a small amount of lemon juice or rice vinegar. This helps mimic the tangy flavor. It’s a simple substitute.
You can swap mozzarella for other cheeses like provolone or a mozzarella blend. Each option adds a slightly different flavor and texture. It’s easy to customize based on preference.
For a vegetarian version, keep the toppings simple with olives, onions, and maybe some mushrooms or spinach. These ingredients pair well with the creamy base. It’s a great meat-free option.
If you want to add protein, cooked chicken, bacon, or even shrimp can work well. These additions make the pizza more filling. They also complement the creamy and savory flavors.
For a bit of heat, consider adding red pepper flakes or sliced jalapeños. This creates a nice contrast to the richness of the sauce. It’s a great way to add extra flavor.
Make Ahead Tips
This Kewpie Olive Pizza can be prepped ahead to make mealtime easier, especially on busy days. You can prepare the dough and toppings in advance, storing them separately in the refrigerator. Keeping everything ready to go makes assembly quick and stress-free.
If using homemade dough, you can let it rise ahead of time and refrigerate it for up to 24 hours. This can even improve the flavor and texture of the crust. Just allow it to come to room temperature before shaping.
You can also slice the olives and onions ahead of time and store them in airtight containers. This saves prep time and keeps everything organized. Having ingredients ready makes the cooking process smoother.
For best results, assemble and bake the pizza just before serving. This ensures the crust stays crisp and the cheese is perfectly melted. Fresh baking always delivers the best texture and flavor.
Instructions
Step 1: Preheat the Oven
Preheat your oven to 475°F and place a pizza stone or baking sheet inside to heat. A hot surface helps create a crisp crust. Allow it to fully heat before baking.
Step 2: Prepare the Dough
Place the pizza dough on a lightly floured surface and stretch or roll it into your desired shape. Transfer it to a piece of parchment paper for easy handling. This helps prevent sticking.
Step 3: Pre-Bake the Crust (Optional)
If you prefer a crispier base, bake the plain dough for about 4 to 5 minutes. This helps set the crust before adding toppings. Remove from the oven carefully.
Step 4: Add the Sauce
Spread a thin, even layer of Kewpie mayonnaise over the dough. Make sure to leave a small border around the edges. This creates the creamy base of the pizza.
Step 5: Add the Toppings
Sprinkle mozzarella cheese evenly over the sauce, followed by the sliced olives and red onion. Add any optional ingredients like chicken or bacon at this stage. Distribute everything evenly.
Step 6: Season the Pizza
Drizzle a small amount of olive oil over the top and sprinkle with garlic powder and black pepper. This enhances the overall flavor. A light seasoning goes a long way.
Step 7: Bake the Pizza
Transfer the pizza to the preheated oven and bake for 10 to 15 minutes. Bake until the crust is golden and the cheese is bubbly and melted. Keep an eye on it to avoid overbaking.
Step 8: Finish and Serve
Remove the pizza from the oven and let it cool slightly before slicing. Garnish with parsley or Parmesan cheese if desired. Serve warm for the best experience.
Serving Suggestions
This pizza is delicious served on its own as a main dish. The creamy base and bold toppings make it satisfying without needing much else. It’s perfect for a casual dinner.
Pair it with a simple green salad for a balanced meal. The freshness of the salad complements the richness of the pizza. It creates a well-rounded plate.
You can also serve it alongside a light soup, such as tomato or vegetable. The contrast between creamy pizza and warm soup works well. It’s a comforting combination.
For gatherings, cut the pizza into smaller slices for easy sharing. This makes it great for parties or casual get-togethers. It’s always a crowd-pleaser.
Serve with a side of dipping sauces like ranch or garlic sauce for extra flavor. This adds variety and makes the meal more interactive. It’s especially fun for kids.
Leftovers and Storage
Store leftover pizza in an airtight container in the refrigerator for up to three days. Allow it to cool completely before storing to maintain its texture. Proper storage helps preserve flavor.
To reheat, place the pizza in an oven or skillet for the best results. This helps restore the crispness of the crust. Avoid microwaving if possible, as it can make the crust soft.
If using a microwave, reheat in short intervals to prevent overcooking. Adding a paper towel underneath can help absorb excess moisture. This improves the texture slightly.
Freezing is possible, but the texture may change slightly due to the creamy base. If freezing, wrap slices tightly and store for up to one month. Thaw before reheating.
For best flavor and texture, enjoy leftovers within a couple of days. Freshly baked will always taste best. Proper reheating helps bring it back to life.
Nutrition and Benefits
- This pizza provides a good source of carbohydrates from the crust, offering energy for your day. It’s a satisfying and filling meal option.
- Cheese adds calcium and protein, contributing to bone health and satiety. It also creates the rich, melty texture.
- Olives provide healthy fats that support heart health and add bold flavor. They also contribute to the unique taste of the dish.
- Making pizza at home allows you to control ingredients and customize toppings. This helps create a more balanced meal.
- Optional additions like vegetables or lean protein can increase nutritional value. This makes the recipe adaptable to different needs.
Recipe FAQ
Can I use regular mayonnaise instead of Kewpie?
Yes, but the flavor will be slightly different. Adding a bit of lemon juice or rice vinegar can help mimic the tanginess. It’s a simple substitute.
How do I keep the crust from getting soggy?
Pre-baking the crust and using a thin layer of sauce helps prevent sogginess. Baking at a high temperature also helps. These steps ensure a crisp base.
Can I make this pizza gluten-free?
Yes, simply use a gluten-free pizza crust. The rest of the ingredients are naturally gluten-free. It’s an easy adaptation.
What cheese works best for this recipe?
Mozzarella is ideal for meltiness, but you can add Parmesan or provolone for extra flavor. A blend often works best. Choose based on preference.
Can I add more toppings?
Absolutely, vegetables, meats, or even herbs can be added. Just be careful not to overload the pizza. Balance helps it cook evenly.
Is this pizza kid-friendly?
Yes, especially if you keep toppings simple. You can reduce olives if needed. The creamy base is usually a hit.
Can I cook this on a grill?
Yes, grilling works well and adds a slightly smoky flavor. Just monitor the heat carefully. It’s a great alternative cooking method.
A Fun Twist on Pizza Night
Once you try pizza made this way, it’s going to change how you think about what goes on a homemade pie. The Kewpie base adds a creaminess that works so well with the salty olives and gooey melted cheese in every single bite.
I love making this on weekends when I want something a little creative without spending a lot of time in the kitchen.
It’s the kind of recipe that surprises people in the best way and always starts a conversation at the table. Simple to make, bold in flavor, and completely worth trying. I hope it becomes a fun regular in your kitchen.