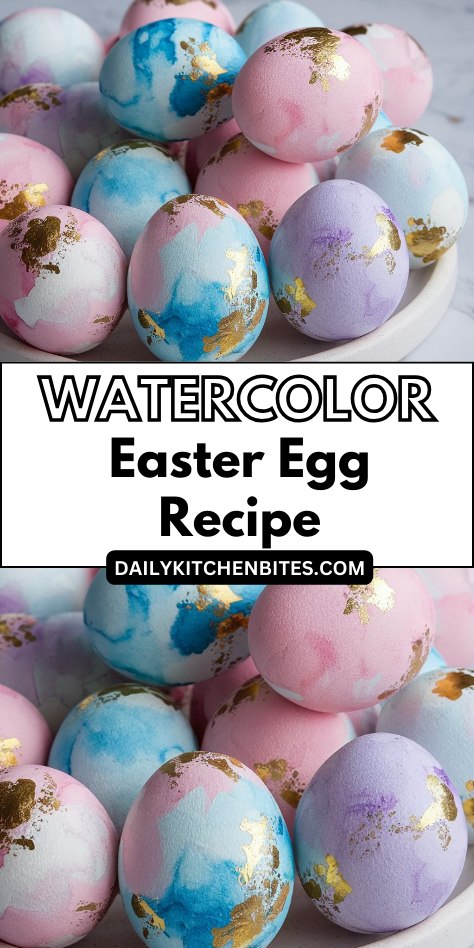
I’ll admit, when I first heard about watercolor Easter eggs, I thought someone was mixing up their craft supplies with their kitchen ingredients.
But here’s the thing—these dreamy, translucent beauties aren’t for eating, they’re for creating absolute magic on your spring table.
You’re probably wondering how regular hard-boiled eggs transform into these ethereal works of art, and honestly, the technique might surprise you with its simplicity.
Why You’ll Love these Dreamy Watercolor Easter Eggs
When you’re tired of the same old solid-colored Easter eggs that look like they came straight from a grocery store dye kit, these watercolor beauties will absolutely transform your holiday decorating game.
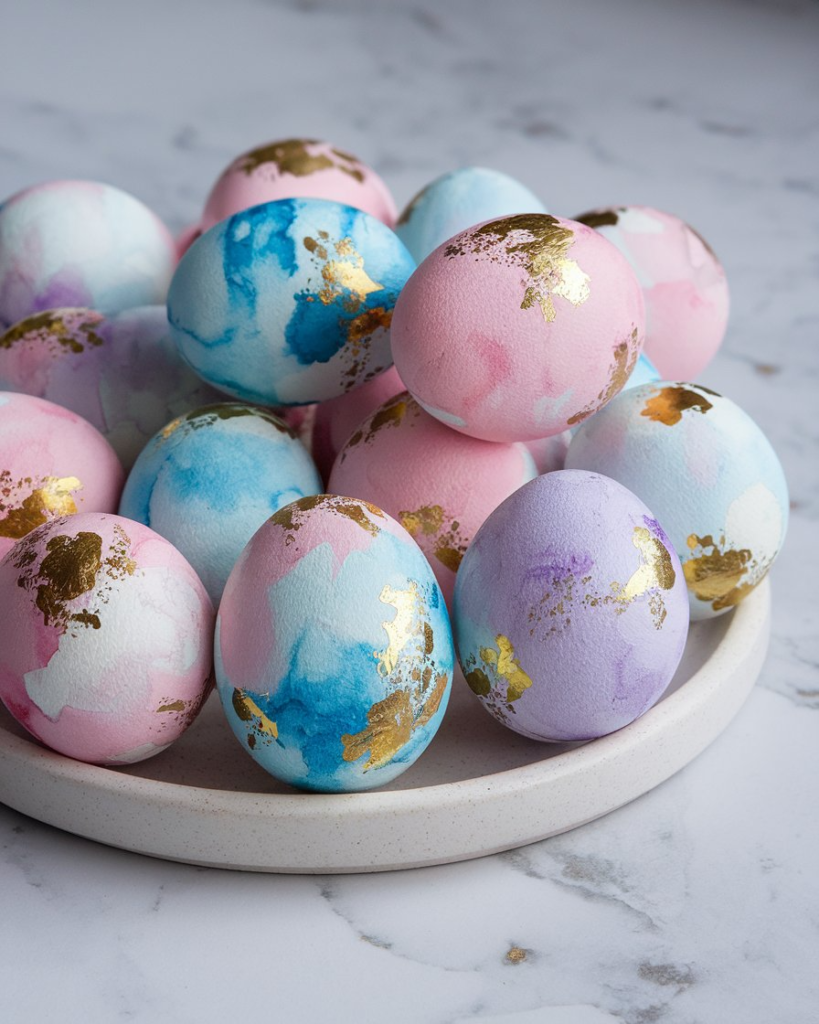
I’m talking about eggs that look like tiny works of art, with colors that blend and flow together like a spring sunrise. You’ll create soft, dreamy effects that make people ask, “How did you do that?”
The best part? You’re probably overthinking it. This technique is way more forgiving than perfect stripes or polka dots, and honestly, the “mistakes” often look the most gorgeous.
What Ingredients are in Dreamy Watercolor Easter Eggs?
You probably already have most of what you need sitting around your kitchen right now, which is always my favorite kind of craft project.
- 12 hard-boiled eggs, cooled and completely dry
- Liquid watercolors or watercolor pans plus water for mixing
- White vinegar (1 tablespoon per ½ cup water) for prepping the eggs
- Small paintbrushes, eyedroppers, or spray bottles for applying color
- Paper towels for blotting and cleanup
- Drying rack or clean egg carton for letting eggs dry
The liquid watercolors will give you the most vibrant results, but honestly, those little watercolor paint sets from the kids’ art supplies work just fine too – just mix them with a bit more water to get that flowing, dreamy effect we’re after.
How to Make these Dreamy Watercolor Easter Eggs
Step 1
Start by rolling each of your 12 hard-boiled eggs in a mixture of 1 tablespoon white vinegar per ½ cup water, then let them dry completely.
This little vinegar trick helps the watercolor actually stick to the eggshell instead of just rolling right off like water on a duck’s back.
Step 2: Mix Your Watercolors to the Perfect Consistency
Dilute your liquid watercolors or watercolor paints with water until they flow like silk but still have enough pigment to show up beautifully.
You want that dreamy, translucent effect, not thick paint that covers everything up.
Step 3: Apply Your First Wash of Color
Load your small brush, eyedropper, or spray bottle with the diluted watercolor and apply it to sections of the egg in gentle washes.
Work quickly while the paint is still wet, and use paper towels to blot and blend the colors where they meet.
Step 4: Let the First Layer Dry Completely
Place your eggs on a drying rack or in a clean egg carton and resist the urge to touch them.
I know it’s tempting, but wet watercolor smudges faster than you can say “oops.”
Step 5: Layer on Additional Colors for Depth
Once that first layer is bone dry, you can add more colors on top to create gorgeous depth and dimension.
The layers will show through each other, creating those magical color combinations that make watercolor so special.
Step 6: Add Speckles and Texture
For extra pizzazz, flick paint speckles onto your eggs using a toothbrush or create gentle paint splatters with your brush.
For preparing ingredients for other Easter recipes, a premium salad spinner can help clean and dry herbs and vegetables efficiently.
This adds that authentic watercolor texture that makes each egg look like a tiny work of art.
Step 7: Final Drying and Finishing Touches
Let your masterpieces dry completely on the rack before handling them.
If you want these beauties to last longer than Easter brunch, you can seal them with a light coat of clear varnish.
What to Serve with Dreamy Watercolor Easter Eggs
These gorgeous watercolor eggs deserve a brunch spread that’s just as impressive.
Since you’ve already got the hard-boiled eggs covered, round out your Easter table with fluffy buttermilk pancakes drizzled in maple syrup, crispy bacon that shatters when you bite it, and fresh strawberries with a dollop of whipped cream.
A pitcher of mimosas or fresh orange juice keeps things festive, while warm cinnamon rolls add that sweet, pull-apart comfort everyone craves on holiday mornings.
Don’t forget a simple fruit salad with mint – the bright colors play beautifully off your artistic eggs, and honestly, someone needs to balance out all that bacon.
Dreamy Watercolor Easter Eggs Substitutions and Variations
While liquid watercolors create those dreamy, translucent effects we’re after, I know not everyone has them sitting around in their craft drawer.
No worries—I’ve got you covered with swaps that work beautifully.
Food coloring mixed with water creates gorgeous washes, though they’re slightly less vibrant.
Watered-down acrylic paints work too, but they dry faster, so you’ll need to move quickly.
For a natural approach, try coffee, tea, or beet juice for earthy tones.
Want something different? Try salt sprinkling while wet for crystalline textures, or use rubber bands for resist patterns before painting.
Leftovers and Storage for these Dreamy Watercolor Easter Eggs
Once you’ve created these gorgeous watercolor masterpieces, you’ll want to keep them looking fresh and vibrant for as long as possible.
If you made hard-boiled eggs, I’d eat them within a week when stored in the fridge. The painted shells might chip a bit, but who cares when they taste so good?
For blown eggs that you want as keepsakes, I store mine in egg cartons with tissue paper cushioning. They’ll last indefinitely if you handle them gently.
Pro tip: I always seal my favorites with clear varnish first, because nothing’s worse than watching your beautiful art fade away.
Final Thoughts for Dreamy Watercolor Easter Eggs
There’s something absolutely magical about watching watercolors bloom across an eggshell, creating those dreamy, organic patterns that no store-bought decoration can match.
These watercolor Easter eggs bring out the artist in everyone, from toddlers who love splashing color around to adults who find the gentle process surprisingly meditative.
Perfect for those quiet spring afternoons when you want to slow down and create something beautiful together, this technique turns simple hard-boiled eggs into little works of art.
Whether they end up as your Easter centerpiece or tucked into baskets, each egg becomes a tiny masterpiece with its own personality.